🌸 Free Crochet Lily Pattern - Realistic Botanical Lily with Wired Petals
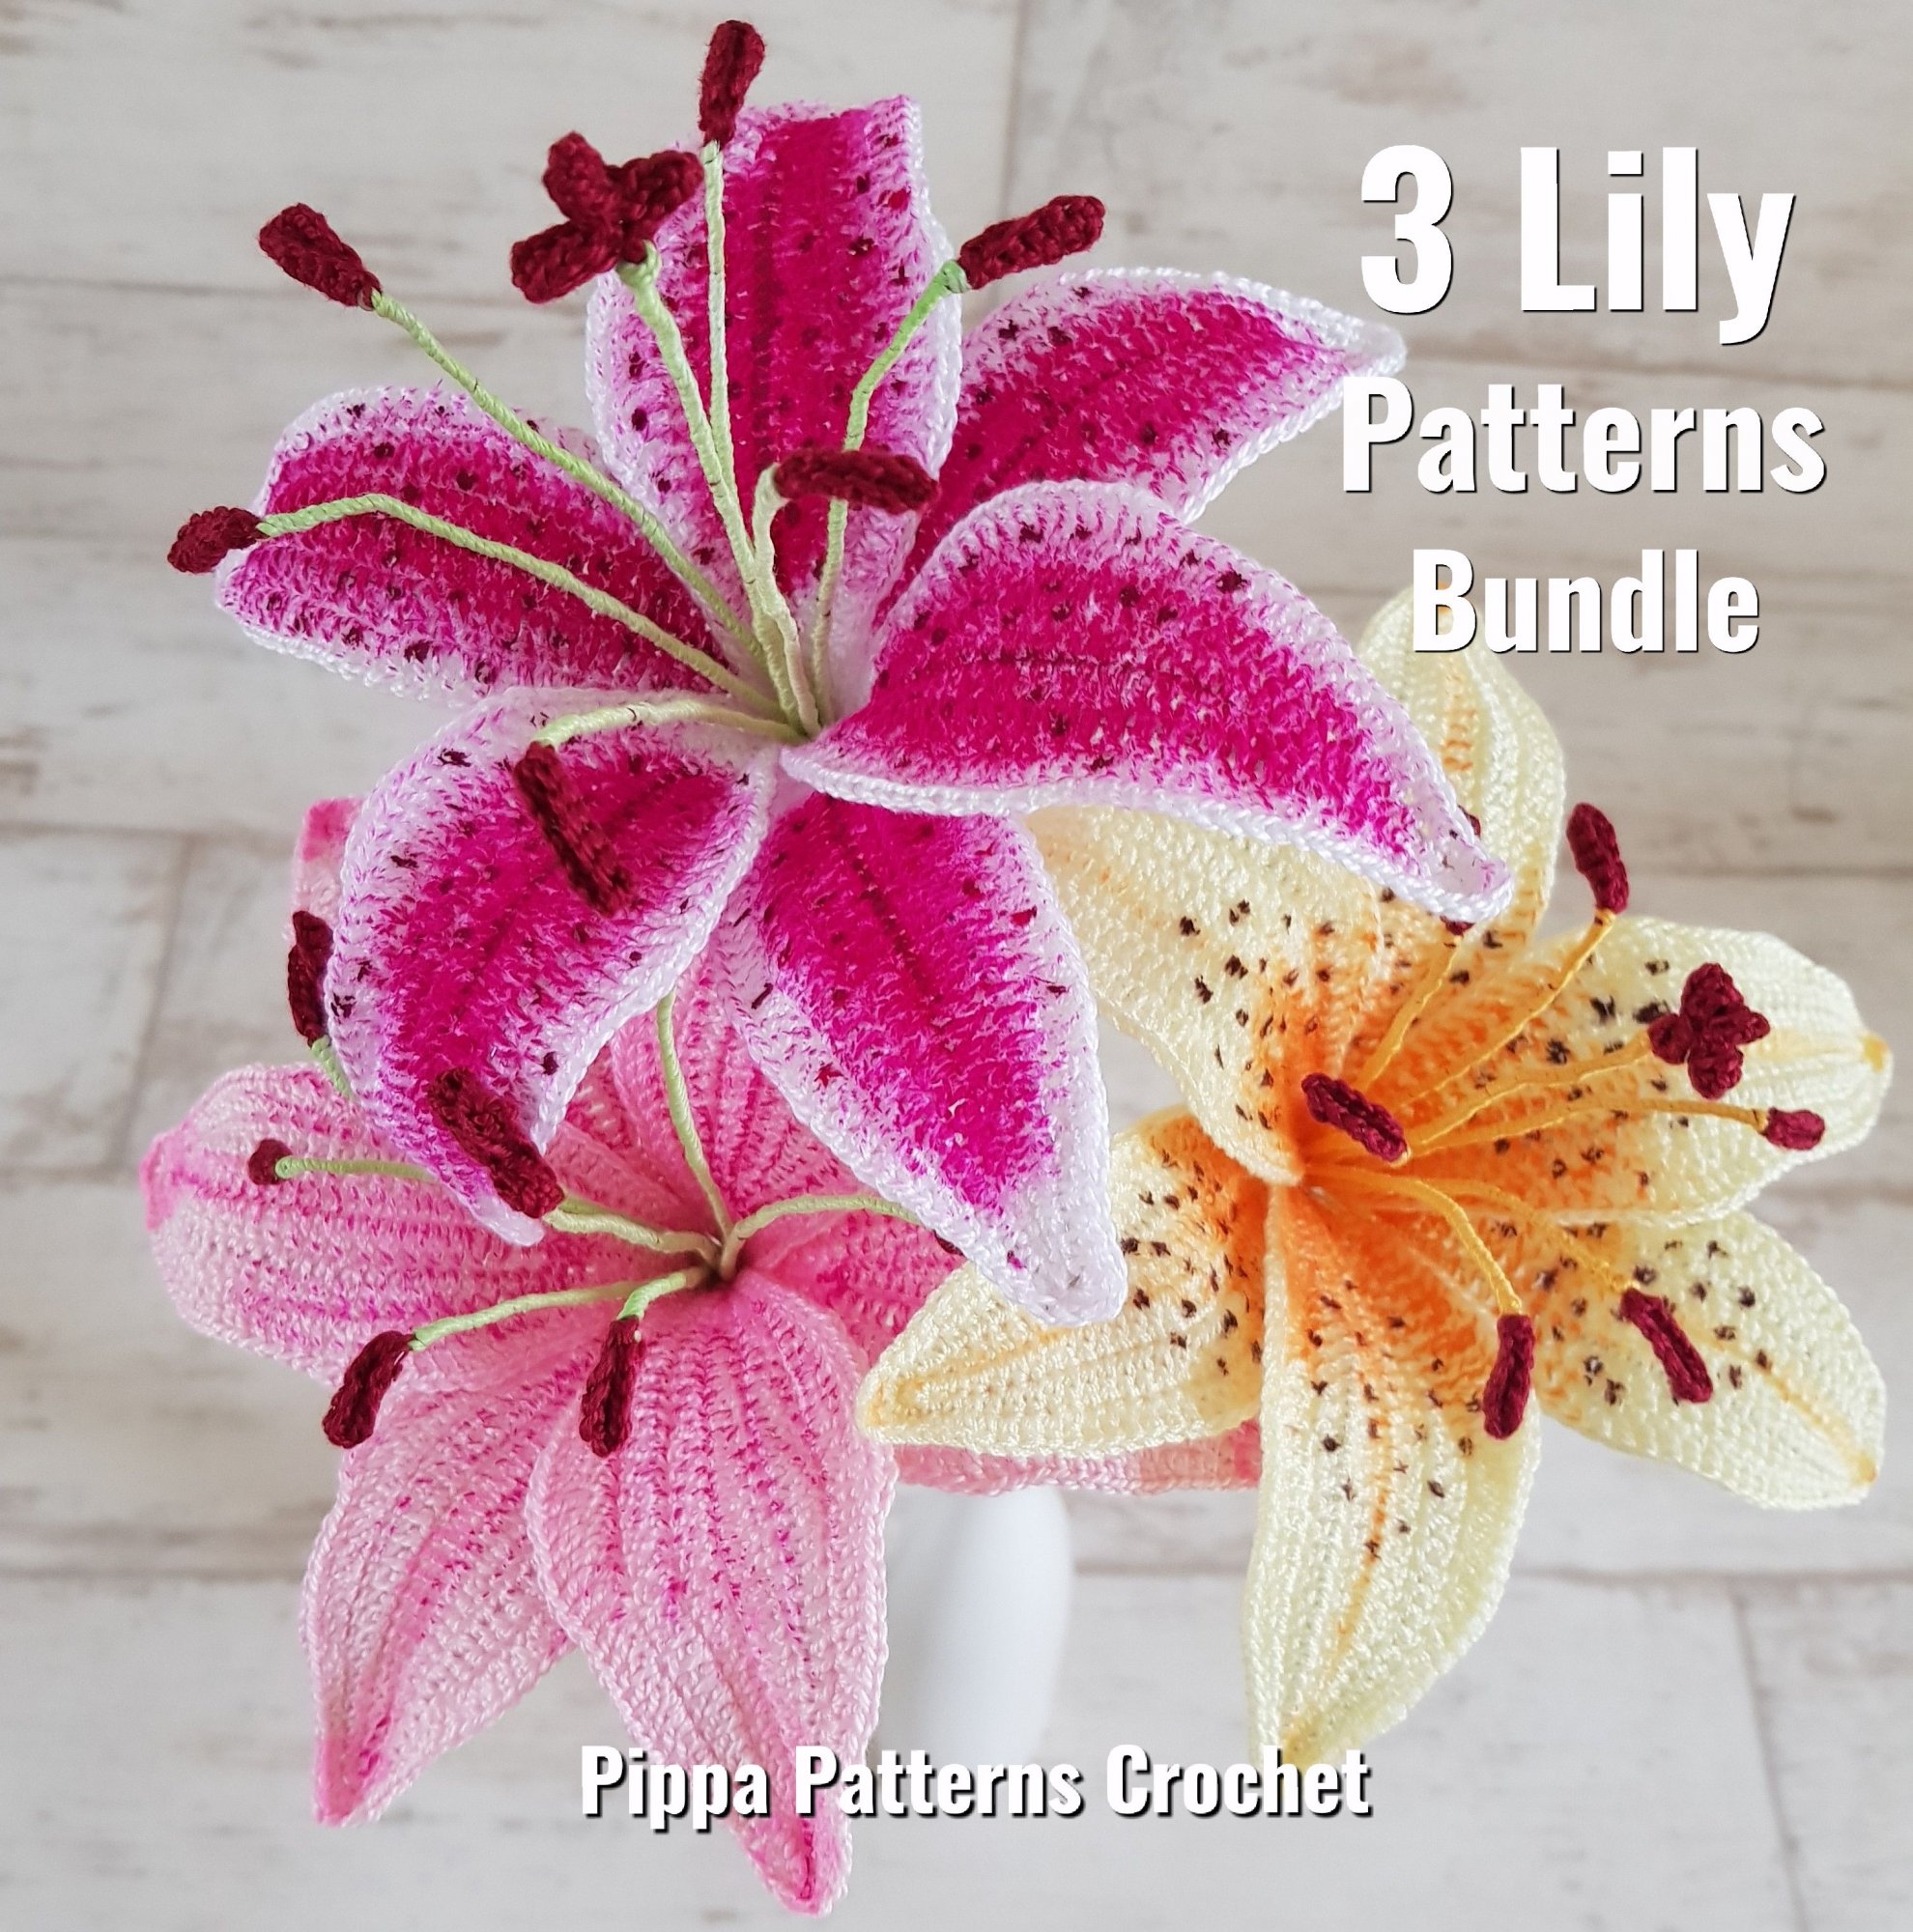
Create an elegant, lifelike crochet lily with six sculpted pointed petals, delicate burgundy anthers, a long central pistil, and a flexible wired structure. This botanical design is inspired by the richly colored lily shown in the reference image and is ideal for bouquets, floral arrangements, wedding decor, home decoration, and heirloom crochet pieces.
The petals are crocheted around both sides of a foundation chain and reinforced with fine floral wire so each flower can be posed into a natural trumpet-like bloom.
Skill Level: Intermediate to Advanced
Finished Flower Size: Approximately 4-5 in (10-13 cm) across, depending on yarn and tension
Construction: 6 individually crocheted wired petals + central pistil + 6 stamens + wrapped stem
Materials and Tools
Yarn
Use a fine, tightly spun cotton or embroidery-floss-style yarn for crisp stitch definition.
- Fuchsia / hot pink: main petal color
- Soft pink: outer petal shading or alternate petals
- Pale yellow or ivory: optional lily variety
- White: narrow petal edging
- Light green: pistil, stamens, and stem wrapping
- Deep burgundy / maroon: anthers
- Small amounts of orange or golden yellow: optional petal shading
A fingering-weight cotton, size 10 crochet cotton, or 2-3 strands of embroidery floss can be used.
Tools
- 1.0-;1.75 mm crochet hook
- Fine tapestry needle
- Sharp embroidery scissors
- Approximately 28-30 gauge floral wire for petals
- Approximately 24-26 gauge floral wire for stamens and pistil
- Approximately 20-22 gauge floral wire for the main stem
- Floral tape, preferably green
- Fabric marker, fabric paint, or acrylic ink
- Small paintbrush
- Stitch markers
- Wire cutters
- Optional: clear fabric glue for securing finished wire ends
Safety note: Floral wire creates sharp ends. Bend or cover every exposed wire end before handling or displaying the finished flower.
Abbreviations
US crochet terminology:
| Abbreviation | Meaning |
|---|---|
| MR | Magic ring |
| ch | Chain |
| sc | Single crochet |
| hdc | Half double crochet |
| dc | Double crochet |
| tr | Treble crochet |
| sl st | Slip stitch |
| inc | Increase - 2 sc in the same stitch |
| dec | Single crochet decrease |
| BLO | Back loop only |
| FLO | Front loop only |
| st | Stitch |
| sts | Stitches |
| FO | Fasten off |
| Rnd | Round |
| RS | Right side |
| WS | Wrong side |
Gauge is not critical. Your tension should be firm enough that the petals hold their shape but flexible enough to allow the wire to pass through the stitches.
Part 1: The Realistic Petals
Make 6 petals for each lily.
The petal is worked continuously around both sides of a foundation chain. The foundation chain forms the central vein of the petal, while the later rounds gradually widen and then taper toward the pointed tip.
For the flower pictured, use fuchsia as the primary color and finish each petal with a delicate white or pale-pink border.
Petal Foundation
With fuchsia yarn:
Ch 25.
Do not turn.
The first side of the foundation chain becomes one side of the petal. Work down the opposite side of the chain to create an oval.
Round 1 - Foundation Outline
Starting in the 2nd ch from hook:
- sc in next 23 ch
- 3 sc in last ch
- working along the underside of the foundation chain, sc in next 22 sts
- 2 sc in the remaining loop of the first foundation ch
Total: 50 sc
Place a stitch marker in the first stitch of the round.
Do not join unless otherwise stated.
Round 2 - Begin the Petal Expansion
- 2 sc in first 2 sts
- sc in next 21 sts
- 2 sc in next 3 sts
- sc in next 21 sts
Total: 52 sts
The three increases at the far end begin creating the rounded shoulder around the future pointed tip.
Round 3
- 2 sc in each of next 2 sts
- sc in next 22 sts
- 2 sc in each of next 3 sts
- sc in next 22 sts
Total: 54 sts
Round 4
- 2 sc in each of next 2 sts
- sc in next 23 sts
- 2 sc in each of next 3 sts
- sc in next 23 sts
Total: 56 sts
The petal should now be noticeably wider through the center.
Round 5 - Maximum Width
- 2 sc in each of next 2 sts
- sc in next 24 sts
- 2 sc in each of next 2 sts
- sc in next 24 sts
Total: 56 sts
This is the widest section of the petal.
Round 6 - Begin Tapering
- sc in next 4 sts
- sc in next 24 sts
- dec twice across the next 4 sts
- sc in next 24 sts
Total: 54 sts
The decreases begin drawing the upper portion of the petal toward its characteristic lily point.
Round 7
- sc in next 4 sts
- sc in next 24 sts
- dec once across the next 2 sts
- sc in next 24 sts
Total: 53 sts
Round 8
- sc in next 4 sts
- sc in next 23 sts
- dec once
- sc in next 23 sts
Total: 51 sts
Round 9
- sc in next 4 sts
- sc in next 21 sts
- dec once
- sc in next 21 sts
Total: 47 sts
Round 10
- sc in next 4 sts
- sc in next 18 sts
- dec once
- sc in next 18 sts
Total: 41 sts
Round 11
- sc in next 4 sts
- sc in next 15 sts
- dec once
- sc in next 15 sts
Total: 35 sts
Round 12
- sc in next 4 sts
- sc in next 12 sts
- dec once
- sc in next 12 sts
Total: 29 sts
Round 13
- sc in next 4 sts
- sc in next 9 sts
- dec once
- sc in next 9 sts
Total: 23 sts
Round 14
- sc in next 4 sts
- sc in next 6 sts
- dec once
- sc in next 6 sts
Total: 17 sts
Round 15
- sc in next 4 sts
- sc in next 3 sts
- dec once
- sc in next 3 sts
Total: 11 sts
Round 16 - Pointed Tip
- sc in next 2 sts
- dec
- sc in next 2 sts
- dec
- sc in next 2 sts
Total: 8 sts
Fasten off.
Do not weave in the end yet.
The resulting shape should resemble a long, narrow leaf with a broad middle and a sharply narrowing upper end.
Creating the Lily's White Petal Border
The contrasting edge is important because it gives the petals the crisp, realistic outline visible in the reference flower.
Join white yarn at the base of the petal.
Work one round of sc evenly around the complete outer perimeter.
At the pointed end:
- sc up to the final 2 sts
- dec
- ch 1
- sl st into the final point if necessary to sharpen the tip
Continue around the remaining edge.
Avoid adding excessive stitches around the point. A lily petal should have a defined, slightly angular tip, rather than a rounded leaf tip.
Fasten off neatly on the underside.
Adding the Petal Wire
The wire should be added after crocheting the petal, using the final edging round to trap it securely.
Cut a piece of 28-30 gauge floral wire approximately:
petal length + 2 1/2 in (6 cm)
Bend approximately 1/2 in (1.25 cm) of one end into a tiny closed loop.
This prevents the wire from pulling through the crochet.
Position the Wire
Place the wire along the outer perimeter of the petal, beginning at the base and following the long edge toward the pointed tip.
Do not position the wire directly down the center. The center should remain soft so the petal can develop a natural curved surface.
Crochet Over the Wire
Using the white edging yarn:
- Hold the wire directly behind the next edge stitch.
- Insert the hook through the crochet stitch.
- Yarn over in front of the wire.
- Pull up a loop.
- Complete the sc while trapping the wire underneath the stitch.
- Continue around the perimeter.
- Keep the wire completely enclosed by the edging stitches.
- At the tip, bend the wire gently so it follows the point.
- Continue down the opposite side.
- Return to the petal base.
The wire should be secure but movable.
Do not crochet so tightly that the wire cannot be adjusted afterward.
Finishing the Wire
At the base, leave approximately 2 in (5 cm) of wire extending.
Fold this wire backward against itself.
Cover the folded section with:
- green floral tape, or
- tightly wrapped green yarn.
This creates a small attachment stem for the petal.
Shaping Each Petal
Before assembling the flower, shape all six petals individually.
For a natural lily:
- curve the outer edges slightly backward
- keep the center relatively flat
- curl the pointed tip outward
- gently cup the lower third of the petal
- avoid making every petal perfectly symmetrical
The six petals should look similar but not identical.
This slight variation makes the finished flower much more botanical.
Part 2: The Pistil and Stamens
A realistic lily has one prominent central pistil surrounded by six long stamens.
Use light green yarn for the filaments and deep burgundy for the anthers.
Central Pistil
Cut approximately 9-10 in (23-25 cm) of 24-26 gauge floral wire.
Make a small loop at the upper end.
The loop prevents the yarn from sliding off.
With light green yarn:
Ch 3.
Join with a sl st to form a tiny tube.
Work around the chain:
Rnd 1: 3 sc
Rnd 2-18: 3 sc
Fasten off.
Place the crocheted tube over the floral wire.
Pull it gently downward so the wire is completely covered.
Secure the bottom with several tight wraps of light green yarn.
Pistil Tip
At the top, form a slightly enlarged three-lobed stigma.
Using light green yarn:
- sc 3 around the wire tip
- inc in each st
- sc around once
- lightly stuff or reinforce the tiny head
- sl st closed
The finished pistil should be slightly thicker than the surrounding stamens.
Six Long Stamens
Make 6 stamens.
For each stamen, cut approximately 7-8 in (18-20 cm) of fine floral wire.
Create a small loop at the upper end.
Cover the wire with light green yarn using either of the following methods.
Method A - Tight Crocheted Tube
Ch 3 and work 3 sc around continuously for approximately 16-20 rounds.
Slide the tube over the wire.
Secure both ends.
Method B - Wrapped Filament
For an even finer botanical appearance:
- Apply a tiny amount of fabric glue to the lower end of the wire.
- Wrap light green yarn tightly around the wire.
- Keep each wrap directly beside the previous wrap.
- Continue to within approximately 1/2 in (1.25 cm) of the top.
- Secure the yarn with a small knot and glue.
Method B produces particularly slender stamens.
Burgundy Anthers
The burgundy anthers are one of the most recognizable details of the flower.
For each stamen, make a tiny elongated anther approximately 3/8-1/2 in (1-1.25 cm) long.
With burgundy yarn:
Ch 4.
Beginning in the 2nd ch from hook:
- sc in next 3 ch
- ch 1
- turn
- sc in 3 sts
Repeat for 2-3 rows.
Fold the tiny rectangle lengthwise around the wire tip.
Secure the center with tight burgundy stitches.
The result should resemble a small elongated pollen-bearing capsule.
Optional T-Shaped Anther
For the more pronounced anthers shown in the photograph:
Ch 3.
Starting in 2nd ch:
- sc
- sc
Then turn the work sideways and make:
ch 3, sc in 2nd ch from hook, sc in next ch, sl st into the base
Repeat on the opposite side.
This produces a tiny T-shaped burgundy cluster.
Attach it securely to the top of each green filament.
Make all six anthers slightly different in orientation.
Part 3: Assembly and Flower Stem
Arrange the Floral Center
Place the central pistil upright.
Position the six stamens evenly around it.
Viewed from above, the arrangement should resemble:
1 central pistil + 6 surrounding stamens
Space the stamens at approximately equal intervals.
Do not make them perfectly vertical.
A realistic lily looks better when:
- some stamens lean outward
- some cross slightly
- some remain close to the pistil
- the anthers sit at slightly different heights
Attach the Stamens
Hold all seven wires together approximately 1-1 1/2 in (2.5-4 cm) below the floral center.
Wrap light green yarn tightly around the entire bundle.
Make 15-20 tight wraps.
Secure with a small knot and a tiny amount of fabric glue.
Trim the excess yarn.
Arrange the Six Petals
The six petals should be arranged in two overlapping layers of three.
Back Layer
Attach three petals first.
Space them approximately:
- 120' apart
- slightly behind the central floral elements
- with their tips pointing outward and upward
These three petals form the rear structure of the bloom.
Front Layer
Add the remaining three petals between the first three.
The six petals should alternate around the flower:
Petal 1 - Petal 2 - Petal 3 - Petal 4 - Petal 5 - Petal 6
Viewed from above, the tips should form an approximately symmetrical six-pointed arrangement.
Do not force the petals into a flat star.
Creating the Trumpet Shape
This step makes the difference between a flat crochet flower and a realistic lily.
Bend each petal wire so the base remains close to the center while the outer half curves gently away.
Then:
- Lift the petal bases slightly.
- Curve the middle of each petal outward.
- Curl the tips backward.
- Leave the center of the flower slightly open.
- Angle three petals higher than the remaining three.
- Make the six petals overlap naturally.
The finished bloom should have a soft, open trumpet shape.
Creating the Main Stem
Cut one piece of 20-22 gauge floral wire approximately:
12-16 in (30-40 cm) long.
Create a small loop at the top.
Insert this wire into the center of the flower bundle.
Position the floral wire alongside the petal, stamen, and pistil wires.
Wrap the entire bundle tightly with light green floral tape.
Begin immediately beneath the flower.
Continue downward while overlapping each wrap by approximately half its width.
For a crochet-covered appearance, replace the floral tape with light green yarn.
Apply tiny amounts of fabric glue to the wire first, then wrap the yarn under firm tension.
Continue until the entire stem is covered.
Finish with a tight knot and conceal the end.
Coloring and Finishing Guide
Creating the Darker Center Gradient
The characteristic lily appearance comes from the transition from a pale outer edge to a much darker center.
For a pink lily:
- Keep the outer edge pale pink or white.
- Gradually deepen the color toward the central vein.
- Concentrate the strongest fuchsia around the lower third of the petal.
- Feather the color outward rather than creating a hard line.
Use a fabric marker with a very fine tip or diluted fabric-safe acrylic ink.
Layering the Color
Apply color in several extremely light passes.
- Start near the center.
- Pull short strokes toward the middle of the petal.
- Gradually reduce pressure.
- Allow the crochet to dry.
- Add another layer if greater intensity is desired.
Do not saturate the yarn.
Too much liquid can cause the crochet stitches to flatten or bleed.
Adding the Lily Speckles
The small burgundy-brown speckles are essential for achieving the tiger-lily appearance.
Use a fine dark brown, burgundy, or deep maroon fabric marker.
Concentrate the dots primarily around the lower central portion of each petal.
Make the dots irregular.
Use a mixture of:
- tiny pinpoints
- short marks
- slightly larger dots
- scattered pairs
- occasional elongated flecks
Avoid creating a perfectly repeated pattern.
Natural Speckle Placement
The densest area should be close to the petal center.
Gradually reduce the number of spots as you move toward the outer edge.
A useful distribution is:
Dense near base - medium through center - sparse toward tip
This gives the petals the organic appearance of a real lily.
Final Botanical Shaping
Once all coloring is completely dry, perform the final shaping.
Petal Position
Each petal should have:
- a narrow base
- a full central section
- a sharply pointed tip
- a slightly cupped surface
- an outward-curving edge
Stamens
Spread the six stamens naturally around the pistil.
The burgundy anthers should sit clearly above the petals.
Pistil
Keep the central pistil slightly taller than the anthers.
This creates visual depth and makes the flower center look more realistic.
Stem
The finished stem should be:
- straight but bendable
- firmly wrapped
- narrow beneath the flower
- cleanly finished
Final Finished Lily Checklist
Before displaying your flower, check that:
- 6 petals are attached.
- The petals alternate in two layers of three.
- Every petal has a flexible wire along its outer edge.
- The petal tips are pointed rather than rounded.
- 6 stamens surround the central pistil.
- Every stamen has a burgundy anther.
- The pistil is centered and slightly taller.
- The stem is securely wrapped.
- No sharp wire ends are exposed.
- The petal centers have a subtle darker gradient.
- Speckles are concentrated naturally near the petal bases.
- The petals curve outward to create an open lily bloom.
The finished flower can be gently reshaped whenever desired, allowing the same crochet lily to appear more open, more upright, or naturally relaxed like a freshly blooming garden lily.
Crochet Strawberry Hanging Basket Pattern
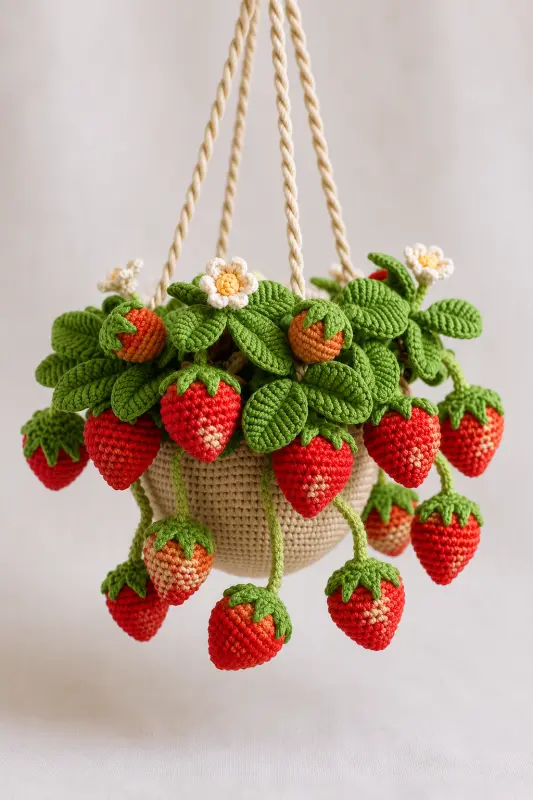
Create a charming Crochet Strawberry Hanging Basket inspired by a lush little strawberry plant overflowing with ripe berries, unripe fruit, ribbed leaves, and delicate white blossoms. This decorative amigurumi-style basket is designed to capture the layered, abundant look of the reference photo while remaining practical for intermediate crocheters.
The basket is crocheted in smooth beige yarn, while the strawberries are shaped individually and decorated with tiny seed stitches. Long green stems and vines allow the berries to hang naturally around the basket, and dimensional leaves and five-petal flowers complete the miniature strawberry plant.
Crochet Flower Wedding Bouquet
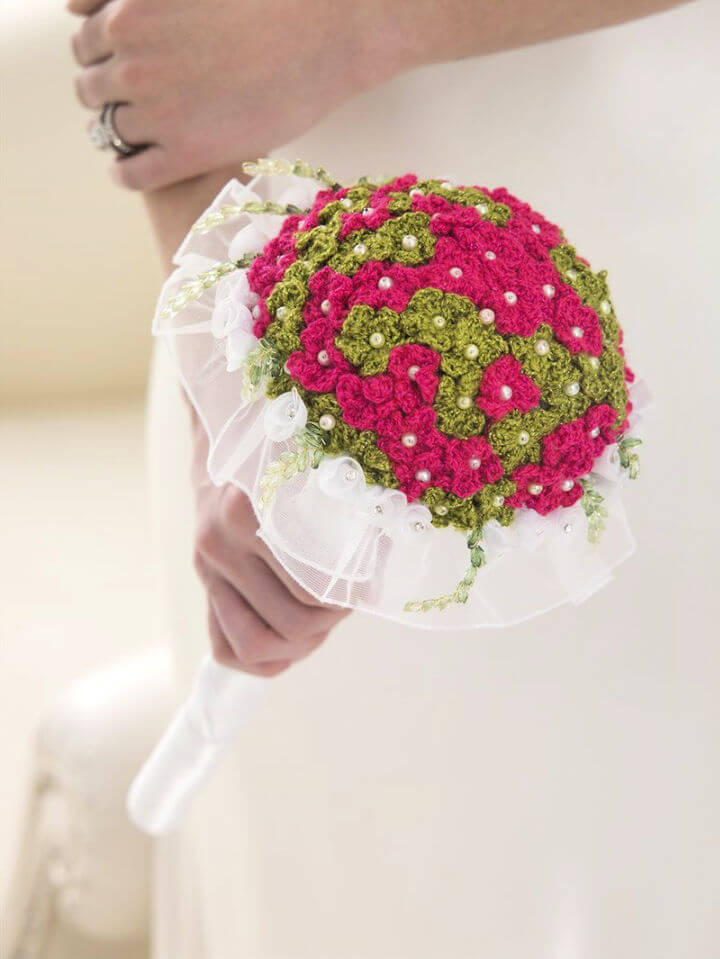
Create your own style and unique-looking wedding flower bouquet using your crochet skills. Moreover, get help from a free pattern to make these impressive flower bouquets. Use Lion Brand bonbons and celebrate yarn for this DIY project. Additionally, you require a 3.75mm crochet hook with a yarn needle to create this bouquet. Excitingly! You don't need an exact size gauge for this crochet project.
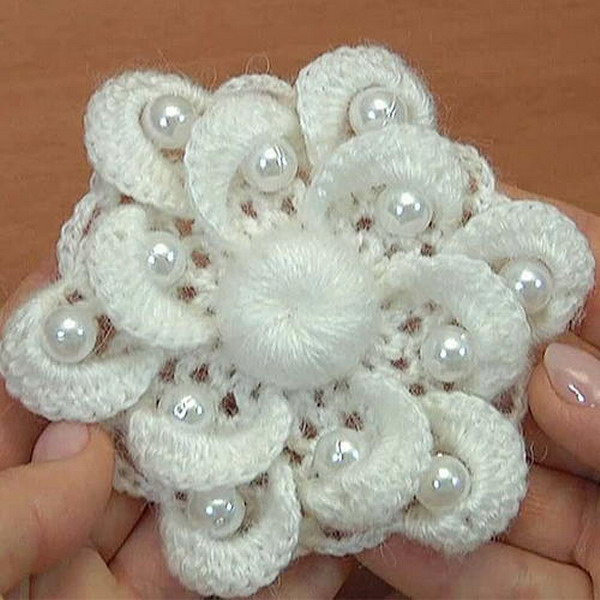
Crochet Double Layered Flower Tutorial
"In this video tutorial you will know how to crochet an gorgeous trim petal flower. Begin the work from crochet this puffy little round element in tutorial 7 of the crochet elements and projects then we make mesh that we fix petals to. In this tutorial, a master show you flower with a layer of the petals and flower with double layer of the petals. In this case, petals are trims that give a flower bigger volume. These crocheted flower makes such a lovely bouquet. You can crochet just the flower with trim petals by itself and attach it to a hat or purse. Or you can make some leaves and learn how to connect the such unusual flower to a traditional flower stem."
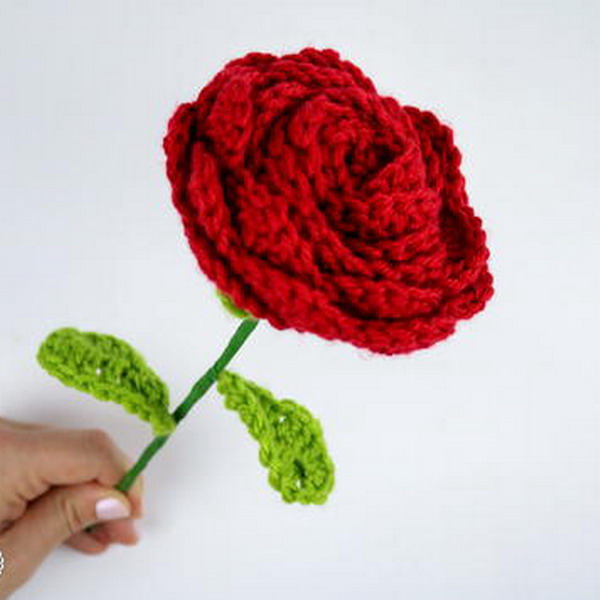
Rose with Wired Stem and Leaves Free Crochet Pattern
"Making Roses has always been one of my favorites crochet projects for gifts and to make my home feel more alive. This pattern for a rose is one of the easiest you will ever see and make. It comes with a detailed photo and video tutorial for every part of it. In fact, the leaves and the stem are wired also so you can bend them the way you like. You can make a full bouquet in different colors also. Beautiful."
Classy Hibiscus Flower Free Crochet Pattern
The Classy Hibiscus Flower takes crochet flower patterns up a notch by featuring a more rare floral design. Not only is the hibiscus infrequently crocheted, but this pattern also stands out by having a three-dimensional effect from its petals. The crocheted pistil completes the look, making a truly realistic yet easy crochet flower. With so many details, this free crochet flower pattern maintains its elegance and would be a great decoration for your home or hair accessory (just think of the big beautiful hats and headbands). This is a unique design that you won't want to miss.