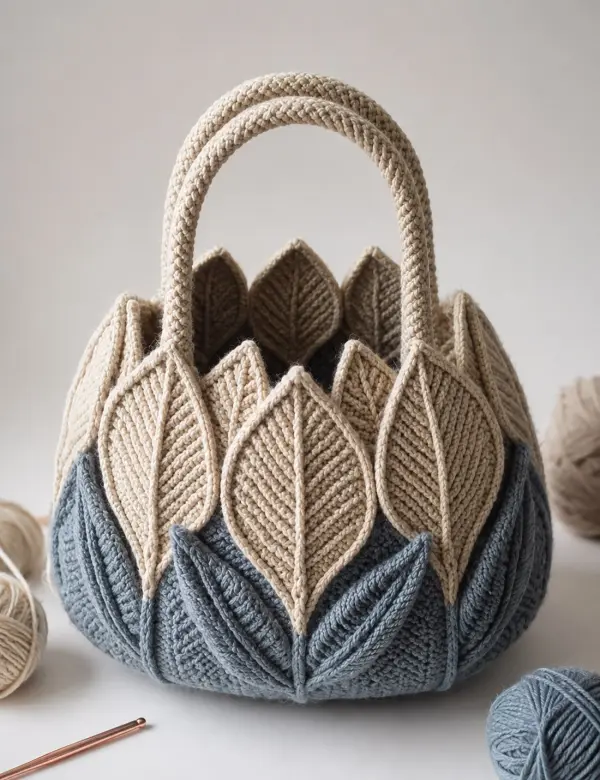
If you have ever wanted a handmade bag that looks complicated but is actually approachable, this easy crochet bag is the project to try. This step-by-step design turns plush yarn and simple stitches into a sculptural botanical tote with raised leaf details and a sturdy arched handle. It is especially useful for craft fairs because shoppers notice texture immediately, while the construction is simple enough to make in repeatable batches. Beginners can work slowly through each round, use stitch markers, and build confidence without juggling many separate pieces. The finished bag also makes a thoughtful gift, market sample, or cozy everyday accessory. The leaf-inspired texture gives it a boutique look, but the pattern relies on familiar US crochet stitches and counted rounds. If you are searching for how to crochet a bag step by step, this pattern gives you a practical, beginner-friendly roadmap from the foundation to the final handle.
Skill Level + Prerequisites
Skill Level: Easy to Intermediate
This pattern is suitable for a confident beginner who knows how to:
-
Make a Magic Ring.
-
Chain.
-
Work single crochet.
-
Increase and decrease.
-
Work slip stitches.
-
Change yarn colors.
-
Work a 4-dc bobble.
-
Crochet into stitches and around chains.
-
Maintain consistent tension.
The decorative leaf work is made directly onto the crocheted bag, so you do not need to sew individual leaf appliques onto the finished piece.
Finished Size
Using the recommended yarn and hook:
-
Width: approximately 10-11 inches
-
Height of bag body: approximately 8 inches
-
Total height including handle: approximately 13-14 inches
-
Depth: approximately 3-4 inches
Your exact dimensions will vary slightly with yarn thickness and tension.
Materials + Tools
Yarn
For a plush version similar to the reference photograph, use:
-
Color A - Dusty Blue: approximately 150-180 g
-
Color B - Warm Cream: approximately 100-120 g
-
Color C - Taupe/Brown: approximately 50-70 g
A soft, sturdy chenille or velvet yarn creates the rounded appearance shown in the inspiration image.
For a more structured market bag, substitute a thick cotton or cotton-blend yarn.
Tools
-
5.0 mm crochet hook, or size needed to obtain firm fabric
-
Stitch markers
-
Yarn needle
-
Scissors
-
Measuring tape
-
Optional: removable locking stitch markers
-
Optional: fabric lining
-
Optional: lightweight bag base insert
Important: If using very stretchy plush yarn, a smaller hook may be necessary. The fabric should feel dense rather than loose.
Crochet Abbreviations
| Abbreviation | Meaning |
|---|---|
| MR | Magic Ring |
| Ch | Chain |
| Sc | Single Crochet |
| Inc | Increase - 2 sc in the same stitch |
| Dec | Decrease - sc2tog |
| Bo | 4-dc Bobble Stitch - 4 double crochets worked together |
| Sl st | Slip Stitch |
| St(s) | Stitch/Stitches |
| Rnd | Round |
| Rep | Repeat |
| BLO | Back Loop Only |
| FLO | Front Loop Only |
Special Stitch Instructions
4-dc Bobble Stitch - Bo
The bobble is used as a raised decorative accent in the botanical design.
-
Yarn over.
-
Insert your hook into the indicated stitch.
-
Yarn over and pull up a loop.
-
Yarn over and pull through 2 loops.
-
Stop before completing the double crochet.
-
Repeat these steps 4 times in the same stitch.
-
You will have 5 loops on your hook.
-
Yarn over.
-
Pull through all 5 loops.
-
Gently tighten the bobble.
The completed stitch counts as 1 stitch.
Important Pattern Notes
1. Work in Continuous Spirals
The main body is crocheted in continuous rounds.
Do not join each round unless specifically instructed.
Place a stitch marker into the first stitch of every round and move it upward as you work.
2. Count Every Round
The stitch count at the end of every body round is provided.
If your count is incorrect, stop and correct it before beginning the next round.
3. Plush Yarn Tension
Chenille yarn can hide individual stitches.
For the cleanest result:
-
Crochet slightly tighter than you normally would.
-
Feel for the stitch with your hook instead of relying only on sight.
-
Avoid pulling the yarn excessively.
-
Keep your increases and decreases compact.
-
Use a smaller hook if the fabric looks floppy.
4. Color Changes
Change colors on the final yarn-over of the preceding stitch.
This keeps the color transition neat.
5. Leaf Details
The leaves are created with surface slip stitches and bobbles directly over the completed body.
This gives the bag the raised botanical appearance seen in the inspiration photograph without requiring separate leaf pieces.
THE COMPLETE STEP-BY-STEP PATTERN
Part 1: Crochet the Bag Base
Rnd 1
Using Color A, ch 18.
Sc in the 2nd ch from hook and in the next 15 ch, placing 16 sc along the first side of the chain.
Work 3 sc in the last chain.
Turn your work naturally around the end of the foundation chain.
Sc in the remaining 15 unused loops of the foundation chain.
Work 2 sc in the final unused loop.
Stitch Count: 36 sc
Rnd 2
Sc in each of the next 16 sts.
Work 3 inc around the first rounded end.
Sc in each of the next 16 sts.
Work 3 inc around the second rounded end.
Stitch Count: 42 sc
Rnd 3
Sc in the next 16 sts.
(Sc, inc) 3 times across the rounded end.
Sc in the next 16 sts.
(Sc, inc) 3 times across the second rounded end.
Stitch Count: 48 sc
Rnd 4
Sc in each st around.
Stitch Count: 48 sc
Rnd 5
Sc in each st around.
Stitch Count: 48 sc
Rnd 6
Sc in each st around.
Stitch Count: 48 sc
Rnd 7
Sc in each st around.
Stitch Count: 48 sc
Rnd 8
Sc in each st around.
Stitch Count: 48 sc
Rnd 9
Sc in each st around.
Stitch Count: 48 sc
Rnd 10
Sc in each st around.
Stitch Count: 48 sc
Rnd 11
Sc in each st around.
Stitch Count: 48 sc
Rnd 12
Sc in each st around.
Stitch Count: 48 sc
Rnd 13
Sc in each st around.
Stitch Count: 48 sc
Rnd 14
Sc in each st around.
Stitch Count: 48 sc
Rnd 15
Sc in each st around.
Stitch Count: 48 sc
Rnd 16
Sc in each st around.
Stitch Count: 48 sc
Rnd 17
Sc in each st around.
Stitch Count: 48 sc
Rnd 18
Sc in each st around.
Stitch Count: 48 sc
Rnd 19
Sc in each st around.
Stitch Count: 48 sc
Rnd 20
Sc in each st around.
Stitch Count: 48 sc
Rnd 21
Sc in each st around.
Stitch Count: 48 sc
Rnd 22
Sc in each st around.
Stitch Count: 48 sc
Rnd 23
Sc in each st around.
Stitch Count: 48 sc
Rnd 24
Sc in each st around.
Stitch Count: 48 sc
Rnd 25
Sc in each st around.
Stitch Count: 48 sc
Rnd 26
Sc in each st around.
Stitch Count: 48 sc
Rnd 27
Sc in each st around.
Stitch Count: 48 sc
Rnd 28
Sc in each st around.
Stitch Count: 48 sc
Rnd 29
Sc in each st around.
Stitch Count: 48 sc
Rnd 30
Sc in each st around.
Stitch Count: 48 sc
Rnd 31
Sc in each st around.
Stitch Count: 48 sc
Rnd 32
Sc in each st around.
Stitch Count: 48 sc
Rnd 33
Sc in each st around.
Stitch Count: 48 sc
Rnd 34
Sc in each st around.
Stitch Count: 48 sc
Rnd 35
Sc in each st around.
Stitch Count: 48 sc
Rnd 36
Sc in each st around.
Stitch Count: 48 sc
Part 2: Shape the Top Edge
Rnd 37
Sc in each of the next 47 sts.
Sl st to the first sc.
Stitch Count: 48 sc
Fasten off Color A.
Do not cut the working end extremely short if you want to use it for reinforcing the edge.
Rnd 38
Join Color B with a sl st in any stitch.
Ch 1.
Sc in the same stitch.
Sc in each st around.
Sl st to the first sc.
Stitch Count: 48 sc
Rnd 39
Ch 1.
Sc in each st around.
Sl st to the first sc.
Stitch Count: 48 sc
Rnd 40
Ch 1.
Sc in each st around.
Sl st to the first sc.
Stitch Count: 48 sc
Fasten off Color B.
Part 3: Create the Raised Botanical Texture
The decorative leaves are worked directly onto the bag.
You are not sewing individual leaves onto the body.
For the cleanest placement, turn the bag so the front is facing you.
The 48 stitches around the top can be mentally divided into four sections of 12 stitches.
Use removable markers to identify:
-
Front center: stitch 1
-
Right side: stitch 13
-
Back center: stitch 25
-
Left side: stitch 37
These markers are temporary placement guides.
Large Front Cream Leaf
Join Color B at the lower center of the front.
Work surface sl sts upward in a tapered leaf shape.
Leaf Row 1
Surface sl st across 3 stitches toward the top center.
Surface Stitch Count: 3
Leaf Row 2
Surface sl st across 5 stitches, widening by one stitch on each side.
Surface Stitch Count: 5
Leaf Row 3
Surface sl st across 7 stitches.
Surface Stitch Count: 7
Leaf Row 4
Surface sl st across 9 stitches.
Surface Stitch Count: 9
Leaf Row 5
Surface sl st across 7 stitches.
Surface Stitch Count: 7
Leaf Row 6
Surface sl st across 5 stitches.
Surface Stitch Count: 5
Leaf Row 7
Surface sl st across 3 stitches.
Surface Stitch Count: 3
Leaf Row 8
Work 1 Bo in the central stitch at the top of the leaf.
Stitch Count: 1 Bo
This creates the raised central botanical bud.
Fasten off.
Part 4: Center Leaf Vein
Join Color B at the bottom point of the large front leaf.
Surface sl st vertically through the center of the leaf from bottom to top.
Work slowly and keep the stitches loose enough that the fabric does not pucker.
Surface Stitch Count: 8 sl sts
Fasten off.
Part 5: Left Front Leaf
Join Color B approximately 6 stitches to the left of the large center leaf.
Create the leaf using the following tapered surface rows.
Leaf Row 1
Surface sl st across 3 stitches.
Stitch Count: 3
Leaf Row 2
Surface sl st across 5 stitches.
Stitch Count: 5
Leaf Row 3
Surface sl st across 7 stitches.
Stitch Count: 7
Leaf Row 4
Surface sl st across 5 stitches.
Stitch Count: 5
Leaf Row 5
Surface sl st across 3 stitches.
Stitch Count: 3
Leaf Row 6
Work 1 Bo in the top center stitch.
Stitch Count: 1 Bo
Fasten off.
Add a vertical surface-slip-stitch vein through the center.
Surface Stitch Count: 6 sl sts
Part 6: Right Front Leaf
Join Color B approximately 6 stitches to the right of the center leaf.
Leaf Row 1
Surface sl st across 3 stitches.
Stitch Count: 3
Leaf Row 2
Surface sl st across 5 stitches.
Stitch Count: 5
Leaf Row 3
Surface sl st across 7 stitches.
Stitch Count: 7
Leaf Row 4
Surface sl st across 5 stitches.
Stitch Count: 5
Leaf Row 5
Surface sl st across 3 stitches.
Stitch Count: 3
Leaf Row 6
Work 1 Bo in the top center stitch.
Stitch Count: 1 Bo
Fasten off.
Add the central surface-slip-stitch vein.
Surface Stitch Count: 6 sl sts
Part 7: Lower Blue Leaf Details
Use Color A to create raised blue leaves around the lower portion of the bag.
These details blend into the body while creating the dimensional leaf texture visible in the reference design.
Create the first lower leaf on the front-left section.
Lower Leaf Row 1
Surface sl st across 3 stitches.
Stitch Count: 3
Lower Leaf Row 2
Surface sl st across 5 stitches.
Stitch Count: 5
Lower Leaf Row 3
Surface sl st across 7 stitches.
Stitch Count: 7
Lower Leaf Row 4
Surface sl st across 5 stitches.
Stitch Count: 5
Lower Leaf Row 5
Surface sl st across 3 stitches.
Stitch Count: 3
Fasten off.
Add a center vein.
Surface Stitch Count: 5 sl sts
Part 8: Second Lower Blue Leaf
Join Color A on the lower front-right section.
Leaf Row 1
Surface sl st across 3 stitches.
Stitch Count: 3
Leaf Row 2
Surface sl st across 5 stitches.
Stitch Count: 5
Leaf Row 3
Surface sl st across 7 stitches.
Stitch Count: 7
Leaf Row 4
Surface sl st across 5 stitches.
Stitch Count: 5
Leaf Row 5
Surface sl st across 3 stitches.
Stitch Count: 3
Fasten off.
Add the central vein.
Surface Stitch Count: 5 sl sts
Part 9: Additional Side Leaves
For the side texture, work two smaller leaves on each side of the bag.
Left Side Leaf
Join Color B.
Row 1
Surface sl st across 3 stitches.
Stitch Count: 3
Row 2
Surface sl st across 5 stitches.
Stitch Count: 5
Row 3
Surface sl st across 3 stitches.
Stitch Count: 3
Row 4
Work 1 Bo into the center top stitch.
Stitch Count: 1 Bo
Fasten off.
Add a center vein of 4 surface sl sts.
Right Side Leaf
Join Color B.
Row 1
Surface sl st across 3 stitches.
Stitch Count: 3
Row 2
Surface sl st across 5 stitches.
Stitch Count: 5
Row 3
Surface sl st across 3 stitches.
Stitch Count: 3
Row 4
Work 1 Bo into the center top stitch.
Stitch Count: 1 Bo
Fasten off.
Add a center vein of 4 surface sl sts.
Part 10: Decorative Leaf Veins
The reference design gets much of its visual character from the vein-like raised lines.
Using Color B, add diagonal surface slip stitches from the center vein toward the outside edge of each cream leaf.
For the large center leaf:
-
Work 3 diagonal sl sts on the left.
-
Work 3 diagonal sl sts on the right.
-
Work 2 additional diagonal sl sts on the left.
-
Work 2 additional diagonal sl sts on the right.
Total Decorative Stitches: 10 surface sl sts
Do not pull these stitches tightly.
They should sit visibly above the fabric.
Repeat the same visual treatment on the two smaller front leaves, using:
-
3 diagonal stitches on the left.
-
3 diagonal stitches on the right.
Total per small leaf: 6 surface sl sts
Part 11: Crochet the Top Handle
The handle is made directly from the bag edge so it looks continuous and sturdy.
Choose the two side sections of the bag.
Each handle attachment uses 6 stitches.
The front attachment occupies stitches 8-13.
The back attachment occupies stitches 32-37.
Handle Foundation
Join Color B to the first handle attachment stitch.
Handle Row 1
Sc in each of the next 6 stitches.
Ch 40.
Skip the next 24 body stitches.
Sc in each of the next 6 stitches.
Stitch Count: 52 stitches/chains across the handle foundation
The 40-chain section forms the arch.
Handle Row 2
Do not turn the bag completely upside down.
Instead, rotate the work so the chain arch is easy to reach.
Sc across the first 6 body stitches.
Work 40 sc evenly across the chain.
Sc across the final 6 body stitches.
Stitch Count: 52 sc
Handle Row 3
Sc in each of the 52 stitches.
Stitch Count: 52 sc
Handle Row 4
Sc in each of the 52 stitches.
Stitch Count: 52 sc
Handle Row 5
Sc in each of the 52 stitches.
Stitch Count: 52 sc
Handle Row 6
Sc in each of the 52 stitches.
Stitch Count: 52 sc
Handle Row 7
Sc in each of the 52 stitches.
Stitch Count: 52 sc
Handle Row 8
Sc in each of the 52 stitches.
Stitch Count: 52 sc
Fasten off and leave a long tail.
Use the yarn needle to reinforce the two handle attachment areas with several passes through the existing stitches.
This is reinforcement, not construction of a separate sewn handle.
Part 12: Second Handle Pass
For an especially sturdy plush handle, join Color B at the opposite edge of the first handle.
Work 6 sc across the attachment area.
Work 40 sc across the inside of the handle arch.
Work 6 sc across the opposite attachment.
Handle Reinforcement Row 1
Sc across all 52 stitches.
Stitch Count: 52 sc
Handle Reinforcement Row 2
Sc across all 52 stitches.
Stitch Count: 52 sc
Handle Reinforcement Row 3
Sc across all 52 stitches.
Stitch Count: 52 sc
Fasten off.
Weave in all remaining ends securely.
Part 13: Final Decorative Border
Join Color C at any point around the top opening.
Border Rnd 1
Ch 1.
Sc in each of the 48 top-edge stitches.
Sl st to the first sc.
Stitch Count: 48 sc
Border Rnd 2
Ch 1.
Sc in each st around.
Sl st to the first sc.
Stitch Count: 48 sc
Fasten off.
Part 14: Finishing
Shape the Bag
Place the finished bag on a flat surface.
Gently massage the bottom into an oval shape.
Do not stretch the plush fabric aggressively.
Reinforce the Handle
Check both handle attachment points.
If the handle feels loose, reinforce each attachment with additional whip-style passes using the yarn needle.
Weave in Ends
Thread each remaining yarn tail onto a yarn needle.
Work the tail through several stitches on the wrong side.
Change direction once or twice.
Trim the excess yarn.
Optional Lining
For a more professional craft-fair product, add a lightweight fabric lining.
A lining helps the bag hold its shape and prevents small objects from catching on the crochet fabric.
How to Make the Bag Look Like the Reference
The most important design element is layering.
Use:
-
Dusty blue for the rounded lower body.
-
Warm cream for the large raised leaves.
-
Taupe or brown for smaller background leaves.
-
Cream for the tall handle.
-
Bobbles as raised botanical buds.
-
Surface slip stitches for leaf veins.
The combination of these elements creates the dimensional botanical effect without requiring a large number of separately sewn components.
Beginner Troubleshooting
My Bag Is Too Wide
Your tension may be too loose.
Try using a smaller crochet hook.
My Bag Is Too Tall
Your stitches may be taller than the recommended gauge.
Measure the bag after Rnd 20.
If it is already significantly taller than expected, reduce the number of plain body rounds while maintaining the same stitch count.
My Bottom Curls
Check the increase rounds.
The base should lie reasonably flat after Rnd 3.
If it curls upward, your tension may be too tight.
My Bottom Is Wavy
Too many increases or loose tension can create waves.
Count Rnds 1-3 carefully:
-
Rnd 1 = 36 sts
-
Rnd 2 = 42 sts
-
Rnd 3 = 48 sts
My Leaves Are Hard to See
Use a contrasting color.
Cream against dusty blue gives the strongest botanical effect.
My Bobbles Disappear
Plush yarn can swallow bobbles.
Make each 4-dc bobble slightly tighter and gently push the finished bobble toward the front of the fabric.
Craft Fair Tips
This bag is particularly suitable for craft fairs because the dimensional texture makes it visually appealing from several feet away.
For a small collection, make several color combinations:
-
Sage green + cream
-
Dusty blue + ivory
-
Terracotta + oatmeal
-
Chocolate brown + beige
-
Soft pink + cream
-
Olive + natural
Keep one finished sample hanging at eye level.
A small sign can say:
"Hand-Crocheted Botanical Bag - Textured Leaf Design."
Highlight the handmade construction and sturdy handle.
Final Pattern Checklist
Before calling the bag finished, check:
-
The base is flat.
-
The body has 48 stitches.
-
The top edge is even.
-
The leaf motifs are securely attached through surface crochet.
-
The bobbles are visible.
-
The handle is reinforced.
-
All yarn ends are woven in.
-
The bag has been gently shaped.
-
The finished dimensions are close to the intended size.
This botanical crochet bag combines a simple rounded construction with dimensional leaf texture, making it a practical project for beginners and a beautiful statement piece for craft-fair displays.
Striped Crochet Market Bag
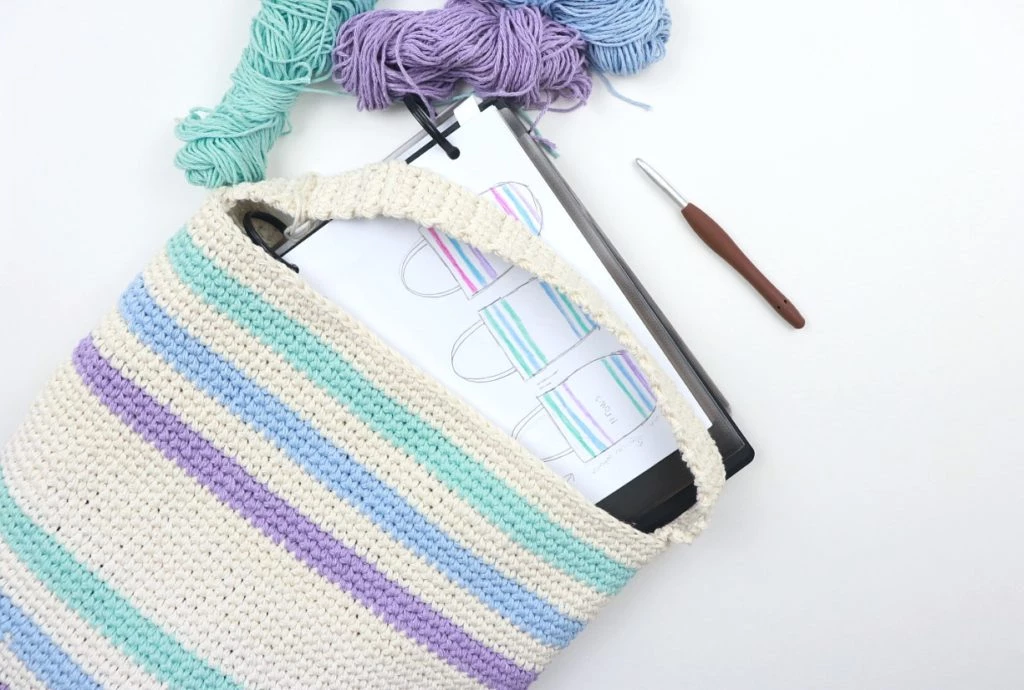
In the Designer's Words: No more plastic bags! Crochet our own pretty market bag and carry your groceries in style. This crochet market bag is easy to make, using the linen stitch.
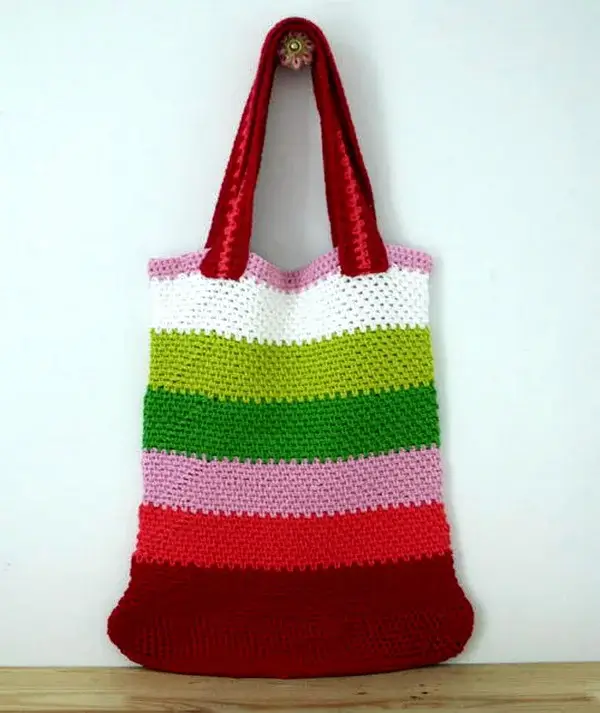
Market bags are the perfect way to combine your love of free crochet patterns with practical uses. While buying recycled bags might seem like a cheaper and easier solution, those bags are not made to last ironically enough. If you tend to carry a lot of heavy groceries and need something sturdy for your veggies, then check out the Striped Crochet Market Bag. This crochet pattern makes the perfect market bag, because it is roomy, sturdy, and easy-to-carry. Apples, oranges, and even canned goods will easily be carted in this cutie.
Perfect Day Market Tote
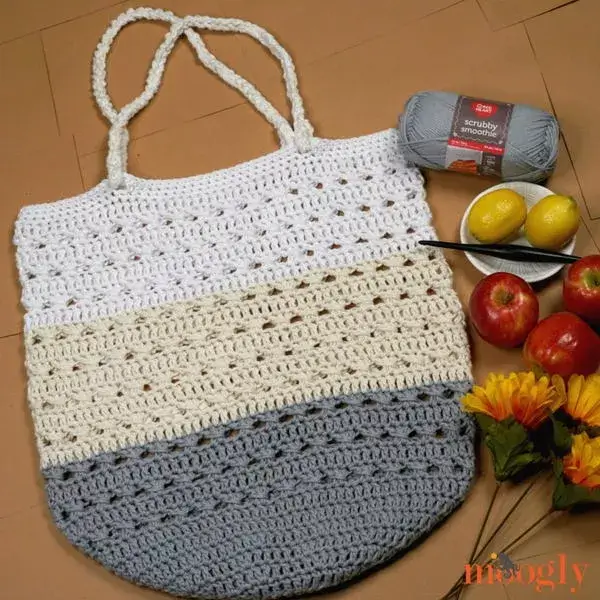
The Perfect Day Market Tote was inspired by all my trips to the local farmer's market this season - the start to a perfect summer day! But you don't have to take it to the market - it's handy wherever you go. And it's a free crochet pattern on Moogly! This is a big, big market bag - but the clever thing about this pattern is that you can actually make it any size! Instructions for this is included. I made the Perfect Day Market Tote in three lovely neutral shades of Red Heart Scrubby Smoothie - it's the perfect yarn for this project! And it comes in tons of colors - so I can't wait to see which ones you choose for your Perfect Bag!
Mary Poppins Inspired Magic Crochet Bag
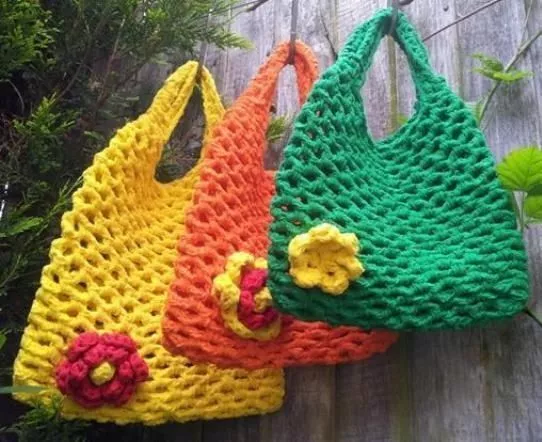
If you're wondering where Mary Poppins got her magic bag, this free purse pattern is the answer. The Mary Poppins Inspired Magic Crochet Bag harnesses the magic of T-shirt yarn combined with mesh styling to allow the bag to stretch out to accommodate a smorgasbord of items for those days when you can't get to the car without packing half your house with you.
When you only have a few essentials, though, it still stays cute and perky. The single flower at the bottom gives the whole piece a fresh, vibrant pop, and the color combinations are limitless. This is also one of the best beginner crochet patterns because it only uses two stitches: chain and single.
My Go To Bag
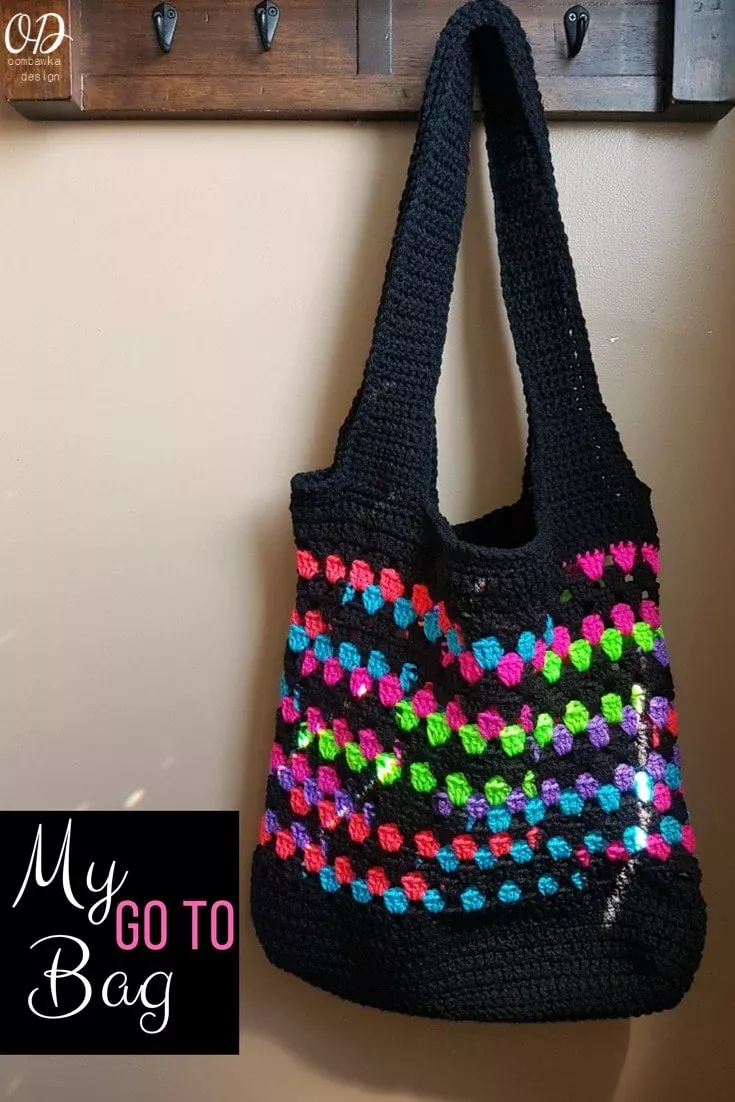
Straps 26 inches long and 2 inches wide Bag 17 inches long by 15 inches wide when measured on a flat surface Handle Drop 14 inches My Go To Bag is my practical, everyday crocheted bag. I wanted a bag I could use for everything - from beach bag to book bag - a single crocheted base gives this bag extra support - the first few rounds are crocheted in double crochet and then the main bag is worked up in an easy to work granny stitch stripe pattern. I chose to make my straps slightly wider than most bags because when you fill the bag and the straps stretch, they will remain comfortable on your shoulders. If you would like to have a narrower strap, it is very easy to change the width of the strap. Simply add one extra decrease repeat of: Sc2tog, 1 sc in each of the next 2 sts, sc2tog. Ch 1, turn. 4 in place of R11 of the straps and for R80 work: 2 sc in the first st, 1 sc in each of the next 2 sts, 2 sc in the last st, ch 1, turn. 6. Have fun making this simple, attractive and practical Go To Bag! You can substitute any yarn and hook for this stitch pattern - just remember when you substitute if your gauge is different, the finished size of your project will also be different.
Spring Market Tote Bag
Are you looking for the perfect summer bag to take with you on the go? The Spring Market Tote Bag is a great bag for the beach or to take to your local farmers market. This bag is an easy, beginner-friendly crochet pattern only using single crochet stitches, and sturdy because we'll be holding multiple strands. The shades of purple and blue scream Spring but the color possibilities are endless! Choose to make your market tote with one accent color or six! Plus, it comes with a video tutorial just in case you need additional help