
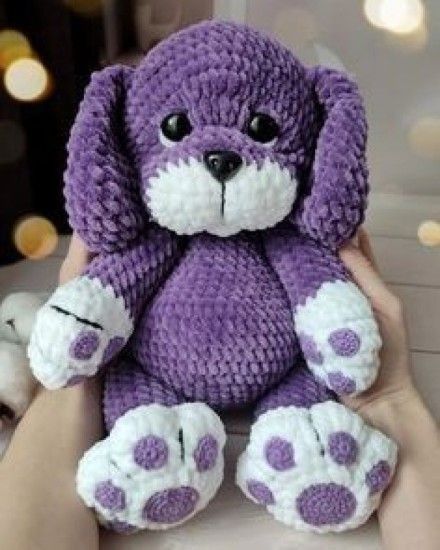
Create an irresistibly cuddly Amigurumi Puppy Crochet Pattern inspired by the adorable plush puppy shown in the photo. This chubby puppy features a deep violet body, oversized floppy ears, a soft white muzzle, and large white paws decorated with contrasting purple paw pads.
The pattern uses super bulky chenille yarn and is designed for advanced beginners who are comfortable crocheting amigurumi in continuous rounds, changing colors, increasing, decreasing, and sewing simple pieces together.
Materials + Tools
Yarn
- Super bulky chenille/velvet yarn
- Deep purple or violet - approximately 150-200 g
- White- approximately 50-70 g
- Small amount of purple for paw pads if using a separate pad color
- Small amount of black embroidery floss for the muzzle line
Notions + Tools
- 5.0-6.0 mm crochet hook, depending on your yarn and tension
- 14-16 mm glossy black safety eyes
- 1 plastic safety nose, approximately 12-15 mm
- Polyester fiberfill
- Yarn needle with a large eye
- Stitch marker
- Scissors
- Optional: locking stitch markers for positioning the limbs
- Optional: pins for positioning pieces before sewing
Finished Size
Using super bulky chenille yarn and a 5.5 mm hook, the finished puppy will measure approximately 9-11 inches (23-28 cm) tall, depending on your tension.
Abbreviations
This pattern uses standard US crochet terminology.
| Abbreviation | Meaning |
|---|---|
| MR | Magic ring |
| ch | Chain |
| sc | Single crochet |
| inc | Increase - 2 sc in the same stitch |
| dec | Invisible decrease |
| sl st | Slip stitch |
| BLO | Back loop only |
| FLO | Front loop only |
| st | Stitch |
| sts | Stitches |
| FO | Fasten off |
| Rnd | Round |
| ( ) | Repeat instructions inside parentheses |
| [ ] | Stitch count at end of round |
Special Notes
- Work amigurumi pieces in continuous rounds unless otherwise stated.
- Use a stitch marker to mark the first stitch of every round.
- Keep your stitches tight enough that stuffing does not show through.
- When working with chenille yarn, avoid overstuffing. The puppy should remain soft and squishy.
- Invisible decreases are recommended for a smooth plush finish.
Part 1: Muzzle + Floppy Ears
White Oval Muzzle
The puppy has a wide, slightly elongated white muzzle positioned horizontally across the lower half of the face.
Work in continuous rounds.
Round 1
Make a foundation chain of 7.
Starting in the 2nd chain from the hook:
- sc in next 5 sts
- 3 sc in last ch
- working along the opposite side of the chain, sc in next 4 sts
- 2 sc in the remaining chain
[14 sts]
Round 2
- inc
- sc in next 4 sts
- inc in each of next 3 sts
- sc in next 4 sts
- inc in each of next 2 sts
[20 sts]
Round 3
- sc
- inc
- sc in next 4 sts
- (sc, inc) 3 times
- sc in next 4 sts
- (sc, inc) 2 times
[26 sts]
Round 4
- sc in next 2 sts
- inc
- sc in next 4 sts
- (sc in next 2 sts, inc) 3 times
- sc in next 4 sts
- (sc in next 2 sts, inc) 2 times
[32 sts]
Round 5
Sc in each stitch around.
[32 sts]
Round 6
Sc in each stitch around.
[32 sts]
Lightly stuff the muzzle. Do not make it hard. You want a soft, rounded muzzle similar to the plush shape in the photo.
Round 7
(sc in next 2 sts, dec) around.
[24 sts]
Round 8
(sc, dec) around.
[16 sts]
Add a little more stuffing if needed.
Round 9
Dec around.
[8 sts]
FO, leaving a long yarn tail for attaching.
Set the muzzle aside.
Long Floppy Ear - Make 2
The ears are intentionally long, wide, and slightly rounded. They should remain soft and floppy rather than being tightly stuffed.
Work in deep purple.
Round 1
Ch 9.
Starting in the 2nd ch from the hook:
- sc in next 7 sts
- 3 sc in last ch
- working down the opposite side of the chain, sc in next 7 sts
- 1 sc in the remaining foundation chain
[18 sts]
Round 2
- inc
- sc in next 7 sts
- inc in each of next 3 sts
- sc in next 7 sts
- inc
[24 sts]
Round 3
- (sc, inc) 2 times
- sc in next 7 sts
- (sc, inc) 3 times
- sc in next 7 sts
- (sc, inc)
[30 sts]
Rounds 4-9
Sc in each stitch around.
[30 sts]
The ear should now be long and substantial.
Round 10
(sc in next 3 sts, dec) around.
[24 sts]
Round 11
(sc in next 2 sts, dec) around.
[18 sts]
Round 12
(sc, dec) around.
[12 sts]
Round 13
Dec around.
[6 sts]
FO.
Do not heavily stuff the ears. Flatten each ear gently with your fingers.
Using the remaining yarn tail, close the opening and leave enough yarn to sew the ear to the head.
Repeat for the second ear.
Part 2: Large Paws + Limbs
The puppy has four oversized paws. The paws are white, while the upper portions of the limbs are deep purple.
The front paws are slightly smaller and more vertical. The back legs are wider and more rounded to give the puppy its sitting position.
Front Leg + White Paw - Make 2
Begin with white yarn.
Round 1
MR, 6 sc.
[6 sts]
Round 2
Inc around.
[12 sts]
Round 3
(sc, inc) around.
[18 sts]
Round 4
(sc in next 2 sts, inc) around.
[24 sts]
Rounds 5-6
Sc in each stitch around.
[24 sts]
Round 7
(sc in next 2 sts, dec) around.
[18 sts]
Change to deep purple.
Round 8
BLO sc around.
[18 sts]
Working BLO on this round creates a subtle, clean transition between the white paw and purple arm.
Rounds 9-13
Sc around.
[18 sts]
Begin lightly stuffing the arm.
Round 14
(sc, dec) around.
[12 sts]
Add a small amount of stuffing.
Round 15
Dec around.
[6 sts]
FO and close the opening.
Do not overstuff the white paw. It should remain broad and soft.
Repeat for the second front leg.
Hind Leg + Oversized White Foot - Make 2
The back feet should be noticeably larger than the front paws.
Begin with white yarn.
Round 1
MR, 6 sc.
[6 sts]
Round 2
Inc around.
[12 sts]
Round 3
(sc, inc) around.
[18 sts]
Round 4
(sc in next 2 sts, inc) around.
[24 sts]
Round 5
(sc in next 3 sts, inc) around.
[30 sts]
Round 6
Sc around.
[30 sts]
Round 7
(sc in next 3 sts, dec) around.
[24 sts]
Round 8
(sc in next 2 sts, dec) around.
[18 sts]
Change to deep purple.
Round 9
BLO sc around.
[18 sts]
Rounds 10-13
Sc around.
[18 sts]
Lightly stuff the foot and leg.
Round 14
(sc, dec) around.
[12 sts]
Round 15
Dec around.
[6 sts]
FO and close.
Make the second hind leg.
Purple Paw Pads
The easiest way to achieve the raised purple paw-pad appearance from the photo is to crochet small appliqués and attach them to the white paws.
For each large hind foot, make:
- 1 large central pad
- 3 small toe pads
For each front paw, make:
- 1 medium central pad
- 2-3 small toe pads
Use a slightly thinner purple yarn if available for more definition.
Large Central Pad
Round 1
MR, 6 sc.
[6 sts]
Round 2
Inc around.
[12 sts]
FO, leaving a long tail.
Gently flatten the pad.
Small Toe Pad
Round 1
MR, 6 sc.
[6 sts]
FO, leaving a sewing tail.
Make the required number of toe pads.
Attaching the Paw Pads
Position the large central pad toward the middle of the white foot.
For each hind foot:
- Place the large pad approximately in the center of the paw.
- Position three small pads above it in a gentle semicircle.
- Pin everything in place.
- Sew around the outer edge of each pad using the yarn tail.
- Pull the stitches firmly enough to secure the pad but not so tightly that the white paw puckers.
The final arrangement should resemble a classic puppy paw:
● ● ●
**●**
For the front paws, use a smaller central pad and arrange the toe pads toward the upper portion of the white paw.
Optional Embroidered Toe Lines
To create the subtle dark lines visible around the toes:
- Thread a yarn needle with a small amount of purple yarn or embroidery floss.
- Bring the needle from the back of the paw to the front.
- Make a short curved stitch between two toe pads.
- Repeat between the remaining toes.
- Keep the lines short and slightly curved.
- Bring the yarn back through the paw and secure it on the back.
Do not pull the embroidery too tightly. The plush fabric should remain rounded.
Part 3: Chubby Body + Large Head
The body and head are crocheted as one continuous piece, eliminating the need to sew the head to the body.
Work entirely in deep purple.
Body
Round 1
MR, 6 sc.
[6 sts]
Round 2
Inc around.
[12 sts]
Round 3
(sc, inc) around.
[18 sts]
Round 4
(sc in next 2 sts, inc) around.
[24 sts]
Round 5
(sc in next 3 sts, inc) around.
[30 sts]
Round 6
(sc in next 4 sts, inc) around.
[36 sts]
Round 7
(sc in next 5 sts, inc) around.
[42 sts]
Round 8
(sc in next 6 sts, inc) around.
[48 sts]
Rounds 9-17
Sc around.
[48 sts]
Continue stuffing as you work.
The lower body should become plump and rounded. Add stuffing gradually rather than in one large amount.
Round 18
(sc in next 6 sts, dec) around.
[42 sts]
Round 19
(sc in next 5 sts, dec) around.
[36 sts]
Round 20
(sc in next 4 sts, dec) around.
[30 sts]
Rounds 21-23
Sc around.
[30 sts]
This narrower section creates the puppy's neck.
Do not stuff this section excessively.
Large Round Head
The head begins by expanding directly from the neck.
Round 24
(sc in next 4 sts, inc) around.
[36 sts]
Round 25
(sc in next 5 sts, inc) around.
[42 sts]
Round 26
(sc in next 6 sts, inc) around.
[48 sts]
Round 27
(sc in next 7 sts, inc) around.
[54 sts]
Round 28
(sc in next 8 sts, inc) around.
[60 sts]
Rounds 29-36
Sc around.
[60 sts]
Stuff the head firmly but keep it slightly squishy.
Safety Eye Placement
For a face matching the proportions in the photo, place the eyes relatively close together and low on the large head.
Before inserting the eyes, mark stitch 1 of Round 24 as the center-front stitch. Keep this center-front line aligned with the middle of the body.
On Round 32:
- Insert the first 14-16 mm safety eye through stitch 55.
- Insert the second safety eye through stitch 7.
This places the eyes approximately 12 stitches apart around the front of the head.
The eyes should sit approximately one to two rounds above the upper edge of the muzzle.
Install the washers securely from inside the head.
Important
Before locking the safety-eye backs into position, hold the muzzle against the face and check the expression.
The eyes should appear:
- symmetrical
- glossy
- relatively close together
- slightly above the muzzle
- not too high on the forehead
Continue Shaping the Head
Round 37
(sc in next 8 sts, dec) around.
[54 sts]
Round 38
(sc in next 7 sts, dec) around.
[48 sts]
Round 39
(sc in next 6 sts, dec) around.
[42 sts]
Round 40
(sc in next 5 sts, dec) around.
[36 sts]
Round 41
(sc in next 4 sts, dec) around.
[30 sts]
Begin adding the final stuffing.
Round 42
(sc in next 3 sts, dec) around.
[24 sts]
Round 43
(sc in next 2 sts, dec) around.
[18 sts]
Check the shape. Add small amounts of stuffing through the remaining opening if necessary.
Round 44
(sc, dec) around.
[12 sts]
Round 45
Dec around.
[6 sts]
FO.
Use a yarn needle to close the final 6 stitches. Pull tightly, weave the yarn through the head, and trim the excess.
Muzzle Placement + Nose
Position the white muzzle horizontally on the lower front of the head.
The muzzle should overlap the area directly beneath the eyes.
Secure the Muzzle
- Center the muzzle with the puppy's center-front line.
- The upper edge should sit approximately at Rounds 32-33.
- The lower edge should extend toward Rounds 37-38.
- Pin it in place.
- Sew around the entire perimeter with the white or matching purple yarn.
- Keep the muzzle slightly rounded instead of pulling it completely flat.
Leave the center front accessible for the nose.
Safety Nose
Insert the plastic safety nose at the exact center of the white muzzle, approximately between Rounds 33 and 34.
The nose should sit just below the eyes and near the upper-middle portion of the muzzle.
Secure the washer firmly inside the head.
Muzzle Line
Use black embroidery floss to recreate the simple dark mouth detail from the photo.
- Bring the floss out directly beneath the safety nose.
- Make one short vertical stitch extending downward approximately 1-1 1/2 cm.
- Add two very short diagonal stitches branching gently from the bottom of the vertical line.
- Secure the floss inside the head.
- Hide the tail between the crocheted stitches.
Keep the embroidery minimal for the sweet, simple puppy expression.
Assembly + Finishing Instructions
1. Attach the Floppy Ears
Position the ears on both sides of the head.
For the look shown in the photo:
- Place the top of each ear around Round 29.
- The ears should extend down alongside the head.
- The lower portions should reach approximately to the upper body.
- Angle the ears slightly forward.
Pin each ear before sewing.
Sew the upper portion securely to the head using several passes of matching purple yarn.
Do not sew the entire ear flat against the head. Allow the lower section to hang freely so it maintains its characteristic floppy shape.
2. Attach the Front Legs
Position the front legs on the upper sides of the body.
The attachment point should be approximately around Body Rounds 15-21.
For a relaxed sitting puppy:
- Angle the arms slightly outward.
- Keep both paws facing forward.
- Place the paws at approximately the same height.
- Leave the white paw sections fully visible.
Sew through the top of each arm and into several body stitches.
Make multiple passes through the thick chenille fabric for security.
3. Attach the Hind Legs
The hind legs should sit low on the body and spread slightly outward.
Position each leg around the lower sides of the body, approximately between Rounds 7-14.
Angle the feet forward so the purple paw pads are clearly visible.
The two hind feet should extend toward the front of the puppy, creating the characteristic seated pose.
Sew each leg securely to the body.
Use several passes of yarn through the attachment area because the oversized feet add weight to the lower limbs.
Creating the Sitting Pose
The puppy should naturally sit rather than stand.
Check the pose before making the final stitches:
- The body should remain upright.
- The belly should be rounded and supported by the hind legs.
- The back feet should point forward.
- The front paws should rest slightly above the hind feet.
- The head should remain centered.
- The ears should hang evenly on both sides.
If the puppy leans backward, add a small amount of stuffing to the lower front of the body.
If the puppy leans forward, gently reposition the hind legs farther toward the sides.
Final Finishing
Once all pieces are securely attached:
- Check every sewn connection.
- Tighten any loose stitches.
- Weave each yarn tail deeply through the plush fabric.
- Bring the yarn through several nearby stitches before trimming.
- Avoid leaving visible knots on the outside.
- Gently massage the chenille yarn to restore its fluffy texture.
- Shape the muzzle, belly, ears, and paws with your fingers.
Finally, gently arrange the floppy ears and position the paws so the purple paw pads face forward.
The finished puppy should have a large rounded head, chubby belly, long floppy ears, oversized white paws, and a sweet centered face matching the proportions and character of the reference design.
Crocheted Elephant
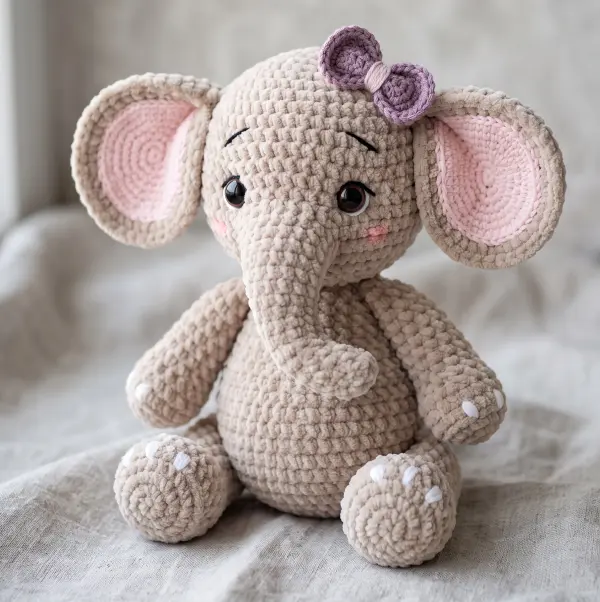
A soft, chubby, squishy crocheted elephant is one of those projects that is almost impossible to resist. With its oversized ears, tiny trunk, round belly, and cuddly chenille texture, this little elephant has the perfect handmade-toy look.
This beginner-friendly pattern is designed for quick crafting with plush yarn. The construction keeps the assembly simple, with parts attached using crochet stitches and slip stitches instead of traditional sewing. That makes it especially appealing if you love no-sew amigurumi and want a project you can finish in a short crafting session.
Easy No-Sew Crochet Bunny Pattern A Quick, Squishy Plush
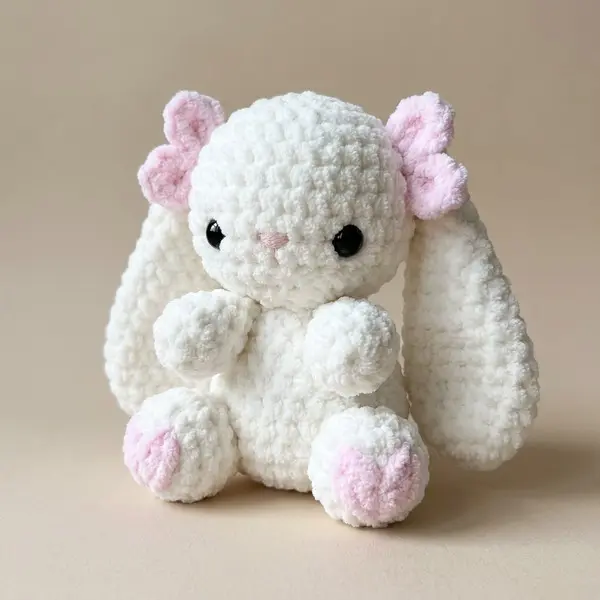
A super-soft bunny with long floppy ears, chubby paws, pink axolotl-style gills, and sweet little feet. This design is worked primarily in continuous rounds, with the ears, arms, feet, and pink gills crocheted onto the main piece using crochet joins rather than needle sewing.
Free No-Sew Crochet Koala Pattern
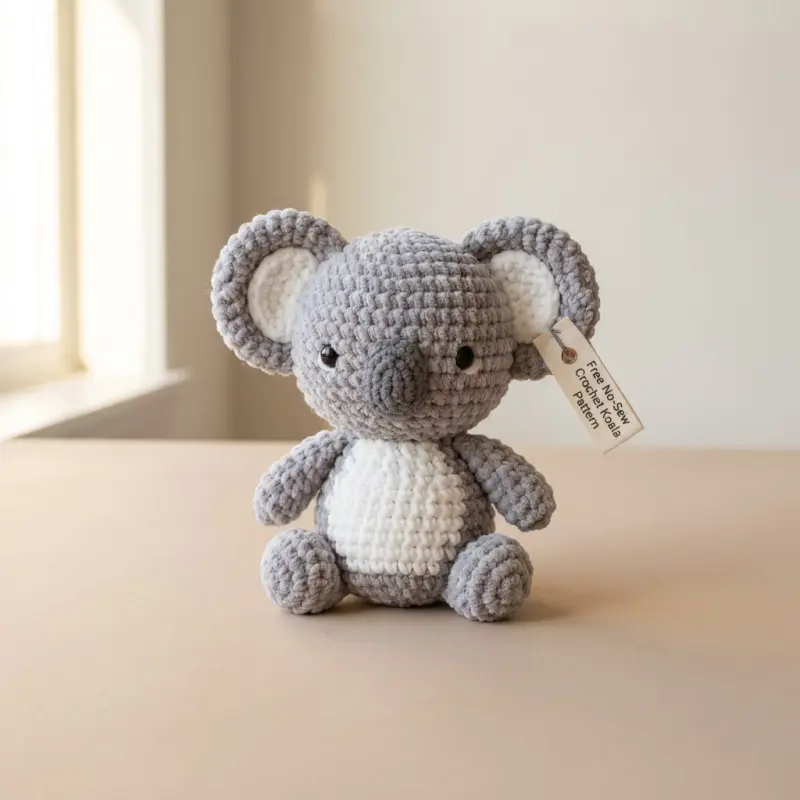
Create an irresistibly squishy Free No-Sew Crochet Koala Pattern with chunky chenille yarn, a round cuddly body, oversized ears, a soft white belly, tiny arms, and adorable little feet. This advanced-beginner amigurumi is designed so the major pieces are crocheted together as you work, eliminating traditional needle-sewn assembly.
The finished koala has the same plush, rounded character as the inspiration photo and works beautifully as a handmade gift, nursery decoration, key-sized plush variation, or craft-fair item.
Realistic Labrador Amigurumi Crochet Pattern
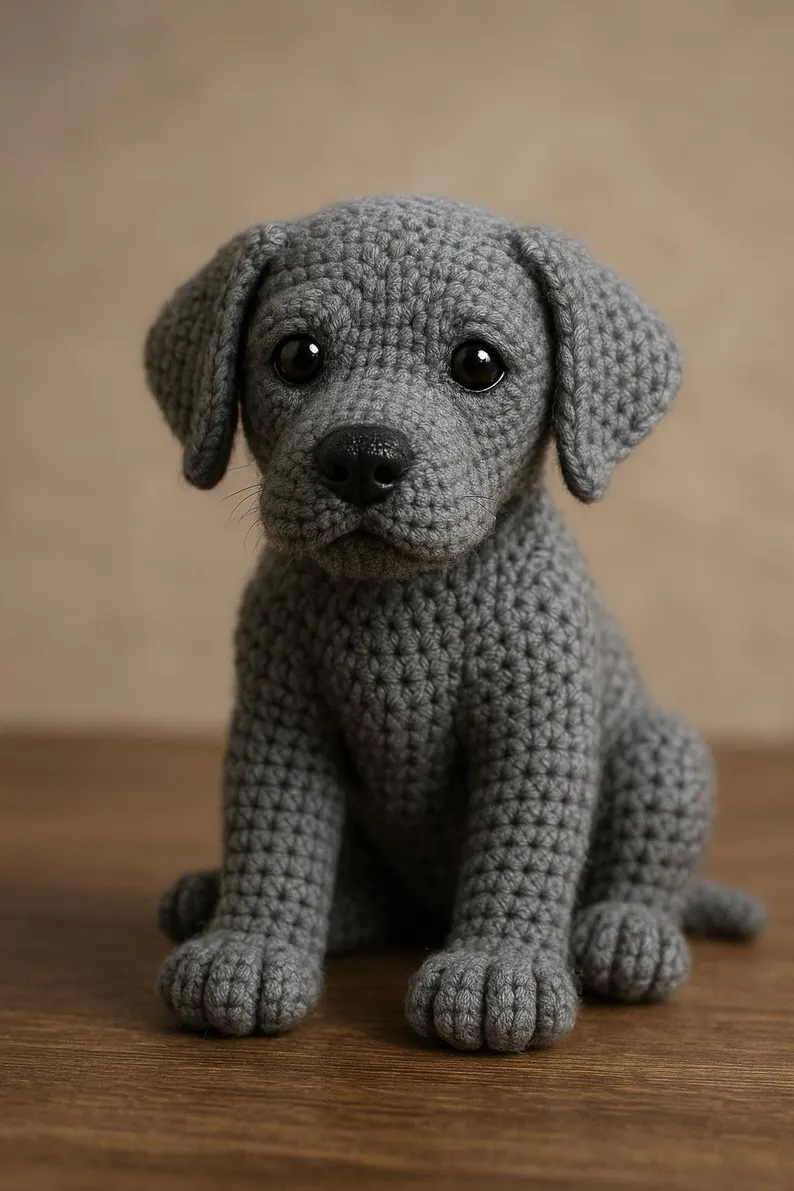
Realistic Labrador Amigurumi Crochet Pattern - Life-Like Sitting Puppy
White English Bulldog Amigurumi Crochet Pattern
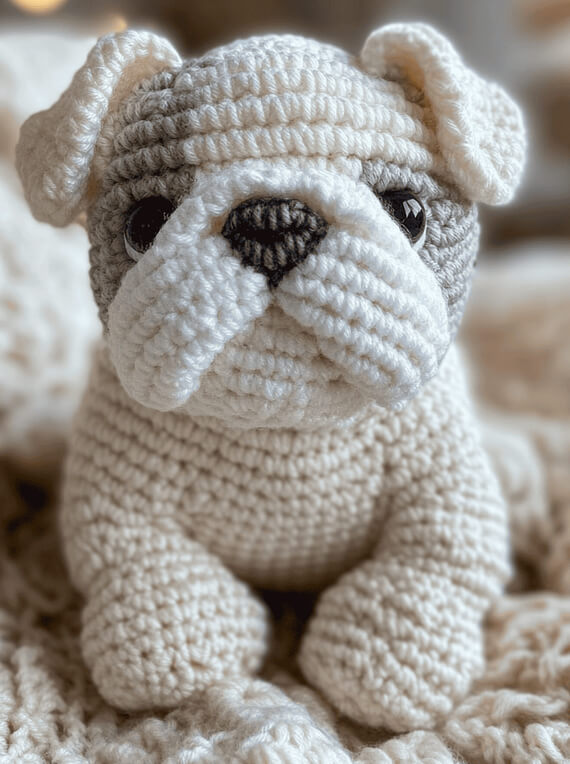
White English Bulldog Amigurumi Crochet Pattern - Easy No-Sew Chunky Plush Puppy
A Realistic, Chubby Bulldog You Can Crochet in One Piece
If you have ever admired the wrinkly, squishy face of an English Bulldog but hesitated because traditional amigurumi patterns require sewing on ears, legs, muzzles, and eyes, this White English Bulldog Amigurumi Crochet Pattern is designed to make the process much simpler. Inspired by the soft, rounded white bulldog in the reference photo, this pattern uses a continuous, seamless construction so the paws, eyes, ears, and facial features are formed directly into the crochet fabric.