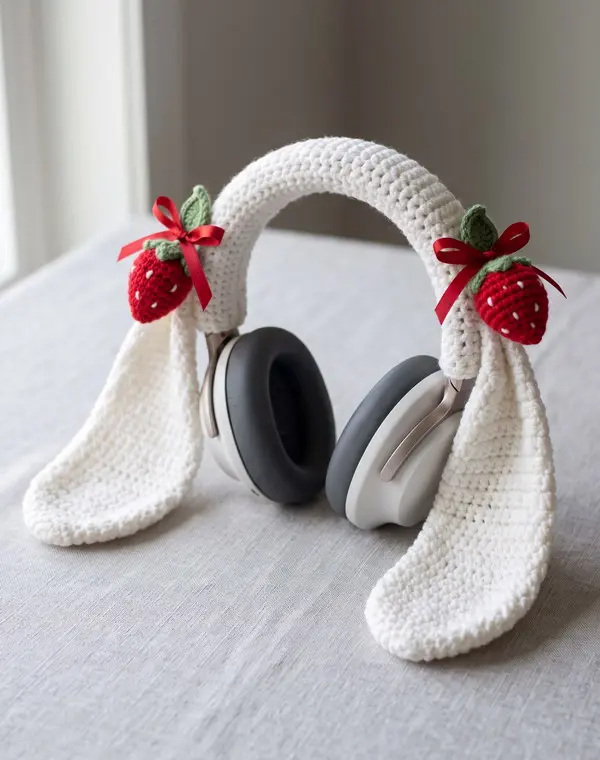
A sweet, removable crochet headphone cozy featuring long floppy bunny ears, tiny 3D strawberries, green leaves, and delicate red satin bows. The design is inspired by the soft coquette aesthetic in the reference photo and is suitable for most standard over-ear headphone headbands.
Materials & Tools
Yarn
- Cream or soft white cotton yarn - approximately 100-120 g
- DK/light worsted cotton works beautifully for a clean, structured texture.
- A smooth acrylic yarn can also be used.
- Bright red yarn - approximately 10-15 g for the strawberries
- Olive green yarn - approximately 5 g for the strawberry leaves
- White embroidery thread - for strawberry seeds
- Red satin ribbon, approximately 6-8 mm wide - for the bows
Crochet Hook
- 3.0 mm crochet hook for DK cotton
- Use a 2.75-3.5 mm hook as needed to obtain firm, neat stitches.
Other Supplies
- Polyester fiberfill
- Tapestry needle
- Embroidery needle
- Stitch marker
- Scissors
- 2 small buttons, approximately 8-10 mm
- Optional: small amount of felt for reinforcing the ear attachment area
- Optional: fabric glue for securing ribbon ends
Finished Size
The sample is designed for a standard over-ear headphone band approximately:
- Headband circumference: 13-15 inches (33-38 cm)
- Cozy width: approximately 2 inches (5 cm)
- Bunny ears: approximately 8-9 inches (20-23 cm) long
- Strawberry: approximately 1-1¼ inches (2.5-3 cm) tall
Because headphone bands vary considerably, measure your actual headphone band before crocheting the cozy.
Abbreviations
| Abbreviation | Meaning |
|---|---|
| MR | Magic Ring |
| ch | Chain |
| sc | Single Crochet |
| hdc | Half Double Crochet |
| dc | Double Crochet |
| inc | Increase - 2 stitches in the same stitch |
| dec | Decrease - single crochet 2 stitches together |
| sl st | Slip Stitch |
| BLO | Back Loop Only |
| FLO | Front Loop Only |
| st | Stitch |
| sts | Stitches |
| FO | Fasten Off |
| RS | Right Side |
| WS | Wrong Side |
Pattern is written in standard US crochet terminology.
Part 1: Removable Headband Cover / Cozy
The cozy is worked as a simple flat rectangle with button closures. This construction allows the entire bunny-ear cover to be removed from the headphones for washing or changing.
Measuring Your Headphone Band
Measure around the portion of the headphone headband that you want to cover.
For a snug removable cozy:
Headband measurement + approximately - inch (1.25 cm) = finished cozy length.
For example:
- 14-inch band - crochet approximately 14½ inches long.
- 15-inch band - crochet approximately 15½ inches long.
Measure the width of your headphone band and make the cozy approximately ¼ inch (6 mm) wider than the band.
For the sample, aim for approximately 2 inches (5 cm) wide.
Headband Cozy
Using cream yarn:
Foundation: Ch 13.
Row 1
Sc in 2nd ch from hook and across.
12 sc
Row 2
Ch 1, turn. Sc in each st across.
12 sc
Rows 3-40
Repeat Row 2 until the rectangle measures approximately 14½ inches (36.5 cm) long.
Sizing note: Do not rely on the number of rows. Measure your work against your actual headphone band. Continue adding or removing rows until the cozy reaches the desired length.
Final Row
Ch 1, turn. Sc in each st across.
12 sc
FO and weave in the yarn tail.
You now have a long cream rectangle.
Button Closures
Lay the cozy around the headphone band with the wrong side facing outward.
At one short end, sew 2 small buttons evenly spaced.
At the opposite short end, create corresponding buttonholes.
Buttonhole Row
Attach cream yarn at the first stitch of the short edge.
Ch 1, sc in the first 3 sts, ch 2, skip 2 sts, sc in the next 2 sts, ch 2, skip 2 sts, sc in the remaining 3 sts.
FO.
The exact buttonhole placement can be adjusted according to your buttons.
Important
The buttonholes should be snug enough that the cozy stays securely closed around the headphone band but loose enough that the buttons can be opened without stretching the crochet excessively.
Optional Slip-Stitch Closure
For a completely button-free version, overlap the two short ends around the headphone band.
Use cream yarn and sl st through corresponding stitches along the edge.
This produces a permanent tube-style sleeve.
For the most removable design, the button closure is recommended.
Part 2: Floppy Bunny Ears
Make 2 ears using cream yarn.
The ears are worked flat in rows. The upper section is narrow, while increases gradually widen the ear toward the rounded, floppy bottom.
The finished ear should be approximately 8-9 inches long.
Bunny Ear 1
Using cream yarn:
Foundation: Ch 7.
Row 1
Sc in 2nd ch from hook and across.
6 sc
Row 2
Ch 1, turn. Inc, sc in next 4 sts, inc.
8 sc
Row 3
Ch 1, turn. Sc across.
8 sc
Row 4
Ch 1, turn. Inc, sc in next 6 sts, inc.
10 sc
Row 5
Ch 1, turn. Sc across.
10 sc
Row 6
Ch 1, turn. Inc, sc in next 8 sts, inc.
12 sc
Row 7
Ch 1, turn. Sc across.
12 sc
Row 8
Ch 1, turn. Inc, sc in next 10 sts, inc.
14 sc
Row 9
Ch 1, turn. Sc across.
14 sc
Row 10
Ch 1, turn. Inc, sc in next 12 sts, inc.
16 sc
Row 11
Ch 1, turn. Sc across.
16 sc
Row 12
Ch 1, turn. Inc, sc in next 14 sts, inc.
18 sc
Row 13
Ch 1, turn. Sc across.
18 sc
Row 14
Ch 1, turn. Inc, sc in next 16 sts, inc.
20 sc
Row 15
Ch 1, turn. Sc across.
20 sc
Row 16
Ch 1, turn. Inc, sc in next 18 sts, inc.
22 sc
Row 17
Ch 1, turn. Sc across.
22 sc
Row 18
Ch 1, turn. Inc, sc in next 20 sts, inc.
24 sc
Row 19
Ch 1, turn. Sc across.
24 sc
Row 20
Ch 1, turn. Inc, sc in next 22 sts, inc.
26 sc
Row 21
Ch 1, turn. Sc across.
26 sc
Rows 22-31
Ch 1, turn. Sc across.
26 sc
The ear should now have a long, straight floppy section.
Creating the Rounded Bottom
Row 32
Ch 1, turn. Dec, sc in next 22 sts, dec.
24 sc
Row 33
Ch 1, turn. Sc across.
24 sc
Row 34
Ch 1, turn. Dec, sc in next 20 sts, dec.
22 sc
Row 35
Ch 1, turn. Sc across.
22 sc
Row 36
Ch 1, turn. Dec, sc in next 18 sts, dec.
20 sc
Row 37
Ch 1, turn. Sc across.
20 sc
Row 38
Ch 1, turn. Dec, sc in next 16 sts, dec.
18 sc
Row 39
Ch 1, turn. Sc across.
18 sc
Row 40
Ch 1, turn. Dec, sc in next 14 sts, dec.
16 sc
Row 41
Ch 1, turn. Dec, sc in next 12 sts, dec.
14 sc
Row 42
Ch 1, turn. Dec, sc in next 10 sts, dec.
12 sc
Row 43
Ch 1, turn. Dec, sc in next 8 sts, dec.
10 sc
Row 44
Ch 1, turn. Dec, sc in next 6 sts, dec.
8 sc
Row 45
Ch 1, turn. Dec, sc in next 4 sts, dec.
6 sc
Row 46
Ch 1, turn. Dec, sc in next 2 sts, dec.
4 sc
Row 47
Ch 1, turn. Dec twice.
2 sc
Row 48
Ch 1, turn. Dec.
1 sc
FO and weave in the end.
Ear Border
A clean crocheted border gives the floppy ears a polished, finished appearance.
Attach cream yarn at the top of the ear.
Work sc evenly around the entire ear, placing approximately 2 sc along each row edge where needed.
At the rounded bottom, distribute the stitches evenly so the edge remains smooth rather than puckered.
Join with a sl st at the starting point.
FO and weave in the end.
Optional Soft Texture
For a slightly more defined edge, work the border in BLO.
For the soft, smooth look shown in the photograph, regular sc is recommended.
Bunny Ear 2
Make a second identical ear following Rows 1-48 above.
Do not reverse the shape.
The two ears will naturally hang in opposite directions once attached to the sides of the headphone cover.
Part 3: Mini 3D Strawberries
Make 2 strawberries, one for each bunny ear.
Use bright red yarn.
The strawberries are worked from the bottom upward.
Strawberry 1
Round 1
Make an MR.
6 sc into the ring.
6 sc
Round 2
Inc around.
12 sc
Round 3
(sc, inc) x 6.
18 sc
Round 4
Sc around.
18 sc
Round 5
(sc in next 2 sts, inc) x 6.
24 sc
Round 6
Sc around.
24 sc
Round 7
(sc in next 2 sts, dec) x 6.
18 sc
Begin lightly stuffing.
Round 8
(sc, dec) x 6.
12 sc
Add a little more stuffing and shape the strawberry into a rounded cone.
Round 9
Dec around.
6 sc
FO, leaving a long tail.
Thread the tail through the front loops of the remaining 6 stitches and pull tight.
Weave the tail inside the strawberry.
Shaping the Strawberry
For the slightly pointed shape shown in the photograph, insert the tapestry needle through the center bottom of the strawberry and bring it out near the top.
Gently pull the yarn to compress the center.
Secure the yarn and hide the tail inside.
Do not over-tighten; the strawberry should remain plump.
Tiny White Strawberry Seeds
Using white embroidery thread and an embroidery needle, add small seed-shaped stitches around the red strawberry.
For each seed:
- Bring the needle from inside the strawberry to the surface.
- Make one tiny vertical stitch.
- Insert the needle back into the strawberry a few millimeters away.
- Pull gently.
Place approximately 10-14 tiny seeds around each strawberry.
Space them irregularly for a natural handmade appearance.
Avoid making the stitches too large because the strawberries are miniature.
Strawberry Leaf Calyx
Use olive green yarn.
Round 1
Make an MR.
6 sc into the ring.
6 sc
Do not close the ring tightly yet.
Leaf 1
(Ch 4, starting in 2nd ch from hook, sl st, sc, hdc, sl st into the next stitch of the ring)
Leaf 2
(Ch 4, starting in 2nd ch from hook, sl st, sc, hdc, sl st into the next stitch of the ring)
Leaf 3
(Ch 4, starting in 2nd ch from hook, sl st, sc, hdc, sl st into the next stitch of the ring)
Leaf 4
(Ch 4, starting in 2nd ch from hook, sl st, sc, hdc, sl st into the next stitch of the ring)
Leaf 5
(Ch 4, starting in 2nd ch from hook, sl st, sc, hdc, sl st into the next stitch of the ring)
Leaf 6
(Ch 4, starting in 2nd ch from hook, sl st, sc, hdc, sl st into the next stitch of the ring)
Pull the MR closed.
FO, leaving a long tail.
Position the calyx over the top of the strawberry and stitch it securely to the strawberry using the green yarn tail.
Repeat for the second strawberry.
Assembly & Finishing
1. Position the Headband Cozy
Place the cream crochet sleeve around the headphone headband.
Close the sleeve using the buttons.
Check that:
- The crochet does not interfere with hinges.
- The ear cups remain completely unobstructed.
- Microphones, controls, charging ports, and adjustment mechanisms remain accessible.
- The cozy does not prevent the headband from extending or folding.
2. Position the Bunny Ears
Place one ear approximately 1-1½ inches (2.5-4 cm) from each end of the headband cozy.
The narrow end of each ear should sit against the upper/outer portion of the cozy.
Allow the ears to hang downward naturally.
For the characteristic floppy appearance, do not pull the ears completely straight while attaching them.
3. Secure the Bunny Ears
Using cream yarn and a tapestry needle:
- Place the top portion of the first ear against the cozy.
- Stitch through the ear and cozy several times.
- Work through multiple crochet stitches rather than a single stitch.
- Make approximately 8-12 small securing stitches.
- Knot securely on the inside of the cozy.
- Hide the yarn tail between the stitches.
Repeat for the second ear.
Extra-Secure Attachment
For headphones that will be used frequently, reinforce each attachment point with a small piece of cream felt or an additional layer of crochet on the inside of the cozy.
The ear attachment should be secure without compressing or restricting the headphone band.
4. Attach the Strawberries
Position one strawberry near the upper/base area of each floppy ear.
The strawberry should sit slightly below the headband rather than directly on top of it.
Using the long red or green yarn tail:
- Stitch through the strawberry.
- Stitch through several stitches of the bunny ear.
- Pass through the attachment point multiple times.
- Pull firmly but gently.
- Knot securely behind the ear.
- Hide the remaining yarn tail.
Repeat with the second strawberry.
The strawberries should sit upright while the ears remain soft and floppy.
5. Add the Red Satin Bows
Cut two pieces of red satin ribbon approximately 10-12 inches (25-30 cm) long.
For each bow:
- Wrap the ribbon around the upper portion of the strawberry/ear attachment area.
- Tie a small central knot.
- Form two even loops.
- Pull the loops gently until the bow looks balanced.
- Trim the ribbon tails diagonally or into small V-shaped points.
- Carefully seal the cut ends with a suitable ribbon-fray method.
For extra security, make a few tiny stitches through the center of the bow using matching red thread.
This prevents the bow from slipping during use.
Final Shaping
Gently arrange the ears so they fall naturally on either side of the headphones.
The finished design should have:
- A smooth cream headband sleeve
- Two long, soft floppy bunny ears
- Rounded, slightly widened ear ends
- One miniature strawberry on each side
- Tiny white strawberry seeds
- Olive-green leafy calyxes
- Bright red satin bows
For the softest aesthetic, allow the ears to remain unstuffed and flexible. The weight of the strawberries will naturally encourage the ears to droop.
Customization Tips
- Longer ears: Add additional sc rows to the straight middle section before beginning the decreases.
- Wider ears: Add another increase section before the straight rows.
- Smaller ears: Stop increasing at 18-20 sts and begin the straight section earlier.
- More structured ears: Use a slightly smaller crochet hook.
- Softer ears: Use cotton/acrylic yarn with a slightly larger hook.
- Pink coquette version: Replace the red strawberries and bows with blush pink.
- Classic bunny version: Omit the strawberries and use small white or pink bows.
- Strawberry-cow print version: Add tiny pink or green embroidered accents to the cream cozy.
Tip: Before wearing the finished cozy, make sure all buttons, bows, embroidered details, and yarn ends are firmly secured and that the cover does not interfere with the headphones' adjustment mechanism or moving parts.
Wine Markers
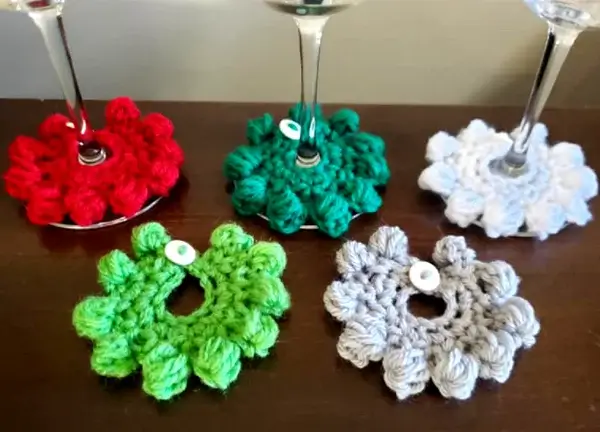
Whip up these easy crochet holiday wine markers this holiday season! So cute and easy to make with this simple easy to follow pattern! Measures approx. 3″ X 3″. Materials: Medium worsted weight yarn, I used Hobby Lobby's “I Love This Yarn” Size F, 3.75 mm crochet hook Tapestry needle Small button, .5″ Sewing needle for button Abbreviations: ch- chain sc- single crochet hk- hook st(s)- stitch(es) sk- skip sl st- slip stitch Whip up these easy crochet holiday wine markers this holiday season! So cute and easy to make with this simple easy to follow pattern! Measures approx. 3″ X 3″. Materials: Medium worsted weight yarn, I used Hobby Lobby's “I Love This Yarn” Size F, 3.75 mm crochet hook Tapestry needle Small button, .5″ Sewing needle for button Abbreviations: ch- chain sc- single crochet hk- hook st(s)- stitch(es) sk- skip sl st- slip stitch Whip up these easy crochet holiday wine markers this holiday season! So cute and easy to make with this simple easy to follow pattern! Measures approx. 3″ X 3″. Materials: Medium worsted weight yarn, I used Hobby Lobby's “I Love This Yarn” Size F, 3.75 mm crochet hook Tapestry needle Small button, .5″ Sewing needle for button Abbreviations: ch- chain sc- single crochet hk- hook st(s)- stitch(es) sk- skip sl st- slip stitch Special stitches Puff stitch: Yarn over and insert hk in st, pull up a loop. Yarn over and insert hook in the same stitch, pull up another loop. Yarn over and insert hook in the same stitch one more time and pull up a loop. Yarn over and pull through all loops, 1 puff made.
Sunshine Coasters
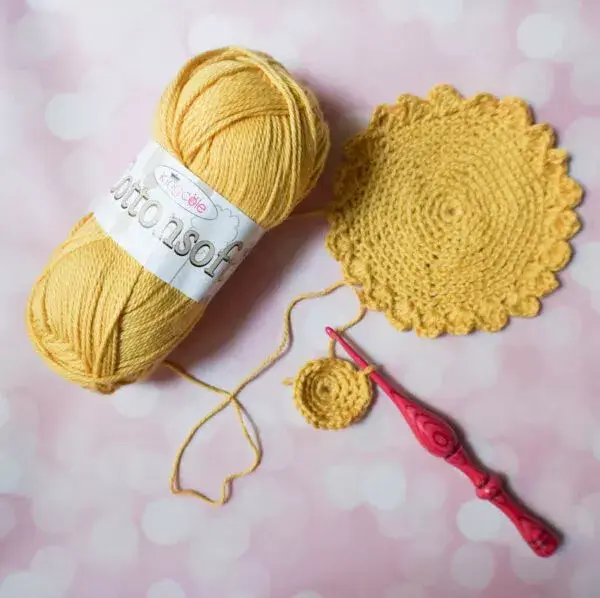
Make these simple, textured coasters as a set, or gift them individually as mug rugs. Skills Used Basic crochet stitches: chain, double crochet, single crochet, slip stitch Crocheting in the round Crocheting the back loop (pattern includes link to video tutorial) Skill Level Easy Finished Size Coaster: Approximately 5.5” (14 cm) in diameter. Materials King Cole Cottonsoft DK yarn (100% cotton, 3.5 oz/100 g, 229 yd/210 m) - 1 skein in 3461 Antique Gold, or approximately 120 yd (110 m) in any light weight cotton yarn for a set of 4 coasters. PLEASE NOTE: Each coaster uses approximately 30 yd (27.5 m) in light weight cotton yarn; each skein makes 7-9 coasters. HenPeckedHooks US Size G-6/4 mm crochet hook, or any size needed to obtain gauge. Clover Quick Locking Stitch Marker Set. Yarn needle. Gauge Through Rnd 11 = 4.5” (11.5 cm) diameter in pattern. Exact gauge is not critical for this project.
Fantail Pencil Case
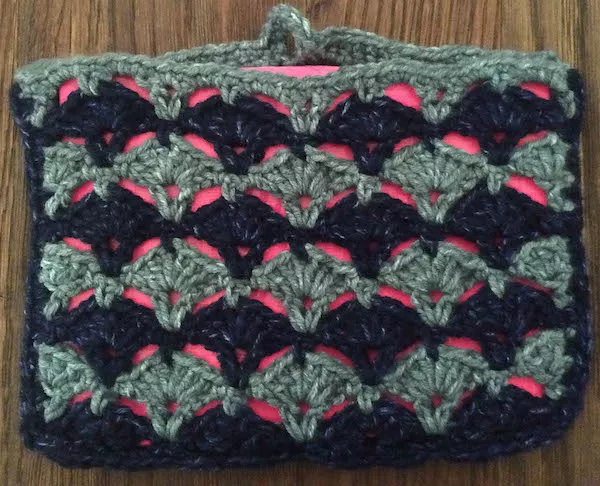
A sturdy, no-sew liner keeps your pencils or hooks protected, even when using an openwork stitch pattern for the case. This pattern is part of the Back-to-School Crochet-a-Long with CAL Central. Skills Used Basic crochet stitches: chain, double crochet, single crochet, slip stitch Crocheting flat in rows Skipping stitches and crocheting in chain spaces Skill Level Easy Finished Size Pencil/Crochet Hook Case: 8.5” (21.5 cm) width x 6.25” (16 cm) height. Materials Lion Brand Jeans yarn (100% acrylic, 3.5 oz/100 g/246 yd/225 m) - 1 skein ea in 108 Brand New (CA) and 150 Vintage (CB), or approximately 60 yd (55 m) in ea of 2 colors in any medium weight cotton yarn. US Size I-9/5.5 mm crochet hook, or size needed to obtain gauge. Yarn or tapestry needle with eye small enough to sew through button. Duck Color Duct Tape - 1 roll (1.88” x 15 yd) in Neon Pink, or approximately 1/3 roll of duct tape. Buttons Galore and More Sparkle Buttons - 1-1/8” (3 cm) button in GBX510 Plum, or any 1-1/8” (3 cm) sew through button. VELCRO® Brand Sticky Value Pack Circles and Squares - (3) 7/8” (2 cm) square fasteners. Gauge 1 fantail = 1.5” (4 cm) across in pattern. Exact gauge is not critical for this pattern.
Beary Sweet Hanging Towel
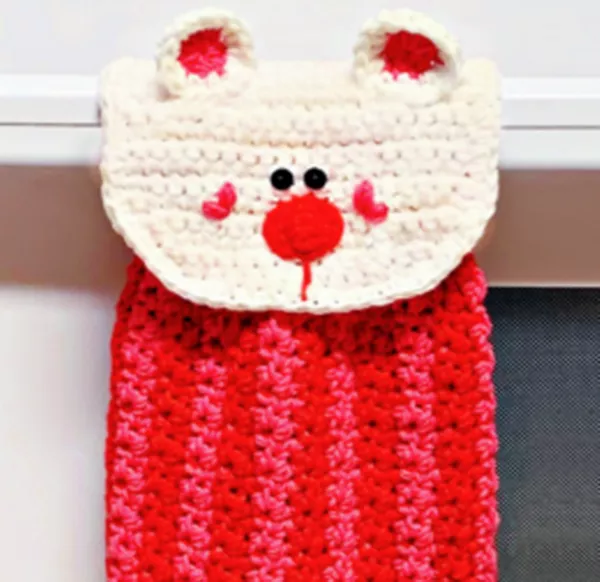
This Beary Sweet Hanging Towel makes a great gift and addition to the kitchen for a pop of color. Materials Worsted Weight Cotton Yarn: 100 yards red, 100 yards pink, 100 yards white Crochet Hooks: H (5mm), I (5.5mm) Notions: Yarn needle, 2 small black buttons for eyes, sewing needle, black thread, white thread, one 3/4” button. Measurements Finished Measurements: Towel - 10” wide x 12” long; With Bear (unfolded) - 19.5” ; With Bear (when hanging/folded) - 15.5-16”” Gauge: not needed for this project.
Spring Hanging Towel
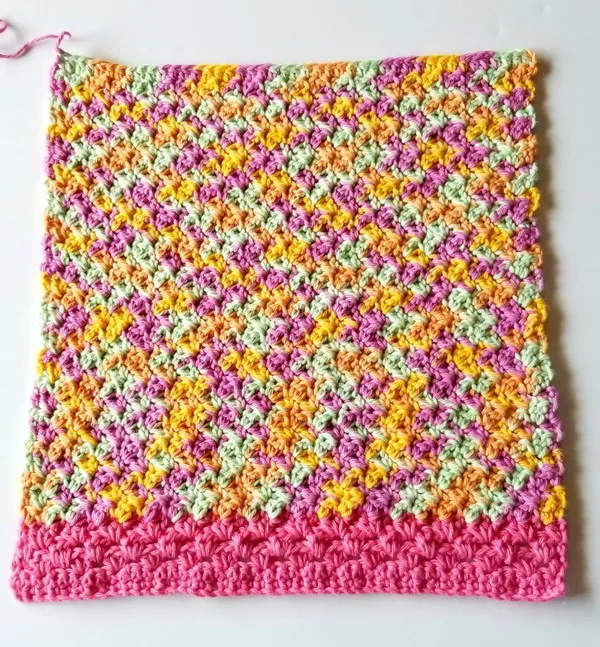
Spring is a great time to bring sunshine into our homes and what a better way than through colorful crochet towels. There is also a video that goes along with these and several matching items so you can make a set. Materials Yarn: Red Heart Scrubby Smoothie Cotton Yarn Chick Sample colors: Brite Orange (20 yds), Sunshine Ombre (153 yds), Lemony (40yds); Bunny Sample Colors: Brite Pink (20 yds), Popsicle Brights (153 yds), White (40 yds) Crochet Hooks: G, H, I Miscellaneous: Yarn needle for weaving in ends, one 3/4” button Optional: 2 small black buttons for eyes, sewing needle and thread, embroidery floss or crochet cotton for smile