
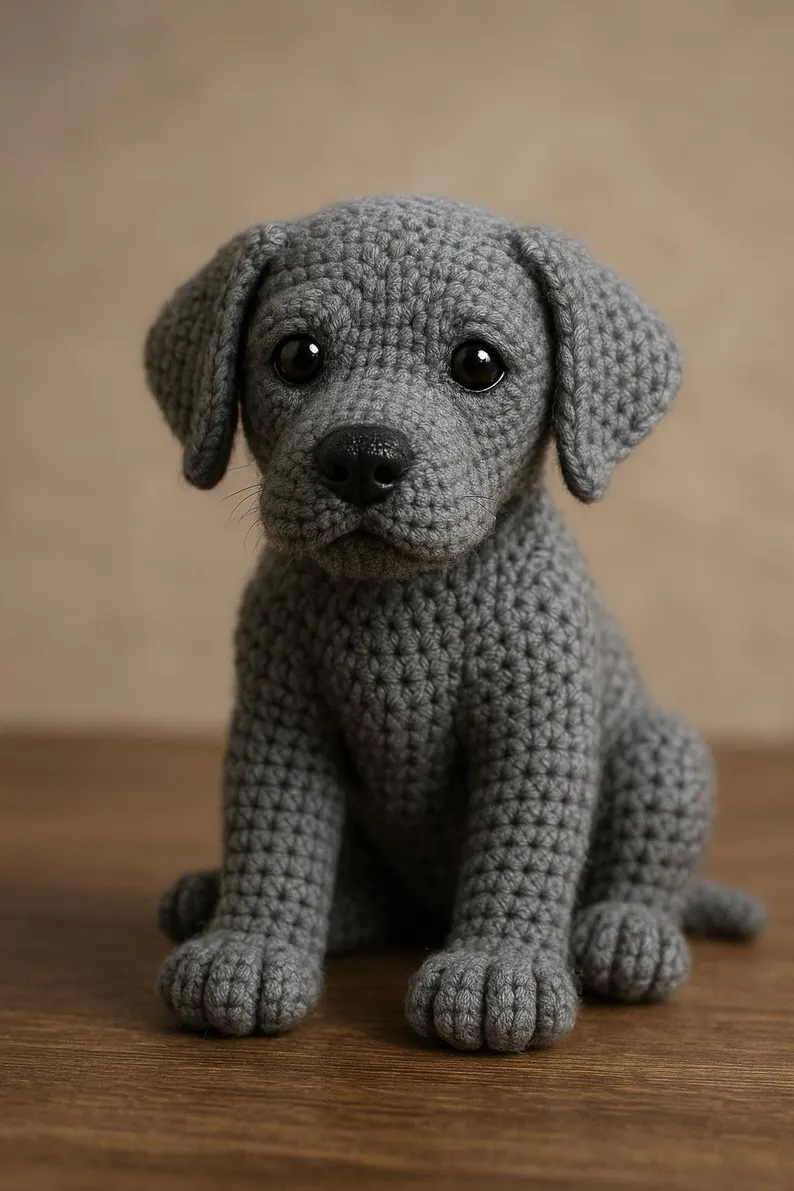
Realistic Labrador Amigurumi Crochet Pattern - Life-Like Sitting Puppy
Materials and Tools
- Worsted/medium-weight yarn (#4) in solid medium grey, approximately 250-300 g
- Small amount of black yarn for optional mouth detailing
- 12-14 mm glossy black safety eyes
- Small pieces of white felt for optional eye backing, creating the subtle catchlight effect visible in the reference
- Black textured plastic safety nose, approximately 15-18 mm
- 2.5-3.5 mm crochet hook - choose a size that produces very tight, firm stitches
- Polyester fiberfill
- Tapestry/yarn needle with a long eye
- Strong nylon or polyester sculpting thread, preferably matching the grey yarn
- Embroidery needle
- Stitch markers
- Small scissors
- Optional: blunt stuffing tool or chopstick
- Optional: locking stitch markers for anatomical positioning
Recommended Hook Size
For a realistic amigurumi finish, use a 3.0 mm hook with worsted-weight yarn as a starting point. Your fabric should be dense enough that stuffing cannot be seen through the stitches.
Finished Size
Using worsted-weight yarn and a 3.0 mm hook, the puppy will measure approximately 10-12 inches (25-30 cm) tall when sitting.
Abbreviations
US crochet terminology:
| Abbreviation | Meaning |
|---|---|
| MR | Magic Ring |
| ch | Chain |
| sc | Single Crochet |
| hdc | Half Double Crochet |
| dc | Double Crochet |
| inc | Increase - 2 sc in same stitch |
| dec | Invisible decrease |
| sl st | Slip Stitch |
| BLO | Back Loop Only |
| FLO | Front Loop Only |
| st/sts | Stitch/Stitches |
| FO | Fasten Off |
| Rnd | Round |
| RS | Right Side |
| WS | Wrong Side |
Pattern note: Unless otherwise stated, work in continuous rounds. Do not join rounds with a slip stitch.
Part 1: Drooping Snout and Head
The head is deliberately built in two components: a rounded, projecting muzzle and a larger skull. This construction allows the muzzle to sit forward from the face rather than looking like a flat embroidered feature.
A. Rounded Labrador Muzzle
Work in grey.
Rounds 1-12
- Rnd 1: 6 sc in MR. (6)
- Rnd 2: inc around. (12)
- Rnd 3: (sc, inc) x 6. (18)
- Rnd 4: (2 sc, inc) x 6. (24)
- Rnd 5: sc around. (24)
- Rnd 6: sc around. (24)
- Rnd 7: sc around. (24)
- Rnd 8: (2 sc, dec) x 6. (18)
- Rnd 9: sc around. (18)
- Rnd 10: (sc, dec) x 6. (12)
- Rnd 11: sc around. (12)
- Rnd 12: dec x 6. (6)
Stuff the muzzle firmly but evenly, concentrating slightly more stuffing toward the center and lower portion.
FO, leaving a long tail for attaching.
Nose Placement
Before attaching the muzzle:
- Locate the center of Round 1.
- Position the black safety nose centrally over the original magic-ring area.
- The bottom of the nose should sit approximately one-third of the way down the muzzle, rather than directly on its lower edge.
- Secure the nose according to the manufacturer's instructions.
For a more realistic Labrador expression, the nose should sit slightly above the visual center of the muzzle.
B. Main Head
Work in grey.
Skull
- Rnd 1: 6 sc in MR. (6)
- Rnd 2: inc around. (12)
- Rnd 3: (sc, inc) x 6. (18)
- Rnd 4: (2 sc, inc) x 6. (24)
- Rnd 5: (3 sc, inc) x 6. (30)
- Rnd 6: (4 sc, inc) x 6. (36)
- Rnd 7: (5 sc, inc) x 6. (42)
- Rnd 8: (6 sc, inc) x 6. (48)
- Rnd 9: sc around. (48)
- Rnd 10: (7 sc, inc) x 6. (54)
- Rnd 11: sc around. (54)
- Rnd 12: sc around. (54)
- Rnd 13: sc around. (54)
- Rnd 14: sc around. (54)
- Rnd 15: sc around. (54)
- Rnd 16: sc around. (54)
- Rnd 17: (8 sc, inc) x 6. (60)
- Rnd 18: sc around. (60)
- Rnd 19: sc around. (60)
- Rnd 20: sc around. (60)
- Rnd 21: sc around. (60)
- Rnd 22: sc around. (60)
- Rnd 23: (8 sc, dec) x 6. (54)
- Rnd 24: (7 sc, dec) x 6. (48)
- Rnd 25: (6 sc, dec) x 6. (42)
- Rnd 26: (5 sc, dec) x 6. (36)
- Rnd 27: (4 sc, dec) x 6. (30)
- Rnd 28: (3 sc, dec) x 6. (24)
- Rnd 29: (2 sc, dec) x 6. (18)
- Rnd 30: (sc, dec) x 6. (12)
- Rnd 31: dec x 6. (6)
Begin stuffing around Round 14.
Stuff the head progressively. Keep the forehead and upper skull firm, but avoid making the lower cheeks completely spherical. The lower cheek area should remain slightly softer so it can be sculpted.
FO and close the remaining opening.
C. Safety Eye Placement
For the most realistic expression, place the eyes after the head has been completely stuffed but before attaching the muzzle.
Use 12-14 mm eyes.
Position
Looking directly at the front of the head:
- Place the left eye approximately 7 stitches to the left of the facial centerline.
- Place the right eye approximately 7 stitches to the right of the facial centerline.
- Both eyes should be centered around Rounds 14-16.
- Keep the eyes approximately 13-15 stitches apart, measured from center point to center point across the face.
The eyes should sit slightly lower than the highest point of the forehead.
Realistic Eye Angle
Do not place the eyes perfectly horizontal.
Angle each eye very slightly inward toward the nose. This gives the puppy the soft, attentive gaze seen in young Labradors.
If using white felt backing:
- Cut two small circles of white felt.
- Make a tiny slit in the center.
- Push the safety-eye post through the felt.
- Insert the eye through the crocheted fabric.
- Secure the backing firmly on the inside.
The white should be almost completely hidden. It should only create a subtle reflective rim.
D. Attach the Muzzle
Center the muzzle beneath the eyes.
The upper edge of the muzzle should overlap approximately Rounds 17-21 of the head.
Pin the muzzle in place before sewing.
Sew around the entire circumference using the long grey yarn tail, taking small stitches through both layers.
Cheek Shaping
While sewing, do not pull the muzzle completely flat against the skull.
Leave the central portion projecting approximately 1-1.5 cm forward.
The lower corners should blend gradually into the cheeks.
This produces the characteristic broad, drooping Labrador muzzle instead of a spherical teddy-bear face.
Part 2: Large Floppy Ears
The ears are intentionally unstuffed. Their weight and flexibility allow them to fold naturally against the head.
Make 2 ears.
Each ear is worked as a three-dimensional continuous-round teardrop.
Left Ear
Work in grey.
- Rnd 1: 6 sc in MR. (6)
- Rnd 2: inc around. (12)
- Rnd 3: (sc, inc) x 6. (18)
- Rnd 4: (2 sc, inc) x 6. (24)
- Rnd 5: (3 sc, inc) x 6. (30)
- Rnd 6: sc around. (30)
- Rnd 7: sc around. (30)
- Rnd 8: sc around. (30)
- Rnd 9: (3 sc, dec) x 6. (24)
- Rnd 10: (2 sc, dec) x 6. (18)
- Rnd 11: (sc, dec) x 6. (12)
- Rnd 12: dec x 6. (6)
Do not stuff.
FO and weave the yarn tail through the final stitches, leaving enough yarn for attachment.
Flatten the ear gently with your fingers. The wider portion should sit near the upper side of the head, while the narrow end should hang downward.
Right Ear
Work exactly as follows:
- Rnd 1: 6 sc in MR. (6)
- Rnd 2: inc around. (12)
- Rnd 3: (sc, inc) x 6. (18)
- Rnd 4: (2 sc, inc) x 6. (24)
- Rnd 5: (3 sc, inc) x 6. (30)
- Rnd 6: sc around. (30)
- Rnd 7: sc around. (30)
- Rnd 8: sc around. (30)
- Rnd 9: (3 sc, dec) x 6. (24)
- Rnd 10: (2 sc, dec) x 6. (18)
- Rnd 11: (sc, dec) x 6. (12)
- Rnd 12: dec x 6. (6)
FO.
Ear Attachment
Position the ears approximately:
- 2-3 stitches behind each eye
- With the top of the ear beginning around Round 9
- With the bottom point reaching approximately the level of the lower muzzle
Sew the upper third securely.
Leave the lower two-thirds relatively loose so the ears can fall forward naturally.
For the characteristic puppy look, fold the ears slightly toward the face before taking the final attachment stitches.
Part 3: Sculpted Paws and Limbs
The legs are intentionally chunky and slightly tapered. The front legs should appear straight and weight-bearing, while the rear thighs are significantly larger to create the seated Labrador silhouette.
A. Front Leg and Paw - Left
Work in grey.
Paw and Lower Leg
- Rnd 1: 6 sc in MR. (6)
- Rnd 2: inc around. (12)
- Rnd 3: (sc, inc) x 6. (18)
- Rnd 4: (2 sc, inc) x 6. (24)
- Rnd 5: sc around. (24)
- Rnd 6: sc around. (24)
- Rnd 7: sc around. (24)
- Rnd 8: (6 sc, dec) x 3. (21)
- Rnd 9: sc around. (21)
- Rnd 10: sc around. (21)
- Rnd 11: sc around. (21)
- Rnd 12: sc around. (21)
- Rnd 13: sc around. (21)
- Rnd 14: sc around. (21)
- Rnd 15: sc around. (21)
- Rnd 16: sc around. (21)
- Rnd 17: sc around. (21)
- Rnd 18: sc around. (21)
- Rnd 19: (5 sc, dec) x 3. (18)
- Rnd 20: sc around. (18)
- Rnd 21: sc around. (18)
- Rnd 22: sc around. (18)
- Rnd 23: sc around. (18)
- Rnd 24: sc around. (18)
- Rnd 25: sc around. (18)
- Rnd 26: sc around. (18)
- Rnd 27: sc around. (18)
- Rnd 28: (4 sc, dec) x 3. (15)
- Rnd 29: sc around. (15)
- Rnd 30: sc around. (15)
- Rnd 31: sc around. (15)
- Rnd 32: (3 sc, dec) x 3. (12)
- Rnd 33: sc around. (12)
- Rnd 34: sc around. (12)
- Rnd 35: sc around. (12)
Stuff firmly, especially the paw, but leave the upper end slightly flexible for positioning.
FO, leaving a long sewing tail.
Front Leg - Right
Work the right front leg using the complete sequence below:
- Rnd 1: 6 sc in MR. (6)
- Rnd 2: inc around. (12)
- Rnd 3: (sc, inc) x 6. (18)
- Rnd 4: (2 sc, inc) x 6. (24)
- Rnd 5: sc around. (24)
- Rnd 6: sc around. (24)
- Rnd 7: sc around. (24)
- Rnd 8: (6 sc, dec) x 3. (21)
- Rnd 9: sc around. (21)
- Rnd 10: sc around. (21)
- Rnd 11: sc around. (21)
- Rnd 12: sc around. (21)
- Rnd 13: sc around. (21)
- Rnd 14: sc around. (21)
- Rnd 15: sc around. (21)
- Rnd 16: sc around. (21)
- Rnd 17: sc around. (21)
- Rnd 18: sc around. (21)
- Rnd 19: (5 sc, dec) x 3. (18)
- Rnd 20: sc around. (18)
- Rnd 21: sc around. (18)
- Rnd 22: sc around. (18)
- Rnd 23: sc around. (18)
- Rnd 24: sc around. (18)
- Rnd 25: sc around. (18)
- Rnd 26: sc around. (18)
- Rnd 27: sc around. (18)
- Rnd 28: (4 sc, dec) x 3. (15)
- Rnd 29: sc around. (15)
- Rnd 30: sc around. (15)
- Rnd 31: sc around. (15)
- Rnd 32: (3 sc, dec) x 3. (12)
- Rnd 33: sc around. (12)
- Rnd 34: sc around. (12)
- Rnd 35: sc around. (12)
FO and stuff as for the left leg.
B. Realistic Front-Toe Sculpting
This step makes a major difference.
Use strong grey sculpting thread and a long needle.
Four Toe Grooves
- Mark four vertical lines across the front paw.
- Insert the needle from the underside of the leg.
- Bring it out at the bottom edge of the paw.
- Take the needle over the paw and insert it again approximately 1-1.5 cm higher.
- Bring it back through the underside.
- Pull gently until the yarn compresses.
Repeat this process to create three deep grooves, dividing the paw visually into four rounded toes.
Do not pull all the way until the stitches collapse. The goal is a soft vertical indentation, not a sharp crease.
Paw Shape
After sculpting, gently massage each toe into a rounded cylinder with your fingers.
The middle two toes should appear slightly fuller than the outer toes.
C. Rear Thighs
The rear thighs need substantially more volume than the front legs.
Make 2.
Left Rear Thigh
- Rnd 1: 6 sc in MR. (6)
- Rnd 2: inc around. (12)
- Rnd 3: (sc, inc) x 6. (18)
- Rnd 4: (2 sc, inc) x 6. (24)
- Rnd 5: (3 sc, inc) x 6. (30)
- Rnd 6: sc around. (30)
- Rnd 7: sc around. (30)
- Rnd 8: sc around. (30)
- Rnd 9: sc around. (30)
- Rnd 10: sc around. (30)
- Rnd 11: (4 sc, dec) x 6. (24)
- Rnd 12: sc around. (24)
- Rnd 13: sc around. (24)
- Rnd 14: sc around. (24)
- Rnd 15: sc around. (24)
- Rnd 16: sc around. (24)
- Rnd 17: sc around. (24)
- Rnd 18: sc around. (24)
- Rnd 19: (2 sc, dec) x 6. (18)
- Rnd 20: sc around. (18)
- Rnd 21: sc around. (18)
- Rnd 22: sc around. (18)
- Rnd 23: sc around. (18)
- Rnd 24: sc around. (18)
- Rnd 25: dec around. (12)
- Rnd 26: sc around. (12)
- Rnd 27: sc around. (12)
- Rnd 28: sc around. (12)
FO, leaving a sewing tail.
Right Rear Thigh
Work the right rear thigh using the complete sequence:
- Rnd 1: 6 sc in MR. (6)
- Rnd 2: inc around. (12)
- Rnd 3: (sc, inc) x 6. (18)
- Rnd 4: (2 sc, inc) x 6. (24)
- Rnd 5: (3 sc, inc) x 6. (30)
- Rnd 6: sc around. (30)
- Rnd 7: sc around. (30)
- Rnd 8: sc around. (30)
- Rnd 9: sc around. (30)
- Rnd 10: sc around. (30)
- Rnd 11: (4 sc, dec) x 6. (24)
- Rnd 12: sc around. (24)
- Rnd 13: sc around. (24)
- Rnd 14: sc around. (24)
- Rnd 15: sc around. (24)
- Rnd 16: sc around. (24)
- Rnd 17: sc around. (24)
- Rnd 18: sc around. (24)
- Rnd 19: (2 sc, dec) x 6. (18)
- Rnd 20: sc around. (18)
- Rnd 21: sc around. (18)
- Rnd 22: sc around. (18)
- Rnd 23: sc around. (18)
- Rnd 24: sc around. (18)
- Rnd 25: dec around. (12)
- Rnd 26: sc around. (12)
- Rnd 27: sc around. (12)
- Rnd 28: sc around. (12)
FO and stuff firmly.
D. Rear Paw
Create two rounded rear paws.
Left Rear Paw
- Rnd 1: 6 sc in MR. (6)
- Rnd 2: inc around. (12)
- Rnd 3: (sc, inc) x 6. (18)
- Rnd 4: (2 sc, inc) x 6. (24)
- Rnd 5: sc around. (24)
- Rnd 6: sc around. (24)
- Rnd 7: sc around. (24)
- Rnd 8: (2 sc, dec) x 6. (18)
- Rnd 9: sc around. (18)
- Rnd 10: sc around. (18)
- Rnd 11: sc around. (18)
FO and stuff firmly.
Right Rear Paw
- Rnd 1: 6 sc in MR. (6)
- Rnd 2: inc around. (12)
- Rnd 3: (sc, inc) x 6. (18)
- Rnd 4: (2 sc, inc) x 6. (24)
- Rnd 5: sc around. (24)
- Rnd 6: sc around. (24)
- Rnd 7: sc around. (24)
- Rnd 8: (2 sc, dec) x 6. (18)
- Rnd 9: sc around. (18)
- Rnd 10: sc around. (18)
- Rnd 11: sc around. (18)
FO and stuff firmly.
Sew each rear paw to the lower/front portion of its corresponding thigh.
Add three toe indentations using the same sculpting technique used for the front paws.
Part 4: Sitting Body and Tail
A. Contoured Sitting Body
The body is worked from the neck downward. The lower half becomes wider and heavier, creating a stable seated base.
Work in grey.
- Rnd 1: 6 sc in MR. (6)
- Rnd 2: inc around. (12)
- Rnd 3: (sc, inc) x 6. (18)
- Rnd 4: (2 sc, inc) x 6. (24)
- Rnd 5: (3 sc, inc) x 6. (30)
- Rnd 6: (4 sc, inc) x 6. (36)
- Rnd 7: (5 sc, inc) x 6. (42)
- Rnd 8: (6 sc, inc) x 6. (48)
- Rnd 9: sc around. (48)
- Rnd 10: sc around. (48)
- Rnd 11: sc around. (48)
- Rnd 12: sc around. (48)
- Rnd 13: (7 sc, inc) x 6. (54)
- Rnd 14: sc around. (54)
- Rnd 15: sc around. (54)
- Rnd 16: sc around. (54)
- Rnd 17: sc around. (54)
- Rnd 18: sc around. (54)
- Rnd 19: (8 sc, inc) x 6. (60)
- Rnd 20: sc around. (60)
- Rnd 21: sc around. (60)
- Rnd 22: sc around. (60)
- Rnd 23: sc around. (60)
- Rnd 24: sc around. (60)
- Rnd 25: sc around. (60)
- Rnd 26: sc around. (60)
- Rnd 27: sc around. (60)
- Rnd 28: (8 sc, dec) x 6. (54)
- Rnd 29: (7 sc, dec) x 6. (48)
- Rnd 30: (6 sc, dec) x 6. (42)
- Rnd 31: (5 sc, dec) x 6. (36)
- Rnd 32: (4 sc, dec) x 6. (30)
- Rnd 33: (3 sc, dec) x 6. (24)
- Rnd 34: (2 sc, dec) x 6. (18)
- Rnd 35: (sc, dec) x 6. (12)
- Rnd 36: dec x 6. (6)
Stuff continuously.
Creating the Sitting Profile
The body should not be stuffed like a perfect ball.
Build the silhouette deliberately:
- Keep the chest firm and relatively vertical.
- Add extra stuffing toward the lower back and rump.
- Compress the front lower portion slightly.
- Make the rear widest around Rounds 20-27.
- Keep the neck opening narrower than the chest.
This creates the characteristic Labrador puppy posture: upright chest, rounded abdomen, large hindquarters, and a gently sloping back.
FO and close.
B. Attach the Front Legs
Position the front legs on either side of the chest.
The upper portion of each leg should begin approximately 2-3 rounds below the neck.
For the reference-style sitting posture:
- Keep both front legs nearly vertical.
- Angle them outward only slightly.
- Place the paws approximately one paw-width apart.
- The paws should point forward rather than inward.
Sew each leg securely through multiple points around its upper opening.
Avoid sewing only through the outer surface. Take the needle deep into the body so the limbs remain stable.
C. Attach the Rear Thighs
Position each large thigh on the lower sides of the body.
The upper rear thigh should sit approximately level with Rounds 19-25.
The thigh should project backward and outward.
Sew through several points:
- Upper thigh.
- Middle side.
- Lower front.
- Lower rear.
The rear paws should rest slightly forward of the thighs, creating the classic seated puppy silhouette.
D. Attach the Head
Place the head over the small neck opening.
The muzzle should face straight forward.
Sew the head securely to the body using the grey yarn tail or strong matching thread.
Take several deep stitches around the entire neck circumference.
For a realistic transition, do not leave a narrow "ball-on-a-cylinder" neck. Slightly compress the bottom of the head into the upper chest while sewing.
E. Straight Tapering Tail
The tail is deliberately modest rather than exaggerated.
Work in grey.
- Rnd 1: 6 sc in MR. (6)
- Rnd 2: inc around. (12)
- Rnd 3: (sc, inc) x 6. (18)
- Rnd 4: sc around. (18)
- Rnd 5: sc around. (18)
- Rnd 6: sc around. (18)
- Rnd 7: sc around. (18)
- Rnd 8: sc around. (18)
- Rnd 9: sc around. (18)
- Rnd 10: sc around. (18)
- Rnd 11: sc around. (18)
- Rnd 12: sc around. (18)
- Rnd 13: (4 sc, dec) x 3. (15)
- Rnd 14: sc around. (15)
- Rnd 15: sc around. (15)
- Rnd 16: sc around. (15)
- Rnd 17: sc around. (15)
- Rnd 18: (3 sc, dec) x 3. (12)
- Rnd 19: sc around. (12)
- Rnd 20: sc around. (12)
- Rnd 21: sc around. (12)
- Rnd 22: sc around. (12)
- Rnd 23: (2 sc, dec) x 3. (9)
- Rnd 24: sc around. (9)
- Rnd 25: sc around. (9)
- Rnd 26: (sc, dec) x 3. (6)
- Rnd 27: dec x 3. (3)
FO and leave a long sewing tail.
Stuff lightly. The tail should remain relatively straight and slightly flexible.
Attach it to the rear of the body around Rounds 23-28, depending on the exact body proportions.
For a naturally sitting Labrador, angle the tail slightly downward at the attachment point before allowing it to extend backward.
Facial Sculpting and Assembly Guide
Facial sculpting is the most important finishing technique in this design. The crochet itself creates the volume; the sculpting thread creates the bone structure, eye sockets, cheek depression, and characteristic puppy expression.
Use strong grey nylon/polyester thread and a long tapestry needle.
1. Create the Eye Sockets
Thread a long needle with approximately 60-80 cm of sculpting thread.
Do not knot the thread at the beginning.
Left Eye
- Insert the needle at the bottom center of the head, approximately 2-3 stitches behind the neck edge.
- Bring the needle out immediately beneath the left eye.
- Re-enter approximately 2 stitches above the eye.
- Return the needle to the underside of the head.
- Pull gently.
The stitches around the eye should compress inward.
Repeat once if additional definition is needed.
Right Eye
Use a fresh length of thread.
- Enter through the bottom center of the head.
- Exit beneath the right eye.
- Re-enter immediately above the eye.
- Return to the bottom.
- Pull until a shallow eye socket forms.
The indentation should be subtle.
The eye itself should remain raised while the surrounding crochet sinks slightly inward.
2. Create the Puppy Brow Bone
A Labrador's expression benefits from a gentle brow ridge above each eye.
Using another length of sculpting thread:
- Enter from the underside of the head.
- Bring the needle out approximately 2 stitches above the left eye.
- Take a small horizontal bite through the crochet.
- Return to the underside.
- Pull gently.
- Repeat on the right side.
Do not make the brow sharply angular.
The goal is a soft transition:
forehead - brow ridge - recessed eye - cheek.
3. Define the Muzzle Drop
The muzzle should look heavier than the forehead.
Insert the needle from the underside of the head and bring it out at the point where the upper muzzle meets the cheek.
Pull gently toward the neck.
Repeat on the opposite side.
This creates two shallow depressions beside the muzzle.
These depressions are extremely important because they prevent the face from looking like a simple round stuffed animal.
4. Sculpt the Mouth Corners
Use strong sculpting thread.
Left Mouth Corner
- Enter from the underside of the head.
- Bring the needle out approximately 2-3 stitches to the left of the nose.
- Take a small stitch through the muzzle.
- Return to the underside.
- Pull gently downward and slightly outward.
Right Mouth Corner
Repeat the same construction on the right side.
The corners should sit lower than the nose.
This creates the characteristic soft Labrador muzzle expression.
5. Create the Nose-to-Mouth Groove
Using black embroidery thread or matching grey sculpting thread:
- Bring the needle from the underside of the muzzle to the center directly below the nose.
- Take a short vertical stitch downward.
- Return the needle through the same entry point.
- Pull only enough to create a shallow groove.
Do not make a long embroidered line.
The realistic effect comes from indentation rather than drawing.
6. Deepen the Lower Cheeks
The reference-style puppy has full, rounded cheeks surrounding the muzzle.
Use two separate lengths of sculpting thread.
For each cheek:
- Enter underneath the head.
- Exit at the lower outer edge of the muzzle.
- Take a small stitch.
- Return to the underside.
- Pull gently.
The cheek should compress inward immediately beside the muzzle while remaining full farther toward the ear.
7. Create the Lower-Jaw Drop
Place a final sculpting point underneath the muzzle.
Enter from the back/bottom of the head.
Bring the needle out at the center underside of the muzzle.
Take a small stitch approximately 3-4 stitches below the nose.
Return the needle to the original entry point and pull gently.
This creates a subtle downward projection of the lower muzzle.
Avoid pulling too tightly the puppy should retain a soft, fleshy mouth rather than developing a sharp crease.
8. Final Eye Adjustment
Once all sculpting is complete:
- Check that both eyes are at the same height.
- Make sure neither eye is pulled excessively inward.
- Confirm that the pupils face forward.
- Adjust the eye sockets until both eyes appear naturally recessed.
- Smooth the surrounding stitches with your fingertips.
The final expression should have:
rounded forehead + subtle brow ridge + recessed glossy eyes + projecting muzzle + full cheeks + low mouth corners.
Final Anatomical Assembly Checklist
Before considering the puppy finished, check the following:
- Head: broad and rounded rather than perfectly spherical
- Muzzle: projects clearly forward from the face
- Nose: centered and slightly elevated
- Eyes: symmetrical, glossy, and slightly recessed
- Ears: large, soft, and naturally drooping
- Chest: upright and broad
- Front legs: straight and weight-bearing
- Front paws: large with three deep toe grooves
- Hindquarters: noticeably larger and rounder than the front legs
- Rear paws: positioned forward enough to create a stable sitting pose
- Back: gently curved rather than completely vertical
- Tail: attached low on the rear and tapering gradually
- Stuffing: firm but not stretched
- Sculpting: subtle enough to look anatomical rather than cartoonish
The final shaping should produce a compact, heavy-headed, floppy-eared sitting Labrador puppy, with the facial sculpting and indented paws providing the realistic character seen in the reference.
Easy No-Sew Crochet Minion Pattern
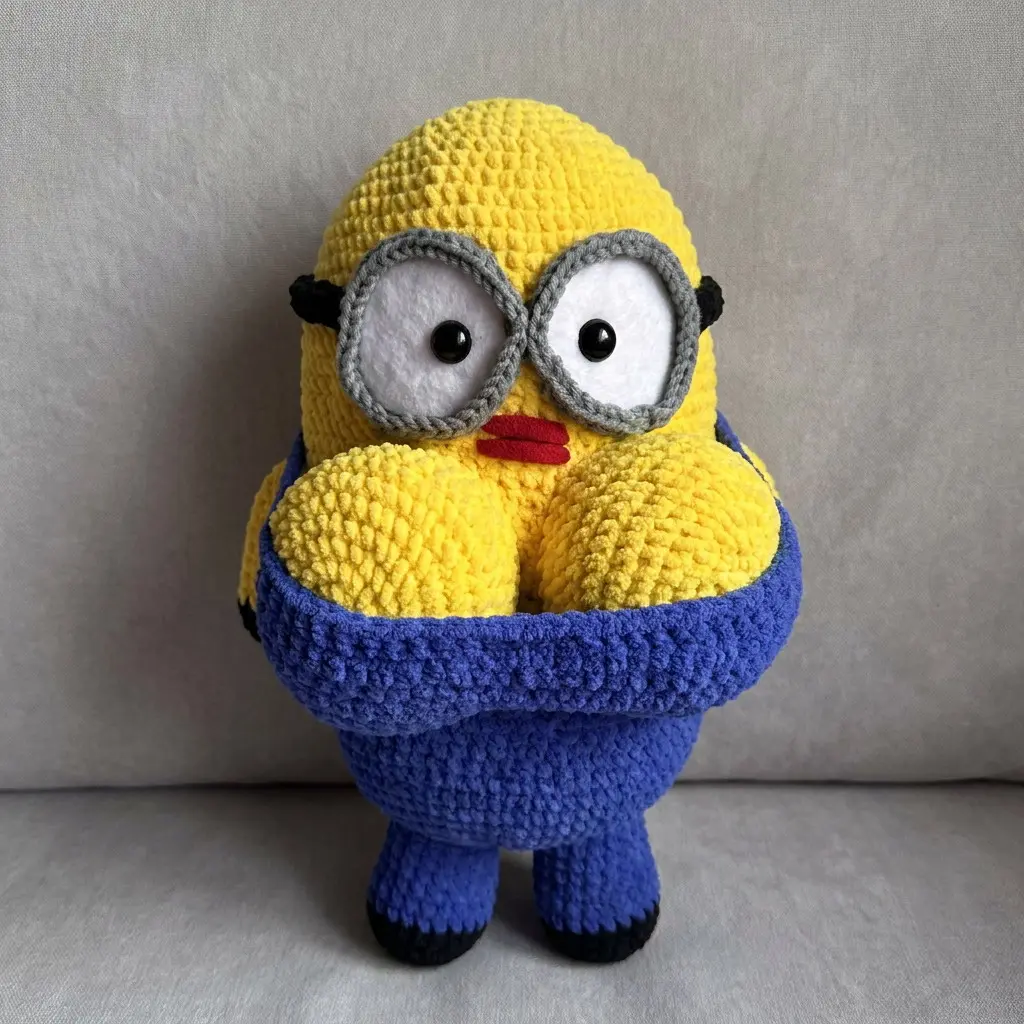
Easy No-Sew Crochet Minion Pattern - Chunky Plush Character-Inspired Amigurumi
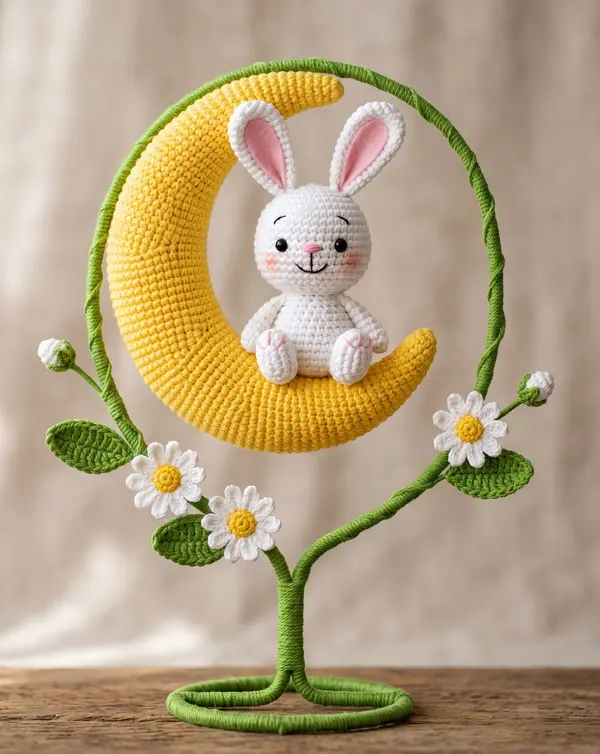
Amigurumi Puppy
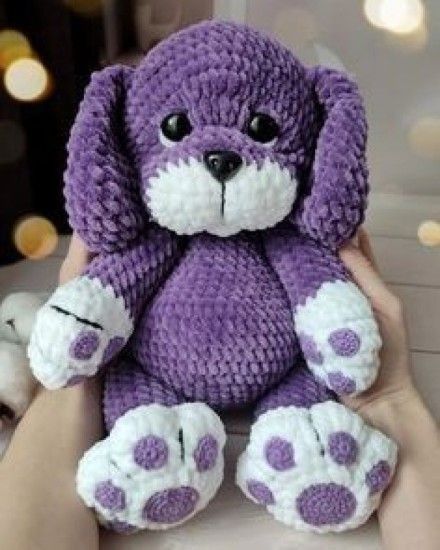
Create an irresistibly cuddly Amigurumi Puppy Crochet Pattern inspired by the adorable plush puppy shown in the photo. This chubby puppy features a deep violet body, oversized floppy ears, a soft white muzzle, and large white paws decorated with contrasting purple paw pads.
The pattern uses super bulky chenille yarn and is designed for advanced beginners who are comfortable crocheting amigurumi in continuous rounds, changing colors, increasing, decreasing, and sewing simple pieces together.
Free dragon crochet pattern
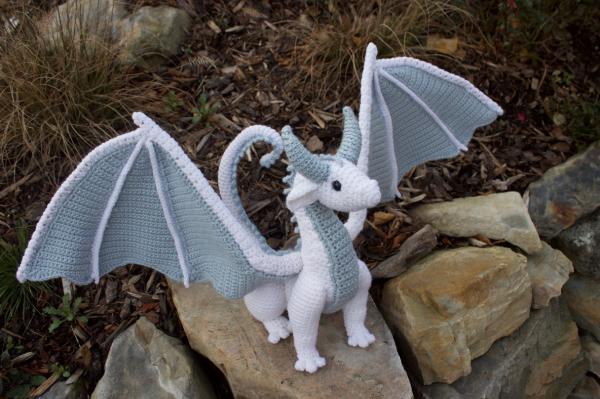
Free Dragon Crochet Pattern - Majestic Fantasy Dragon with Posable Ribbed Wings
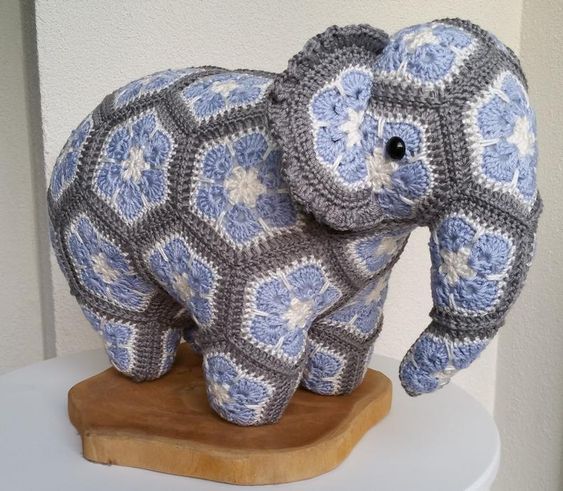
African flower crochet elephant free pattern
Materials and Tools
Yarn
Use a smooth, tightly spun sport or DK-weight cotton/cotton-blend yarn so the motifs remain crisp after joining and stuffing.
- Gray: approximately 100-120 g - outer framing, joining, and structural seams
- Light blue: approximately 70-90 g - flower petals
- Cream/white: approximately 40-60 g - flower centers and petal outlines
- Total: approximately 220-270 g
The exact amount will vary according to yarn brand, tension, and finished size.