Materials and Tools
Yarn
Use a smooth, tightly spun sport or DK-weight cotton/cotton-blend yarn so the motifs remain crisp after joining and stuffing.
- Gray: approximately 100-120 g - outer framing, joining, and structural seams
- Light blue: approximately 70-90 g - flower petals
- Cream/white: approximately 40-60 g - flower centers and petal outlines
- Total: approximately 220-270 g
The exact amount will vary according to yarn brand, tension, and finished size.
Tools
- 3.0 mm crochet hook for DK weight
- 2.75-3.0 mm hook for sport weight
- 10-12 mm black safety eyes
- Polyester fiberfill
- Tapestry needle
- Sharp yarn scissors
- Locking stitch markers
- Measuring tape
- Optional: blocking mat and rustproof pins
Recommended Finished Size
With DK-weight cotton and a 3.0 mm hook, the finished elephant should measure approximately:
- 12-14 in (30-36 cm) long
- 8-10 in (20-25 cm) high
- Approximately 5-6 in (13-15 cm) wide
The final size depends primarily on the size of your motifs.
Abbreviations
US crochet terminology is used throughout.
| Abbreviation | Meaning |
|---|---|
| MR | Magic Ring |
| ch | Chain |
| sc | Single Crochet |
| hdc | Half Double Crochet |
| dc | Double Crochet |
| tr | Treble Crochet |
| sl st | Slip Stitch |
| st/sts | Stitch/Stitches |
| sp | Space |
| inc | Increase |
| dec | Decrease |
| BLO | Back Loop Only |
| FLO | Front Loop Only |
| Rnd | Round |
| rep | Repeat |
| FO | Fasten Off |
Pattern notation: Instructions inside [ ] are repeated as indicated.
Part 1: African Flower Motif Guide
This elephant is constructed from four polygonal versions of the same African Flower motif:
- Pentagon - 5 petals / 5 sides
- Hexagon - 6 petals / 6 sides
- Heptagon - 7 petals / 7 sides
- Octagon - 8 petals / 8 sides
The important construction principle is that every completed motif has exactly 5 sc stitches along every joining edge. This makes the different polygon sizes compatible during assembly.
Color Sequence
Use the following color sequence throughout the elephant:
- Rnd 1 - Cream
- Rnd 2 - Light Blue
- Rnd 3 - Cream
- Rnd 4 - Gray
Do not fasten off between rounds if you prefer to carry the working yarn neatly, but for the cleanest professional finish, fasten off and join the next color at the designated location.
Rnd 1 - Cream Flower Center
Make a MR.
[Ch 2, 2 dc into MR, ch 1] the required number of times for your motif.
Join with a sl st to the first dc.
Stitch count
- Pentagon: 10 dc + 5 ch-1 spaces
- Hexagon: 12 dc + 6 ch-1 spaces
- Heptagon: 14 dc + 7 ch-1 spaces
- Octagon: 16 dc + 8 ch-1 spaces
Pull the MR tightly closed.
Fasten off Cream.
Rnd 2 - Light Blue Petals
Join Light Blue in any ch-1 space.
Work:
5 dc in the same ch-1 space.
Continue around by working 5 dc in every ch-1 space.
At the end of the round, sl st to the first dc.
Stitch count
- Pentagon: 25 dc
- Hexagon: 30 dc
- Heptagon: 35 dc
- Octagon: 40 dc
The five-dc groups form the individual blue flower petals.
Fasten off Light Blue.
Rnd 3 - Cream Petal Definition
Join Cream in the first dc of any petal.
Work:
sc in each of the next 5 dc, ch 1.
Repeat around.
The ch-1 spaces between the petals will become the turning points of the geometric border.
Join with a sl st to the first sc.
Stitch count
- Pentagon: 25 sc + 5 ch-1 spaces
- Hexagon: 30 sc + 6 ch-1 spaces
- Heptagon: 35 sc + 7 ch-1 spaces
- Octagon: 40 sc + 8 ch-1 spaces
Fasten off Cream.
Rnd 4 - Gray Geometric Border
Join Gray in any ch-1 space.
For each side, work:
sc in each of the next 5 sc, (sc, ch 1, sc) in the next ch-1 space.
Repeat around the entire motif.
Join with a sl st to the first sc.
Fasten off and weave in the end.
Final stitch count
Each polygon has:
- 5 sc along every straight joining edge
- 1 ch-1 corner space at every corner
Total sc:
- Pentagon: 35 sc + 5 corner spaces
- Hexagon: 42 sc + 6 corner spaces
- Heptagon: 49 sc + 7 corner spaces
- Octagon: 56 sc + 8 corner spaces
Important geometric check
Do not accidentally work into the corner ch-1 space as part of the five edge stitches.
Each joining edge must contain exactly:
5 sc - corner ch-1 - 5 sc - corner ch-1
This is the key measurement that keeps the elephant's seams aligned.
Motif Blocking
Before assembly, lightly block the motifs.
Do not aggressively stretch them.
For each motif:
- Pin the corners evenly.
- Make every joining edge straight.
- Confirm that each edge contains exactly 5 sc.
- Allow the motifs to dry completely.
- Stack motifs by shape.
The motifs should remain slightly flexible rather than stiff.
Part 2: Required Motifs Checklist
This original elephant uses 52 African Flower motifs.
No separate triangles are required.
| Motif | Quantity | Primary Use |
|---|---|---|
| Pentagon | 20 | Curves, legs, trunk, tail, head shaping |
| Hexagon | 20 | Main body, head, ears, legs, trunk |
| Heptagon | 4 | Belly and body volume |
| Octagon | 4 | Body core, head, ears |
| Triangle | 0 | Not required |
| Total | 52 |
|
Color Distribution
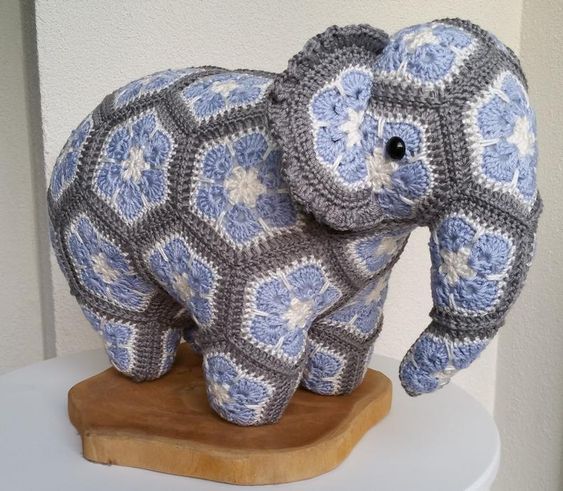
For a balanced appearance similar to the supplied photograph, make the majority of the motifs with the same three-color sequence:
Cream center - Blue petals - Cream outline - Gray border
You can make the motifs identical for a highly coordinated elephant, or vary which blue shade is used if you want a more patchwork appearance.
Part 3: Motif Placement + Assembly Guide
Assembly Key
Label your motifs before joining.
Body
- B1: Octagon
- B2-B9: 8 Hexagons
- B10-B17: 8 Pentagons
- B18-B21: 4 Heptagons
Head
- H1: Octagon
- H2-H5: 4 Hexagons
- H6-H7: 2 Pentagons
Ears
Left ear:
- L1: Octagon
- L2-L3: 2 Hexagons
Right ear:
- R1: Octagon
- R2-R3: 2 Hexagons
Legs
Four legs, each made from:
- 1 upper Pentagon
- 1 lower Pentagon
- 1 foot Hexagon
Total:
- 8 Pentagons
- 4 Hexagons
Trunk
- 4 Hexagons
- 1 Pentagon
Tail
- 1 Pentagon
Joining Method
The recommended finish is a gray slip-stitch join, because it reproduces the strong dark geometric lines visible in the reference.
You may also sew the motifs together with a tapestry needle.
Gray Slip-Stitch Join
Place two motifs with their wrong sides facing each other.
Insert the hook through the corresponding stitch on the first motif and then through the corresponding stitch on the second motif.
Yarn over with Gray and pull through both motifs and the loop on the hook.
Continue across all 5 edge stitches.
Do not pull the joins excessively tight.
The seam should be firm but flexible.
For a softer seam
Use single crochet instead:
sc through corresponding stitches of both motifs across the entire edge.
This creates a raised decorative ridge.
A. Constructing the Main Body
The body is deliberately broader through the center and narrower toward the neck and rear.
Step 1 - Central Body Octagon
Place B1, the octagon, horizontally.
It forms the central structural panel of the elephant.
Think of its eight edges as:
- Neck
- Upper shoulder
- Upper back
- Rear
- Lower rear
- Belly
- Lower shoulder
- Chest
Step 2 - First Body Ring
Attach B2-B9, one hexagon to each of the eight edges of B1.
Join:
- B1/E1 - B2
- B1/E2 - B3
- B1/E3 - B4
- B1/E4 - B5
- B1/E5 - B6
- B1/E6 - B7
- B1/E7 - B8
- B1/E8 - B9
Join neighboring hexagons along their corresponding outer edges wherever the edges naturally meet.
The result should begin to curve into a rounded barrel.
Step 3 - Second Body Ring
Attach B10-B17, the eight pentagons, around the outer portion of the hexagon ring.
Place one pentagon behind each corresponding hexagon.
The pentagons create the gradual narrowing and curvature needed for an animal-shaped body.
Join each pentagon to its neighboring pentagon where their edges meet.
Do not force the pieces flat.
The slight three-dimensional cupping is intentional.
Step 4 - Belly Volume
Use B18-B21, the four heptagons, to create the lower belly and shoulder volume.
Position them along the underside of the body.
A useful arrangement is:
- B18 - front belly
- B19 - front underside
- B20 - rear underside
- B21 - rear belly
Join the heptagons to the exposed lower edges of the surrounding pentagons and hexagons.
The heptagons should create a gentle outward curve.
This is important because the elephant should have a substantial barrel-shaped body rather than a flat patchwork panel.
B. Constructing the Head
The head should be slightly smaller than the body but visibly rounded.
Step 1 - Head Center
Place H1, the octagon, at the center of the head.
This becomes the main cheek/temple area.
Step 2 - Add the Head Hexagons
Attach H2-H5 around the octagon.
Position them as follows:
- H2 - forehead
- H3 - upper cheek
- H4 - rear cheek
- H5 - lower jaw
Join neighboring hexagons where their edges touch.
Step 3 - Shape the Face
Use H6 and H7, the pentagons, to taper the front and underside of the head.
Place:
- H6 - front cheek
- H7 - lower/front jaw
This creates a rounded facial profile rather than a flat polygonal block.
C. Positioning the Safety Eyes
Install the eyes before the head is completely closed.
For a balanced elephant:
- Use 10-12 mm black safety eyes.
- Position one eye on each side of the head.
- Place each eye approximately one motif-edge width behind the front of the face.
- Position the eye slightly above the horizontal centerline of the head.
- Keep the two eyes at identical heights.
For the side facing you, the eye should sit close to the junction between the main face motif and the cheek motif.
Secure attachment
- Push the safety-eye post through the crochet fabric.
- Place the washer firmly on the inside.
- Check the eye from the outside.
- Make sure the washer is fully seated.
- Do not install the washer over loose stuffing.
For toys intended for very young children, embroidered eyes are safer than plastic safety eyes.
D. Constructing the Large Ears
Each ear uses:
- 1 octagon
- 2 hexagons
Left Ear
Place L1, the octagon, in the center.
Attach:
- L2 to the upper side
- L3 to the lower/rear side
Join the three motifs to create a broad, slightly curved ear.
Leave the outermost edge unjoined until the ear is positioned against the head.
Right Ear
Repeat with:
- R1 - central octagon
- R2 - upper hexagon
- R3 - lower/rear hexagon
Reverse the placement for the opposite side.
Attaching the ears
Position each ear behind the head.
The top of the ear should sit approximately level with the top of the head.
Use Gray yarn to join the ear's inner edges to the head.
Do not completely flatten the ear.
A small amount of fiberfill inside the ear will give it the soft dimensional appearance seen in the reference.
E. Constructing the Four Legs
Each leg consists of:
- Upper Pentagon
- Lower Pentagon
- Foot Hexagon
This produces a sturdy, tapered leg.
Front Left Leg
- Select one Pentagon for the upper section.
- Join one edge to the underside/front section of the body.
- Attach the second Pentagon beneath it.
- Attach the Hexagon to the bottom as the foot.
- Join the remaining open edges around the leg.
- Leave the top/body seam partially open until stuffing.
Front Right Leg
Repeat the same three-motif construction on the opposite front underside.
Back Left Leg
Attach the third leg toward the rear underside of the body.
Back Right Leg
Attach the fourth leg symmetrically opposite the third.
Leg shaping
The foot hexagon should sit slightly wider than the lower portion of the leg.
When stuffed, gently push the fiberfill downward toward the foot.
This creates the stable, rounded feet visible in the photograph.
F. Constructing the Trunk
The trunk consists of:
- 4 Hexagons
- 1 Pentagon
The trunk should curve downward rather than hang straight.
Step 1
Join the first hexagon to the front of the head.
This is the trunk root.
Step 2
Attach the second hexagon below and slightly forward.
Step 3
Attach the third hexagon at a gentle downward angle.
Step 4
Attach the fourth hexagon to create the lower curve.
Step 5
Use the Pentagon as the trunk tip.
The pentagon creates the rounded termination at the end.
Trunk Curve
Do not align all five motifs in one perfectly straight line.
Instead, angle each successive motif slightly.
A useful progression is:
Head - downward - forward - downward - slightly backward
This gives the trunk a natural S-shaped curve.
Stuff the trunk gradually as you close it.
Use small amounts of fiberfill.
Do not overstuff.
Overstuffing will straighten the trunk and make it look rigid.
G. Constructing the Tail
Use the remaining Pentagon as the tail.
Position it at the rear of the body.
Join approximately half of the pentagon's perimeter to the rear body motifs.
Leave the remaining portion free to create a small tapered tail.
For additional definition, lightly stuff the tail with a very small amount of fiberfill before closing its final seam.
H. Joining the Complete Elephant
Once all individual components have been prepared, connect them in this order:
- Body
- Four legs
- Head
- Trunk
- Ears
- Tail
This order keeps the body accessible while the main seams are still being formed.
Joining the Legs to the Body
Place each leg beneath the body.
Check all four feet from the front and side before permanently joining.
The feet should form approximately two parallel pairs.
Join the upper pentagon to the underside body motifs using Gray yarn.
Work stitch-for-stitch along the available edges.
Use additional reinforcing stitches at the beginning and end of every seam.
Joining the Head to the Body
Position the head so that:
- The forehead is slightly above the body's shoulder line.
- The lower jaw projects forward.
- The head does not point sharply downward.
- The trunk emerges from the center-front of the head.
Join the rear head motifs to the front body motifs.
Work slowly.
Because polygonal motifs have different internal angles, avoid pulling the seam tight enough to create puckering.
Part 4: Three-Dimensional Shaping
The most important difference between a flat African Flower project and this elephant is controlled shaping.
Do not attempt to flatten every motif.
Allow these areas to curve:
- Heptagons - belly
- Pentagons - legs and head taper
- Octagons - major rounded areas
- Hexagons - transitional areas
- Trunk motifs - directional curve
The gray borders should remain visible as structural lines.
Part 5: Stuffing Instructions
Stuff the elephant progressively rather than filling it at the end.
Recommended order
1. Legs
Stuff each foot first.
Use small pieces of fiberfill.
Push the stuffing into the corners with the blunt end of a crochet hook.
The leg should feel firm but not hard.
2. Body
Begin filling from the rear.
Work toward the chest.
Add fiberfill evenly around the entire body.
Avoid creating large lumps.
3. Head
Stuff the cheeks first.
Then fill the forehead and jaw.
Check the position of the safety eyes before completely closing the head.
4. Trunk
Use very small quantities.
The trunk should remain flexible.
Do not compress the stuffing excessively.
5. Ears
Use only a light layer of fiberfill.
The ears should remain slightly soft and flexible.
Part 6: Closing the Remaining Openings
Once the elephant has the desired firmness:
- Add small amounts of fiberfill wherever you see a depression.
- Check the silhouette from the front.
- Check it from both sides.
- Check the feet are level.
- Check the trunk curve.
- Check both ears are balanced.
- Close the remaining seams with Gray yarn.
Use a ladder stitch or invisible mattress-style seam for final openings.
Insert the needle through the inner loops of corresponding stitches on opposite edges.
Alternate sides until the opening is closed.
Pull gently after every few stitches.
Do not yank the seam closed.
Part 7: Professional Finishing
Weaving in Ends
For every yarn tail:
- Thread the tail onto a tapestry needle.
- Weave it through several stitches on the wrong side.
- Change direction.
- Weave through another 1-2 inches.
- Pull gently.
- Trim close to the fabric.
Never leave loose tails inside an area where they can migrate toward an eye or seam.
Final Shaping
After stuffing, use your fingers to shape:
- The rounded belly
- Shoulder line
- Cheeks
- Forehead
- Trunk curve
- Feet
- Ear edges
Do not press the motifs completely flat.
The slight three-dimensional distortion of the polygonal pieces is what gives the elephant its sculptural form.
Final Construction Checklist
Before declaring the elephant finished, verify:
- 20 pentagons completed
- 20 hexagons completed
- 4 heptagons completed
- 4 octagons completed
- 52 motifs total
- Every motif has exactly 5 sc along each joining edge
- All gray borders face outward
- Flower centers remain cream
- Blue petals are clearly defined
- Four legs are securely joined
- Both ears are firmly attached
- Head is securely connected to the body
- Trunk has a natural downward curve
- Tail is securely attached
- Safety eyes are firmly locked in place
- Fiberfill is evenly distributed
- No large gaps remain between motifs
- All yarn tails are securely woven in
- The elephant stands evenly on all four feet
Finished Design Formula
Cream center + blue five-dc petals + cream definition round + gray geometric border + 52 carefully joined polygonal motifs = a sculptural African Flower crochet elephant with the characteristic patchwork appearance of the supplied reference.
Realistic Labrador Amigurumi Crochet Pattern
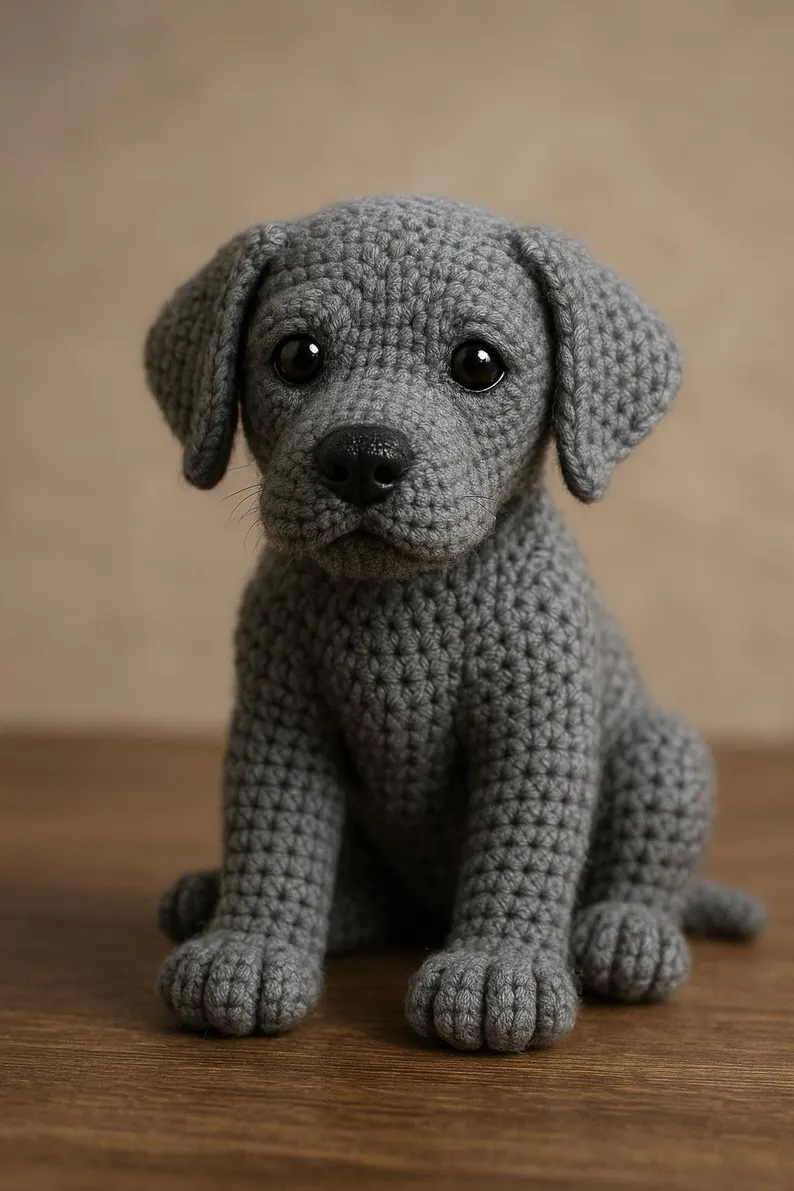
Realistic Labrador Amigurumi Crochet Pattern - Life-Like Sitting Puppy
Amigurumi Puppy
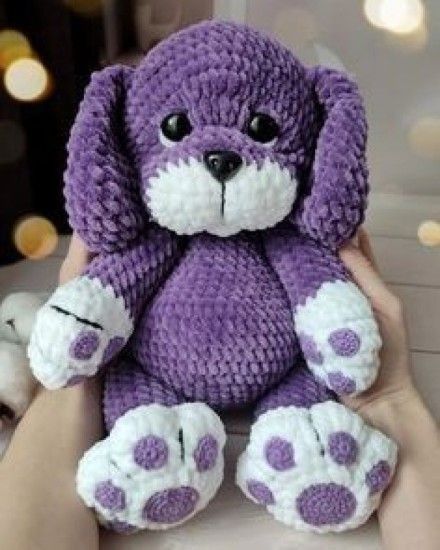
Create an irresistibly cuddly Amigurumi Puppy Crochet Pattern inspired by the adorable plush puppy shown in the photo. This chubby puppy features a deep violet body, oversized floppy ears, a soft white muzzle, and large white paws decorated with contrasting purple paw pads.
The pattern uses super bulky chenille yarn and is designed for advanced beginners who are comfortable crocheting amigurumi in continuous rounds, changing colors, increasing, decreasing, and sewing simple pieces together.
Amigurumi Snake Crochet Free Pattern
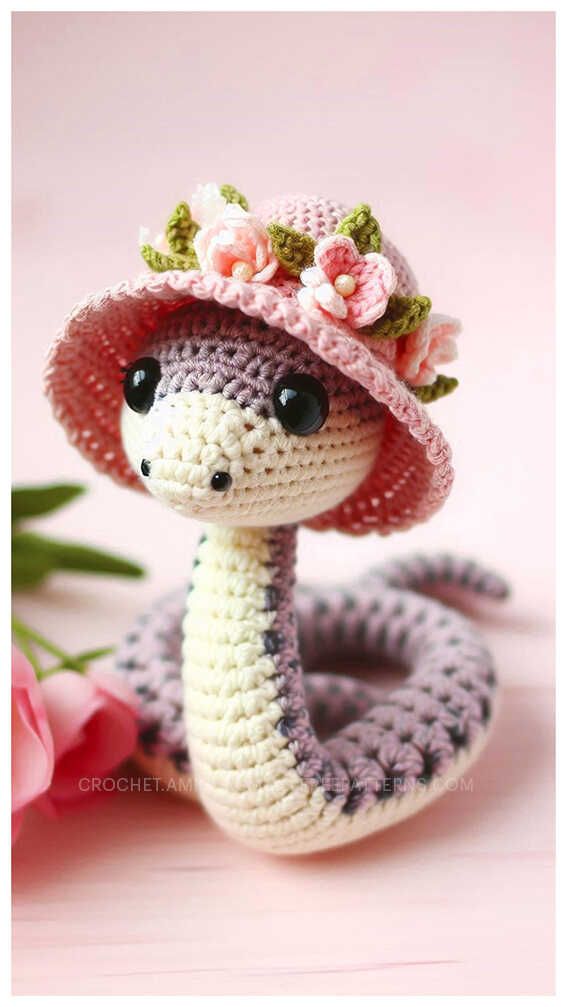
Create an irresistibly sweet coiled pastel snake amigurumi with a soft cream belly, oversized glossy eyes, tiny embroidered nostrils, and a charming pink sun hat covered in miniature flowers and leaves. This elegant snake is worked primarily in continuous rounds and designed for advanced beginners to intermediate crocheters familiar with amigurumi shaping and color changes.
Free dragon crochet pattern