
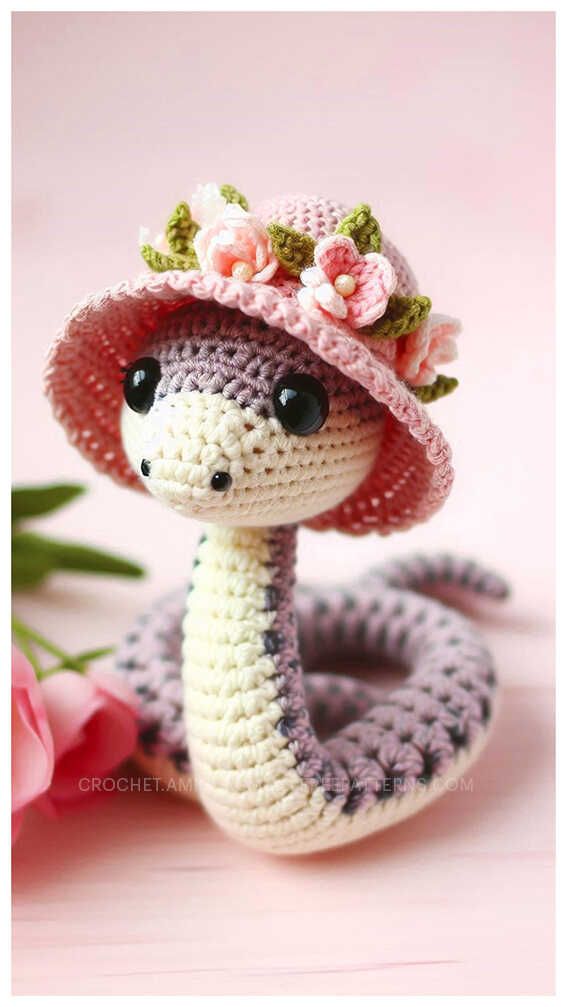
Create an irresistibly sweet coiled pastel snake amigurumi with a soft cream belly, oversized glossy eyes, tiny embroidered nostrils, and a charming pink sun hat covered in miniature flowers and leaves. This elegant snake is worked primarily in continuous rounds and designed for advanced beginners to intermediate crocheters familiar with amigurumi shaping and color changes.
Finished size: Approximately 10-12 in (25-30 cm) long when gently uncoiled, depending on yarn and tension.
Skill level: Advanced Beginner / Intermediate
Crochet terms: US terminology
Materials and Tools
Yarn
Use sport- or DK-weight cotton, cotton-acrylic blend, or smooth acrylic yarn.
- Dusty lavender/mauve: approximately 50-70 g for the snake's back and head
- Cream: approximately 35-45 g for the muzzle and belly
- Soft pink: approximately 20-25 g for the sun hat and flowers
- Olive green: approximately 10 g for leaves
- Black: small amount for nostrils and optional eye detailing
Choose a slightly smaller hook than recommended on the yarn label to create a firm amigurumi fabric.
Tools
- 2.5-3.0 mm crochet hook; 2.75 mm recommended
- 12-14 mm black safety eyes
- Fiberfill stuffing
- Tapestry needle
- Stitch markers
- Scissors
- Removable stitch marker or locking marker
- Approximately 75-90 cm (30-36 in) of soft, plastic-coated craft wire, optional for posing
- Small jewelry/craft pliers for bending the wire
- Two small decorative beads for flower centers, optional
Safety note: Internal wire and safety eyes are decorative craft components and are not appropriate for toys intended for children under 3 years.
Abbreviations
| Abbreviation | Meaning |
|---|---|
| MR | Magic Ring |
| ch | Chain |
| sc | Single Crochet |
| hdc | Half Double Crochet |
| dc | Double Crochet |
| inc | Increase - 2 sc in the same stitch |
| dec | Invisible Decrease |
| sl st | Slip Stitch |
| BLO | Back Loop Only |
| FLO | Front Loop Only |
| st/sts | Stitch/Stitches |
| R | Round |
| FO | Fasten Off |
| rep | Repeat |
| [ ] | Repeat instructions inside brackets |
Pattern is worked in continuous rounds unless otherwise stated.
Part 1: Head & Body
Color Placement Before You Begin
The snake has a cream lower face and belly with dusty lavender across the crown, sides, back, and tail.
For the head, the beginning of each round is positioned at the center of the lower/front face. This allows the cream section to remain centered beneath the eyes.
For the body, keep the beginning-of-round marker aligned with the center of the underside. The cream stitches at the beginning and end of each round form one continuous belly panel.
When changing colors:
- Work the final yarn-over of the preceding stitch with the new color.
- Carry the unused yarn loosely inside the head/body when practical.
- Do not pull carried yarn tightly, or the piece will pucker.
Head
Cream Muzzle
With cream yarn, begin with an MR.
Rounds 1-6
R1: 6 sc in MR. (6)
R2: Inc around. (12)
R3: [Sc, inc] around. (18)
R4: [2 sc, inc] around. (24)
R5: [3 sc, inc] around. (30)
R6: [4 sc, inc] around. (36)
Do not fasten off.
The center of the MR is the front center of the face. Continue working in continuous rounds.
Shaping the Lavender Face
From this point forward, each round begins at the center front/lower face.
The cream stitches should sit across the lower muzzle while lavender gradually takes over the upper portion of the head.
R7
Work:
- 6 cream sc
- 24 lavender sc
- 6 cream sc
Total: 36 sts
R8
Work:
- 5 cream sc
- 26 lavender sc
- 5 cream sc
Total: 36 sts
R9
Work:
- 4 cream sc
- 28 lavender sc
- 4 cream sc
Total: 36 sts
R10
Work:
- 3 cream sc
- 30 lavender sc
- 3 cream sc
Total: 36 sts
R11-R12
With lavender, sc around.
36 sts each round
The cream now forms a rounded lower-face patch while the lavender covers the forehead and crown.
Head Decreases
Stuff the head gradually as you crochet. Add small amounts of fiberfill rather than one large amount.
The head should feel firm but remain soft enough for gentle sculpting.
R13: [4 sc, dec] around. (30)
R14: Sc around. (30)
R15: [3 sc, dec] around. (24)
R16: Sc around. (24)
R17: [2 sc, dec] around. (18)
R18: Sc around. (18)
R19: [Sc, dec] around. (12)
R20: Sc around. (12)
Do not fasten off.
You now have a narrow 12-stitch opening at the bottom of the head.
Eye Placement
Insert the safety eyes before completely closing the head.
For the proportions shown in the photograph:
- Place the eyes approximately 6-8 stitches apart, depending on eye size.
- Position them around R9-R11.
- The eyes should sit on the lavender portion, just above the cream muzzle.
- Keep both eyes at the same height.
For a particularly expressive appearance, angle the eyes very slightly outward.
Do not install the washers until you are satisfied with the placement.
Long Tapering Body
The body continues directly from the bottom of the head.
Neck
R21: [Sc, inc] around. (18)
R22: Sc around. (18)
R23: Sc around. (18)
R24: Sc around. (18)
R25: Sc around. (18)
The narrow neck gives the snake its characteristic elegant, upright appearance.
Establish the Cream Belly
Beginning with R26, the body expands slightly.
The first and last cream stitches of each round are continuous across the round boundary, creating a centered cream stripe on the underside.
R26
Work:
- 4 cream sc
- [2 sc, inc] repeated 6 times in lavender
- 4 cream sc
Total: 24 sts
R27-R58
Work each round as:
- 4 cream sc
- 16 lavender sc
- 4 cream sc
24 sts each round
Keep the cream section facing the underside as you shape the snake.
Creating the Textured Belly
For a subtle raised appearance similar to the photograph, work every 5th body round with the cream section in BLO.
On R30, R35, R40, R45, R50 and R55:
- 4 cream sc BLO
- 16 lavender sc
- 4 cream sc BLO
All other stitches are worked normally.
This creates a discreet horizontal texture across the belly without adding a separate sewn-on panel.
Optional Wire Placement
The wire is easiest to install after most of the body has been crocheted.
Work through R58 first, leaving the tail opening unfinished.
Preparing the Wire
Cut approximately 75-90 cm (30-36 in) of soft-coated craft wire.
- Round both ends carefully with pliers.
- Wrap each end with a small piece of yarn or tape so there are no sharp edges.
- The wire should be flexible enough to bend easily with your fingers.
Insert the wire through the tail opening and gently guide it through the stuffed body toward the neck.
Do not force the wire through the head or through the crochet fabric.
Leave the wire approximately 2-3 cm (1 in) short of the tail tip.
Add stuffing around the wire so it remains centered.
The wire should allow the body to form a graceful coil without making the snake rigid.
Tail Taper
Continue stuffing as you decrease.
R59
[2 sc, dec] around. (18)
R60
Sc around. (18)
R61
Sc around. (18)
R62
Sc around. (18)
R63
[Sc, dec] around. (12)
R64
Sc around. (12)
R65
Sc around. (12)
R66
Sc around. (12)
R67
[Sc, dec] around. (8)
R68
Sc around. (8)
R69
[2 sc, dec] around. (6)
R70
Sc around. (6)
Add the final small amount of stuffing.
Remove any excess wire if necessary, keeping the end safely rounded and covered.
Fasten off, leaving a 6-8 in (15-20 cm) yarn tail.
Thread the tail onto a tapestry needle and weave through the front loops of the remaining stitches. Pull gently to close the opening.
Weave the yarn securely into the body.
Part 2: Floral Sun Hat
The hat is worked separately from the snake in soft pink.
It consists of a fitted dome followed by a broad, slightly ruffled brim.
Hat Dome
With soft pink yarn, make an MR.
R1: 6 sc in MR. (6)
R2: Inc around. (12)
R3: [Sc, inc] around. (18)
R4: [2 sc, inc] around. (24)
R5: [3 sc, inc] around. (30)
R6: Sc around. (30)
R7: Sc around. (30)
R8: Sc around. (30)
The dome should resemble a shallow cap rather than a deep beanie.
Wide Ruffled Brim
From this point, work into the FLO to create a crisp transition between the dome and brim.
R9: FLO [4 sc, inc] around. (36)
R10: [5 sc, inc] around. (42)
R11: [6 sc, inc] around. (48)
R12: [7 sc, inc] around. (54)
R13: [8 sc, inc] around. (60)
R14 - First Ruffle Increase
FLO [2 hdc, 2 hdc in next st] around. (80)
The brim will begin to ripple naturally.
R15
Work 1 dc in each stitch around. (80)
Keep the stitches relaxed so the brim remains soft.
R16 - Scalloped Edge
Work:
[Sl st in next st, skip next st, 5 dc in next st, skip next st]
Repeat around.
This produces approximately 20 soft scallops around the edge.
Fasten off and weave in the yarn end.
Hat-Securing Strap
To prevent the hat from sliding off the snake's head, make a discreet chin strap.
With soft pink yarn:
Ch 36.
Fasten off.
Attach one end to the underside of the hat approximately 8-10 stitches to the left of center.
Attach the opposite end approximately 8-10 stitches to the right of center.
Alternatively, sew small ch-4 loops to opposite sides of the hat and thread a narrow pink ribbon or yarn tie through them.
The strap should be snug enough to hold the hat but not tight against the snake.
Part 3: Mini Blossoms and Leaves
The floral decorations are deliberately small so they complement the hat without overwhelming the snake.
Five-Petal Pink Flower
Use soft pink yarn.
Make an MR.
Flower
R1: [Ch 2, 3 dc into MR, ch 2, sl st into MR] 5 times.
Pull the MR closed.
Fasten off, leaving a yarn tail for attaching.
You should have 5 rounded petals.
For a more dimensional flower:
- Pinch the base of each petal slightly.
- Pull the center thread firmly.
- Sew through the center once or twice to stack the petals upward.
Contrasting Flower Center
Use cream, darker pink, or a small decorative bead.
For a crocheted center:
- Thread a tapestry needle with cream yarn.
- Bring the yarn through the center.
- Wrap it around the center several times.
- Secure at the back.
A tiny bead gives the flowers the polished, three-dimensional appearance seen in the photograph.
Small Olive Green Leaves
Use olive green yarn.
Leaf
Ch 7.
Beginning in the second chain from the hook:
- Sc in next st
- Hdc in next st
- Dc in next st
- Hdc in next st
- Sc in next st
- 3 sc in last chain
Continue along the opposite side of the foundation chain:
- Sc
- Hdc
- Dc
- Hdc
- Sc
Sl st into the base of the leaf.
Fasten off, leaving a sewing tail.
Gently pinch the base to give the leaf a natural pointed shape.
Make 5-8 leaves in different sizes for a fuller floral arrangement.
Assembly and Detailing Guide
Shape the Snake
Before attaching anything, gently pose the snake.
The body should form:
- A graceful upright neck
- A rounded lower curve
- One or two overlapping coils
- A gently tapered tail
Bend the internal wire gradually rather than making sharp angles.
The snake should remain stable when placed on a flat surface.
Sculpt the Eyes
The large glossy safety eyes are an important part of the expression.
If you want deeper eye sockets, use a length of matching lavender yarn and a tapestry needle.
- Insert the needle near the back of the head.
- Bring it out immediately beneath one eye.
- Insert it above or beside the eye.
- Return to the back of the head.
- Pull gently.
- Repeat on the opposite eye.
Do not pull excessively. A slight indentation is enough to make the eyes appear embedded naturally.
Embroider the Nostrils
Use black embroidery floss.
The cream muzzle should have two tiny nostrils positioned close together toward the front.
For each nostril:
- Bring the needle out at the desired point.
- Make one or two tiny horizontal stitches.
- Pull the floss firmly enough to create a small black dot.
- Return the needle through the head.
- Secure the tail internally.
Keep the nostrils deliberately tiny so they don't compete with the oversized eyes.
Add the Mouth Detail
For an optional subtle mouth:
- Use a single strand of cream or light brown embroidery floss.
- Make a very short curved horizontal line beneath the muzzle.
- Keep the line delicate and centered.
The photographed style works beautifully with an understated facial expression.
Position the Floral Hat
Place the hat over the top of the head.
The front brim should sit:
- Just above the eyes
- Slightly lower on one side
- At a gentle angle rather than perfectly straight
This asymmetry gives the snake a playful, handmade character.
Secure the hat discreetly with the pink chin strap or with a few tiny stitches through the underside of the brim.
Arrange the Flowers
For the most natural floral arrangement, place the largest flower slightly off-center.
A balanced arrangement can be:
- 1 large flower near the front-center
- 2 medium flowers beside it
- 2-3 smaller flowers toward the sides
- Small olive leaves tucked between the flowers
Do not arrange everything in a perfectly straight line.
Overlap a few petals and leaves to create depth.
Sew Flowers to the Hat
Use the long yarn tails left on each flower.
- Position the flower.
- Insert the needle through the center of the flower.
- Catch a few stitches from the hat underneath.
- Sew through the flower center several times.
- Secure the yarn on the inside of the hat.
- Weave in the end.
For leaves, sew only through the base so the tips remain slightly raised.
This creates the dimensional 3D floral effect.
Final Shaping
Give the finished snake a final shaping session.
- Smooth the lavender body.
- Pull the cream belly gently into alignment.
- Round the muzzle with your fingers.
- Adjust the eye indentations.
- Curve the neck into an elegant S-shape.
- Form the lower body into a relaxed coil.
- Bend the tail slightly inward.
- Tilt the hat until the brim frames the eyes attractively.
Finally, weave in and trim every remaining yarn tail.
Your finished Floral Sun Hat Snake Amigurumi should have a soft pastel palette, expressive glossy eyes, a clearly defined cream belly, and a graceful poseable coil reminiscent of the elegant handmade snake in the reference image.
Realistic Labrador Amigurumi Crochet Pattern
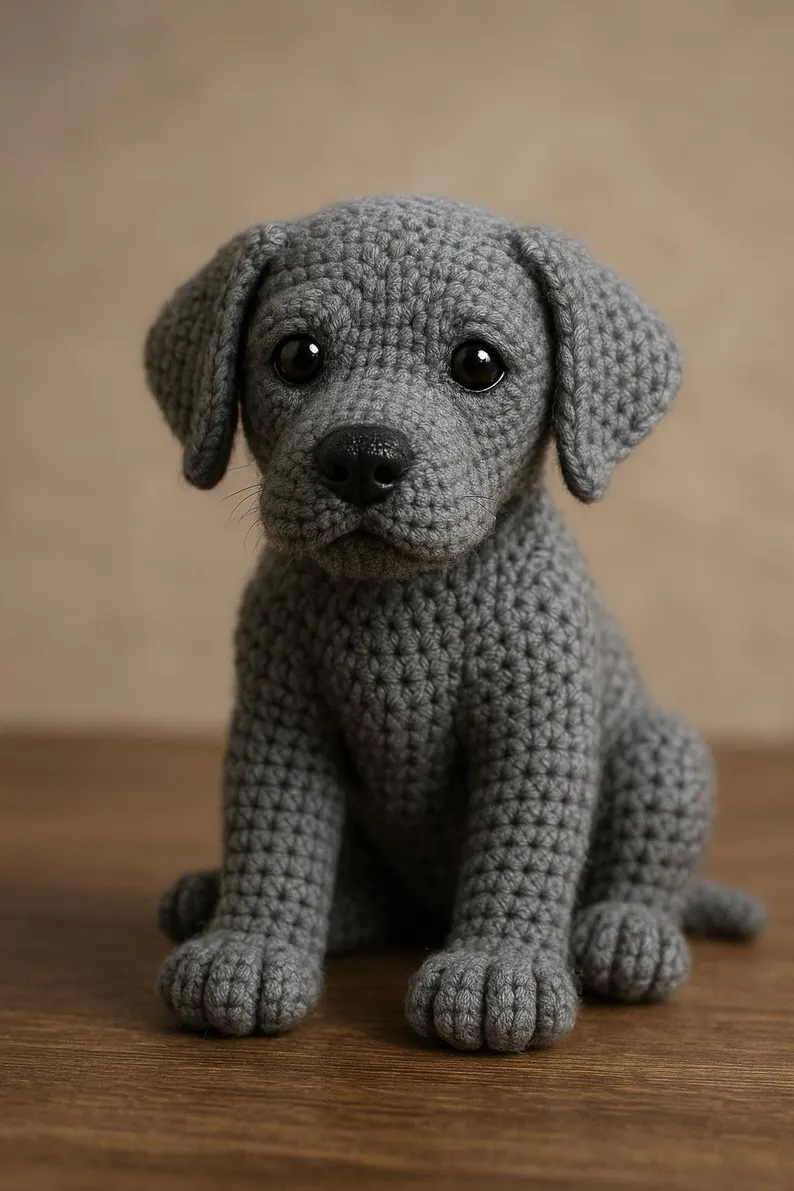
Realistic Labrador Amigurumi Crochet Pattern - Life-Like Sitting Puppy
Amigurumi Puppy
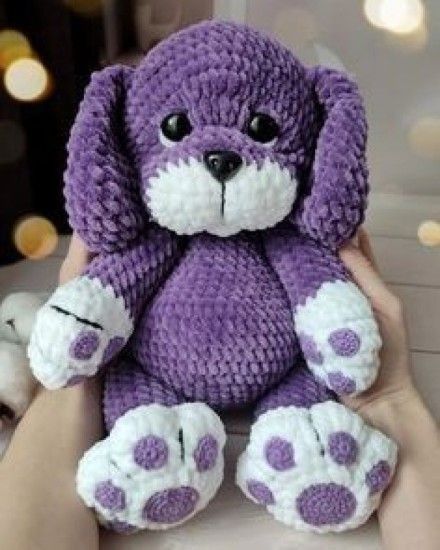
Create an irresistibly cuddly Amigurumi Puppy Crochet Pattern inspired by the adorable plush puppy shown in the photo. This chubby puppy features a deep violet body, oversized floppy ears, a soft white muzzle, and large white paws decorated with contrasting purple paw pads.
The pattern uses super bulky chenille yarn and is designed for advanced beginners who are comfortable crocheting amigurumi in continuous rounds, changing colors, increasing, decreasing, and sewing simple pieces together.
Free dragon crochet pattern
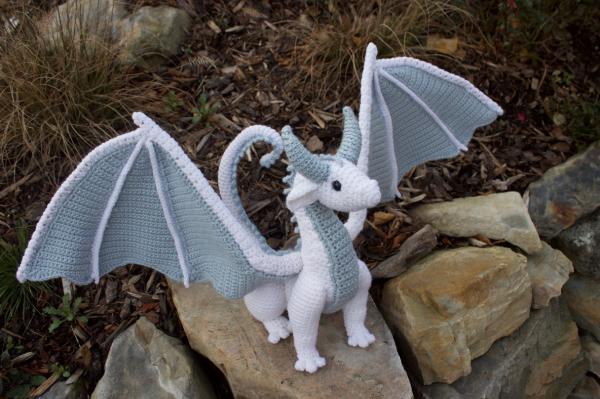
Free Dragon Crochet Pattern - Majestic Fantasy Dragon with Posable Ribbed Wings
African flower crochet elephant free pattern
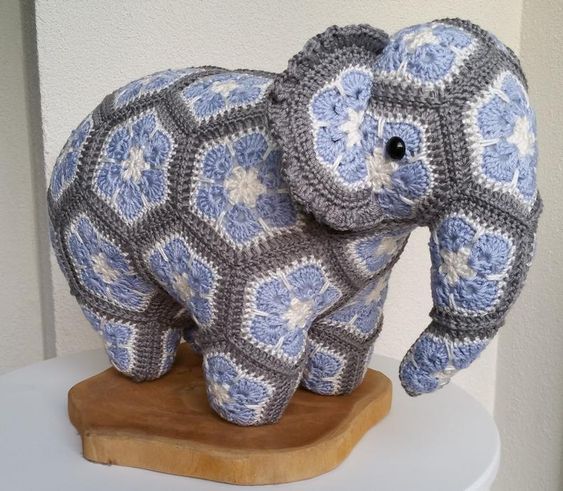
Materials and Tools
Yarn
Use a smooth, tightly spun sport or DK-weight cotton/cotton-blend yarn so the motifs remain crisp after joining and stuffing.
- Gray: approximately 100-120 g - outer framing, joining, and structural seams
- Light blue: approximately 70-90 g - flower petals
- Cream/white: approximately 40-60 g - flower centers and petal outlines
- Total: approximately 220-270 g
The exact amount will vary according to yarn brand, tension, and finished size.