
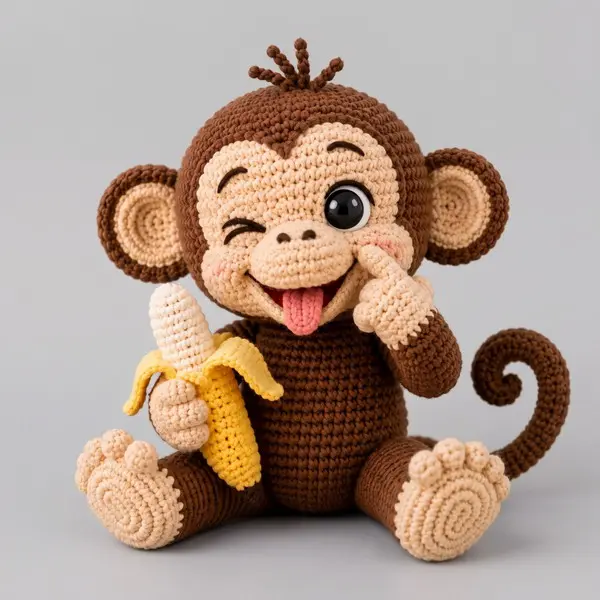
Meet your new favorite quick plush project: the Easy No-Sew Crochet Monkey Pattern! This cheeky little monkey is designed with a chubby body, oversized head, squishy cheeks, big ears, chunky feet, a curly tail, and a playful expression inspired by the monkey in the photo.
Materials & Tools
Yarn
Use smooth sport/DK-weight cotton or cotton-blend yarn for the neat stitch definition shown in the photo.
- Dark brown: approximately 120-150 g for the body, head, arms, legs, tail, and outer ears
- Tan/beige: approximately 50-60 g for the face patch, muzzle, hands, feet, and inner ears
- Yellow: approximately 15-20 g for the banana peel
- Cream: approximately 10-15 g for the banana fruit and stalk
- Pink: a small amount for the tongue
- Black embroidery floss: eyebrows, nostrils, wink, mouth details, and facial accents
Tools
- 3.0 mm crochet hook for the monkey
- 2.5-3.0 mm crochet hook for smaller details
- 12-14 mm safety eye, one only
- Polyester fiberfill
- Stitch marker
- Tapestry needle only for weaving in yarn ends
- Embroidery needle for optional facial embroidery
- Small amount of pink blush or pink pastel
- Scissors
Finished size: approximately 9-11 in (23-28 cm) tall when made with DK yarn and a 3.0 mm hook.
Abbreviations
| Abbreviation | Meaning |
|---|---|
| MR | Magic ring |
| ch | Chain |
| sc | Single crochet |
| hdc | Half double crochet |
| dc | Double crochet |
| inc | Increase - 2 sc in the same stitch |
| dec | Invisible decrease |
| sl st | Slip stitch |
| BLO | Back loop only |
| FLO | Front loop only |
| st/sts | Stitch/stitches |
| FO | Fasten off |
| bobble | 4-dc bobble stitch |
| Rnd | Round |
| RS | Right side |
Pattern note: Unless otherwise stated, work in continuous spirals and use a stitch marker to identify the first stitch of each round.
Part 1: Separate Limbs, Tail & Ears
The limbs are made first. During the body construction, their top stitches are crocheted directly into the body. This eliminates traditional sewing for the main assembly.
Left Leg & Foot
Work the foot in tan/beige.
Foot
Rnd 1: Ch 7. Starting in the 2nd ch from hook, sc in next 5 ch, 3 sc in last ch, sc in next 4 ch on the opposite side of the foundation chain, 2 sc in the first chain. (14 sts)
Rnd 2: Sc in next 5 sts, inc in each of next 3 sts, sc in next 4 sts, inc in each of next 2 sts. (20 sts)
Rnd 3: Sc in next 5 sts, (sc, inc) 3 times, sc in next 4 sts, (sc, inc) 2 times. (25 sts)
Rnd 4: Sc in next 4 sts, bobble in next st, sc in next 2 sts, bobble in next st, sc in next 2 sts, bobble in next st, sc in remaining 13 sts. (25 sts)
Rnd 5: Sc around. (25 sts)
Rnd 6: Sc around. (25 sts)
Stuff the foot firmly, concentrating stuffing toward the heel.
Rnd 7: (Sc in next 2 sts, dec) 6 times, sc in next st. (19 sts)
Rnd 8: Change to dark brown. Sc around. (19 sts)
Rnd 9: Sc around. (19 sts)
Rnd 10: Sc around. (19 sts)
Rnd 11: Sc around. (19 sts)
Rnd 12: Sc around. (19 sts)
Rnd 13: Sc around. (19 sts)
Add stuffing to the leg, keeping the final section slightly flexible.
Rnd 14: (Sc, dec) 6 times, sc. (13 sts)
FO, leaving a short tail. The 13-st opening will be positioned inside the body during assembly.
Right Leg & Foot
Work the second leg completely in the same manner, but write the piece separately so both legs are ready for direct body integration.
Foot
Rnd 1: Ch 7. Starting in the 2nd ch from hook, sc in next 5 ch, 3 sc in last ch, sc in next 4 ch on the opposite side of the foundation chain, 2 sc in the first chain. (14 sts)
Rnd 2: Sc in next 5 sts, inc in each of next 3 sts, sc in next 4 sts, inc in each of next 2 sts. (20 sts)
Rnd 3: Sc in next 5 sts, (sc, inc) 3 times, sc in next 4 sts, (sc, inc) 2 times. (25 sts)
Rnd 4: Sc in next 4 sts, bobble in next st, sc in next 2 sts, bobble in next st, sc in next 2 sts, bobble in next st, sc in remaining 13 sts. (25 sts)
Rnd 5: Sc around. (25 sts)
Rnd 6: Sc around. (25 sts)
Stuff firmly.
Rnd 7: (Sc in next 2 sts, dec) 6 times, sc in next st. (19 sts)
Rnd 8: Change to dark brown. Sc around. (19 sts)
Rnd 9: Sc around. (19 sts)
Rnd 10: Sc around. (19 sts)
Rnd 11: Sc around. (19 sts)
Rnd 12: Sc around. (19 sts)
Rnd 13: Sc around. (19 sts)
Stuff the leg.
Rnd 14: (Sc, dec) 6 times, sc. (13 sts)
FO and leave the opening unsewn.
Arms
The hands feature three raised bobble "fingers" for the cute, chunky look.
Left Arm
Work the hand in tan.
Rnd 1: MR, 6 sc. (6 sts)
Rnd 2: Inc around. (12 sts)
Rnd 3: Sc in next 2 sts, bobble in next st, sc in next 2 sts, bobble in next st, sc in next 2 sts, bobble in next st, sc in next 3 sts. (12 sts)
Rnd 4: Sc around. (12 sts)
Rnd 5: Change to dark brown. Sc around. (12 sts)
Rnd 6: Sc around. (12 sts)
Rnd 7: Sc around. (12 sts)
Rnd 8: Sc around. (12 sts)
Rnd 9: Sc around. (12 sts)
Rnd 10: Sc around. (12 sts)
Rnd 11: Sc around. (12 sts)
Rnd 12: Sc around. (12 sts)
Stuff lightly.
Rnd 13: (Sc, dec) 4 times. (8 sts)
FO and leave the opening unsewn.
Right Arm
Work the hand in tan.
Rnd 1: MR, 6 sc. (6 sts)
Rnd 2: Inc around. (12 sts)
Rnd 3: Sc in next 2 sts, bobble in next st, sc in next 2 sts, bobble in next st, sc in next 2 sts, bobble in next st, sc in next 3 sts. (12 sts)
Rnd 4: Sc around. (12 sts)
Rnd 5: Change to dark brown. Sc around. (12 sts)
Rnd 6: Sc around. (12 sts)
Rnd 7: Sc around. (12 sts)
Rnd 8: Sc around. (12 sts)
Rnd 9: Sc around. (12 sts)
Rnd 10: Sc around. (12 sts)
Rnd 11: Sc around. (12 sts)
Rnd 12: Sc around. (12 sts)
Stuff lightly.
Rnd 13: (Sc, dec) 4 times. (8 sts)
FO and leave the opening unsewn.
Long Curly Tail
The tail is intentionally crocheted with increases along a foundation chain. The extra stitches force the narrow cord to naturally curl into the playful spiral seen in the photograph.
Work in dark brown.
Rnd 1: Ch 61.
Starting in the 2nd ch from the hook, work 2 sc in every chain across. (120 sts)
Do not flatten the strip. Allow it to naturally twist and curl as you work.
Rnd 2: Sl st loosely across all 120 sts. (120 sl sts)
FO, leaving the final 4 stitches of the tail available for attachment.
Important: Do not tightly block the tail. Gently coil it around your finger and release it. The increased inner edge will create the curly shape.
Large Double-Layered Ears
Each ear consists of a tan inner circle and a dark-brown outer layer. The two layers are crocheted together rather than sewn.
Left Inner Ear
Work in tan.
Rnd 1: MR, 6 sc. (6 sts)
Rnd 2: Inc around. (12 sts)
Rnd 3: (Sc, inc) 6 times. (18 sts)
Rnd 4: (2 sc, inc) 6 times. (24 sts)
FO.
Left Outer Ear
Work in dark brown.
Rnd 1: MR, 6 sc. (6 sts)
Rnd 2: Inc around. (12 sts)
Rnd 3: (Sc, inc) 6 times. (18 sts)
Rnd 4: (2 sc, inc) 6 times. (24 sts)
Rnd 5: (3 sc, inc) 6 times. (30 sts)
FO.
Place the tan inner ear centered on the brown outer ear.
Using brown yarn and your crochet hook, insert the hook through both layers and work 24 loosely spaced sl sts around the inner-ear edge. This secures the inner ear without needle sewing.
Right Inner Ear
Work in tan.
Rnd 1: MR, 6 sc. (6 sts)
Rnd 2: Inc around. (12 sts)
Rnd 3: (Sc, inc) 6 times. (18 sts)
Rnd 4: (2 sc, inc) 6 times. (24 sts)
FO.
Right Outer Ear
Work in dark brown.
Rnd 1: MR, 6 sc. (6 sts)
Rnd 2: Inc around. (12 sts)
Rnd 3: (Sc, inc) 6 times. (18 sts)
Rnd 4: (2 sc, inc) 6 times. (24 sts)
Rnd 5: (3 sc, inc) 6 times. (30 sts)
FO.
Place the tan inner ear on top and crochet the two layers together around the inner-ear perimeter with 24 brown sl sts.
Part 2: Face Patch & Muzzle
Heart-Shaped Face Patch
Work in tan.
This panel creates the broad heart-shaped forehead and cheek area characteristic of the monkey's expression.
Ch 2.
Row 1: Sc in 2nd ch from hook. (1 st)
Row 2: Inc. (2 sts)
Row 3: Inc, sc. (3 sts)
Row 4: Inc, sc in next 2 sts. (4 sts)
Row 5: Inc, sc in next 3 sts. (5 sts)
Row 6: Inc, sc in next 4 sts. (6 sts)
Row 7: Inc, sc in next 5 sts. (7 sts)
Row 8: Inc, sc in next 6 sts. (8 sts)
Row 9: Inc, sc in next 7 sts. (9 sts)
Row 10: Inc, sc in next 8 sts. (10 sts)
Row 11: Inc, sc in next 9 sts. (11 sts)
Row 12: Inc, sc in next 10 sts. (12 sts)
Row 13: Inc, sc in next 11 sts. (13 sts)
Row 14: Inc, sc in next 12 sts. (14 sts)
Left Heart Lobe
Work across the first 7 stitches of Row 14.
Row 15: Inc, sc in next 5 sts, inc. (9 sts)
Row 16: Sc across. (9 sts)
Row 17: Dec, sc in next 5 sts, dec. (7 sts)
Row 18: Sc across. (7 sts)
FO.
Right Heart Lobe
Join tan yarn to the 8th stitch of Row 14.
Row 15: Inc, sc in next 5 sts, inc. (9 sts)
Row 16: Sc across. (9 sts)
Row 17: Dec, sc in next 5 sts, dec. (7 sts)
Row 18: Sc across. (7 sts)
FO.
The pointed bottom forms the chin portion while the two raised sections create the heart-shaped forehead.
Muzzle
Work in light beige.
Rnd 1: Ch 10. Starting in the 2nd ch from hook, sc in next 8 ch, 3 sc in last ch, sc in next 7 ch along the opposite side, 2 sc in the first ch. (20 sts)
Rnd 2: Sc in next 8 sts, inc in each of next 3 sts, sc in next 7 sts, inc in each of next 2 sts. (25 sts)
Rnd 3: Sc in next 8 sts, (sc, inc) 3 times, sc in next 7 sts, (sc, inc) 2 times. (30 sts)
Rnd 4: Sc around. (30 sts)
Rnd 5: Sc around. (30 sts)
Rnd 6: Sc around. (30 sts)
Rnd 7: (3 sc, dec) 6 times. (24 sts)
Rnd 8: Sc around. (24 sts)
Lightly stuff the muzzle so it remains rounded but not overly firm.
FO.
Open Mouth
Work in dark brown.
Rnd 1: MR, 6 sc. (6 sts)
Rnd 2: Inc around. (12 sts)
Rnd 3: (Sc, inc) 6 times. (18 sts)
Rnd 4: Sc around. (18 sts)
FO.
Use brown yarn and your crochet hook to attach the mouth oval to the lower center of the muzzle with closely spaced surface slip stitches. This creates a recessed-looking open mouth without sewing.
Pink Tongue
Work in pink.
Rnd 1: MR, 6 sc. (6 sts)
Rnd 2: Inc around. (12 sts)
Rnd 3: Sc around. (12 sts)
Rnd 4: (Sc, dec) 4 times. (8 sts)
FO.
Flatten the tongue slightly and use pink yarn with your crochet hook to surface-slip-stitch the top edge into the bottom-center of the dark mouth opening.
Part 3: Main Body & Head
This is the most important no-sew section.
The legs, tail, and arms are incorporated as the body is crocheted. No needle attachment is required.
Work primarily in dark brown.
Body
Bottom
Rnd 1: MR, 8 sc. (8 sts)
Rnd 2: Inc around. (16 sts)
Rnd 3: (Sc, inc) 8 times. (24 sts)
Rnd 4: (2 sc, inc) 8 times. (32 sts)
Rnd 5: (3 sc, inc) 8 times. (40 sts)
Rnd 6: (4 sc, inc) 8 times. (48 sts)
Rnd 7: Sc around. (48 sts)
Rnd 8: Sc around. (48 sts)
Rnd 9: Sc around. (48 sts)
Rnd 10: Sc around. (48 sts)
Rnd 11: Sc around. (48 sts)
Rnd 12: Sc around. (48 sts)
Incorporating the Legs
Position the feet so the toes point forward.
The first 18 stitches of this round will crochet directly through the top opening of the left leg.
Rnd 13: Insert hook through the first stitch of the left leg and the next stitch of the body and work sc through both layers across all 18 leg stitches; sc in next 6 body sts; insert hook through the first stitch of the right leg and next body stitch and work sc through both layers across all 18 right-leg stitches; sc in remaining 6 body sts. (48 sts)
Check that both feet point forward before continuing.
Body & Tail
Rnd 14: Sc in next 4 sts; crochet through the next 4 body stitches and the four available tail stitches together, working 1 sc through each pair; sc in remaining 40 sts. (48 sts)
The tail should emerge from the center-back of the monkey.
Gently curve the tail upward and allow its naturally increased cord to form a spiral.
Rnd 15: Sc around. (48 sts)
Rnd 16: Sc around. (48 sts)
Rnd 17: Sc around. (48 sts)
Incorporating the Arms
Place the arms approximately halfway up the torso, with the hands pointing slightly inward.
Rnd 18: Sc in next 6 sts; crochet through all 12 stitches of the left arm and the corresponding 12 body stitches, working 1 sc through each pair; sc in next 12 body sts; crochet through all 12 stitches of the right arm and the corresponding 12 body stitches, working 1 sc through each pair; sc in remaining 6 body sts. (48 sts)
Rnd 19: Sc around. (48 sts)
Rnd 20: Sc around. (48 sts)
Rnd 21: Sc around. (48 sts)
Rnd 22: Sc around. (48 sts)
Rnd 23: Sc around. (48 sts)
Rnd 24: Sc around. (48 sts)
Rnd 25: Sc around. (48 sts)
Rnd 26: Sc around. (48 sts)
Rnd 27: Sc around. (48 sts)
Shape the shoulders and neck
Rnd 28: (6 sc, dec) 6 times. (42 sts)
Rnd 29: Sc around. (42 sts)
Rnd 30: (5 sc, dec) 6 times. (36 sts)
Rnd 31: Sc around. (36 sts)
Rnd 32: Sc around. (36 sts)
The next rounds expand into the large round monkey head.
Head
Rnd 33: (5 sc, inc) 6 times. (42 sts)
Rnd 34: (6 sc, inc) 6 times. (48 sts)
Rnd 35: (7 sc, inc) 6 times. (54 sts)
Rnd 36: (8 sc, inc) 6 times. (60 sts)
Rnd 37: Sc in next 10 sts while crocheting through the left ear edge and corresponding head stitches for all 10 stitches; sc in next 20 sts; crochet through the right ear edge and corresponding head stitches for the next 10 sts; sc in remaining 20 sts. (60 sts)
This secures both large ears directly into the head.
Rnd 38: Sc around. (60 sts)
Rnd 39: Sc around. (60 sts)
Rnd 40: Sc around. (60 sts)
Rnd 41: Sc around. (60 sts)
Rnd 42: Sc around. (60 sts)
Rnd 43: Sc around. (60 sts)
Rnd 44: Sc around. (60 sts)
Start adding stuffing. Firmly stuff the lower head while keeping the face surface smooth.
Rnd 45: (8 sc, dec) 6 times. (54 sts)
Rnd 46: (7 sc, dec) 6 times. (48 sts)
Insert the safety eye before the opening becomes too small.
Safety Eye Placement
Position the single 12-14 mm safety eye on the monkey's right side of the face, approximately between Rnds 39–42.
The eye should sit slightly to one side of the vertical center of the face patch. Place the washer securely on the inside.
Rnd 47: (6 sc, dec) 6 times. (42 sts)
Rnd 48: (5 sc, dec) 6 times. (36 sts)
Continue stuffing firmly.
Rnd 49: (4 sc, dec) 6 times. (30 sts)
Rnd 50: (3 sc, dec) 6 times. (24 sts)
Add the final stuffing, especially around the cheeks and crown.
Rnd 51: (2 sc, dec) 6 times. (18 sts)
Rnd 52: (sc, dec) 6 times. (12 sts)
Rnd 53: Dec around. (6 sts)
FO and close the remaining opening using your preferred amigurumi closure method. Weaving in the yarn tail is the only needle-based finishing needed for the core body.
Attaching the Heart Face Patch
Center the heart patch vertically on the front of the head.
The pointed end should sit just above the muzzle, while the two rounded lobes extend upward toward the safety eye and winking eye.
Using tan yarn and your crochet hook, attach the patch with surface slip stitches around its perimeter.
Work slowly around the curves so the patch stays flat.
This creates a crochet attachment rather than traditional sewing.
Attaching the Muzzle
Center the beige muzzle over the lower half of the face patch.
The top of the muzzle should sit approximately 1-2 rounds below the safety eye.
Attach it with closely spaced surface slip stitches using beige yarn.
Do not over-tighten the stitches. The muzzle should remain slightly raised and dimensional.
Facial Details
Nostrils
Using black embroidery floss:
- Place two tiny horizontal nostril stitches near the upper center of the muzzle.
- Keep them close together.
- Add a tiny third stitch between or just below them if desired for the soft cartoon appearance.
Winking Eye
On the side opposite the safety eye, embroider a curved closed eye.
Use black embroidery floss and make:
- One slightly curved horizontal line for the closed eyelid
- A shorter curved stitch above it for the expressive lash/eyelid accent
For the photo-inspired expression, angle the wink slightly upward toward the outer edge.
Eyebrows
Embroider one small arched eyebrow above the safety eye and another above the wink.
Make the eyebrow above the wink slightly more curved to emphasize the playful expression.
Cheek Details
Add two small blush areas beneath the eyes.
Use pink blush, pastel, or a small amount of pink yarn worked as surface stitches.
Keep the color soft and concentrated toward the center of each cheek.
Top Hair Tuft
Use dark brown yarn.
At the crown, use your crochet hook to surface-slip-stitch into several neighboring stitches.
For each tuft:
- Pull up a loop.
- Ch 5.
- Sl st back into the same crown area.
- Move to the next stitch.
- Create another ch-5 loop.
Make approximately 5-7 small tufts, varying the directions slightly.
Gently twist each loop between your fingers to make it look like short curly monkey hair.
Part 4: Peeled Banana Accessory
The banana is deliberately constructed from a central cream fruit piece and four yellow peel flaps.
Cream Banana Fruit
Work in cream.
Rnd 1: MR, 6 sc. (6 sts)
Rnd 2: Inc around. (12 sts)
Rnd 3: Sc around. (12 sts)
Rnd 4: Sc around. (12 sts)
Rnd 5: Sc around. (12 sts)
Rnd 6: Sc around. (12 sts)
Rnd 7: Sc around. (12 sts)
Rnd 8: Sc around. (12 sts)
Rnd 9: (Sc, dec) 4 times. (8 sts)
Rnd 10: Sc around. (8 sts)
Rnd 11: (Dec) 4 times. (4 sts)
FO.
Add a tiny amount of stuffing if you want the fruit to remain rounded.
Cream Stalk
Join cream yarn to the top of the fruit.
Row 1: Ch 5.
Row 2: Starting in 2nd ch from hook, sl st in next 4 ch.
Sl st into the top of the fruit and FO.
Yellow Banana Peel Base
Work in yellow.
Rnd 1: MR, 8 sc. (8 sts)
Rnd 2: Inc around. (16 sts)
Sl st to the first stitch and FO.
This 16-st base provides four attachment sections of four stitches each.
Peel Flap 1
Join yellow yarn to the first stitch of the peel base.
Row 1: Sc in next 4 sts. (4 sts)
Turn.
Row 2: Sc across. (4 sts)
Row 3: Inc, sc in next 2 sts, inc. (6 sts)
Row 4: Sc across. (6 sts)
Row 5: Dec, sc in next 2 sts, dec. (4 sts)
Row 6: Sc across. (4 sts)
Row 7: Dec twice. (2 sts)
FO.
Peel Flap 2
Join yellow yarn to the next four stitches of the peel base.
Row 1: Sc in next 4 sts. (4 sts)
Row 2: Sc across. (4 sts)
Row 3: Inc, sc in next 2 sts, inc. (6 sts)
Row 4: Sc across. (6 sts)
Row 5: Dec, sc in next 2 sts, dec. (4 sts)
Row 6: Sc across. (4 sts)
Row 7: Dec twice. (2 sts)
FO.
Peel Flap 3
Join yellow yarn to the third group of four stitches.
Row 1: Sc in next 4 sts. (4 sts)
Row 2: Sc across. (4 sts)
Row 3: Inc, sc in next 2 sts, inc. (6 sts)
Row 4: Sc across. (6 sts)
Row 5: Dec, sc in next 2 sts, dec. (4 sts)
Row 6: Sc across. (4 sts)
Row 7: Dec twice. (2 sts)
FO.
Peel Flap 4
Join yellow yarn to the final four stitches of the peel base.
Row 1: Sc in next 4 sts. (4 sts)
Row 2: Sc across. (4 sts)
Row 3: Inc, sc in next 2 sts, inc. (6 sts)
Row 4: Sc across. (6 sts)
Row 5: Dec, sc in next 2 sts, dec. (4 sts)
Row 6: Sc across. (4 sts)
Row 7: Dec twice. (2 sts)
FO.
Place the cream banana fruit inside the yellow peel base. Spread the four yellow flaps outward and slightly downward.
For additional texture, surface-slip-stitch a few vertical lines down each peel flap using a slightly darker yellow yarn.
Finishing Instructions
Positioning the Cheek-Touching Hand
The monkey's most expressive feature is the hand resting against its cheek.
Position the left arm upward so the elbow points diagonally downward and the hand rests beside the muzzle.
The three bobble fingers should face toward the cheek.
For the most natural pose:
- Curve the arm gently forward.
- Push the hand against the side of the muzzle.
- Position the fingertips approximately level with the lower edge of the safety eye.
- Secure the pose with a few crochet surface slip stitches between the arm and body if additional stability is desired.
This uses crochet attachment rather than needle sewing.
Positioning the Banana Hand
Angle the right arm toward the front of the body.
Place the peeled banana vertically between the hand and body, with:
- The cream fruit pointing upward
- The yellow peel flaps pointing downward and outward
- The hand positioned around the middle of the banana
You can secure the banana using a short length of matching yarn passed through the hand and banana, or simply leave it removable for play and photography.
Final Face Shaping
Gently massage the stuffing from the inside so the head has:
- Full rounded cheeks
- A slightly narrower chin
- A smooth forehead
- A prominent muzzle
- A softly rounded back of the head
Avoid overstuffing the muzzle or face patch.
Rosy Cheeks
Apply a very small amount of pink blush beneath each eye.
Build the color gradually rather than applying a heavy layer at once.
The finished monkey should have one large shiny safety eye, one embroidered wink, raised eyebrows, rosy cheeks, a protruding pink tongue, oversized ears, chunky feet, a curling tail, and the playful banana-holding pose.
The result is a fully integrated no-sew amigurumi monkey with the core body, head, legs, arms, tail, and ears assembled directly with crochet rather than traditional needle sewing.
Crocheted Giraffe
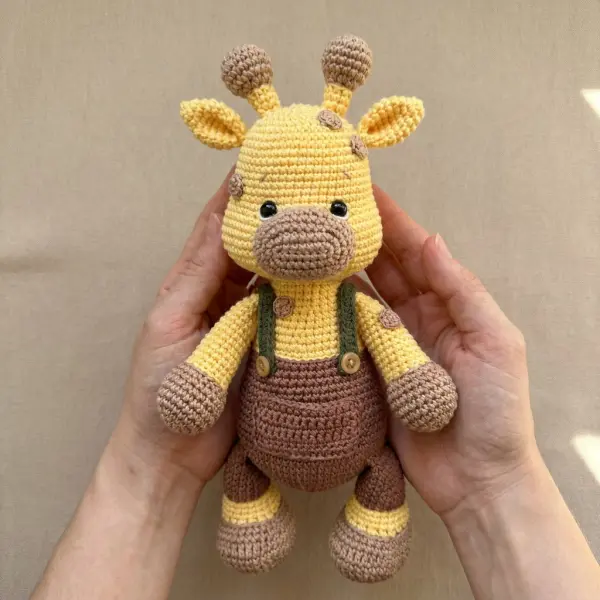
This adorable crocheted giraffe is a fun, beginner-friendly amigurumi project inspired by the sweet handmade giraffe in the photo. With a round head, tiny muzzle, floppy ears, tall ossicones, chunky legs, and cute little overalls, this plush has an irresistibly squishy personality.
The pattern is designed for quick crafting and simple construction. Most of the major pieces are worked directly onto the body with crochet stitches or slip stitches, keeping assembly to a minimum. There is no complicated garment sewing or difficult shaping.
Crocheted Elephant
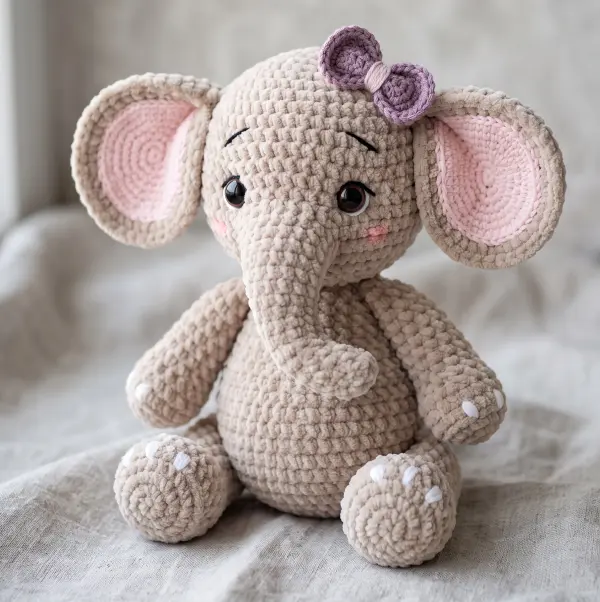
A soft, chubby, squishy crocheted elephant is one of those projects that is almost impossible to resist. With its oversized ears, tiny trunk, round belly, and cuddly chenille texture, this little elephant has the perfect handmade-toy look.
This beginner-friendly pattern is designed for quick crafting with plush yarn. The construction keeps the assembly simple, with parts attached using crochet stitches and slip stitches instead of traditional sewing. That makes it especially appealing if you love no-sew amigurumi and want a project you can finish in a short crafting session.
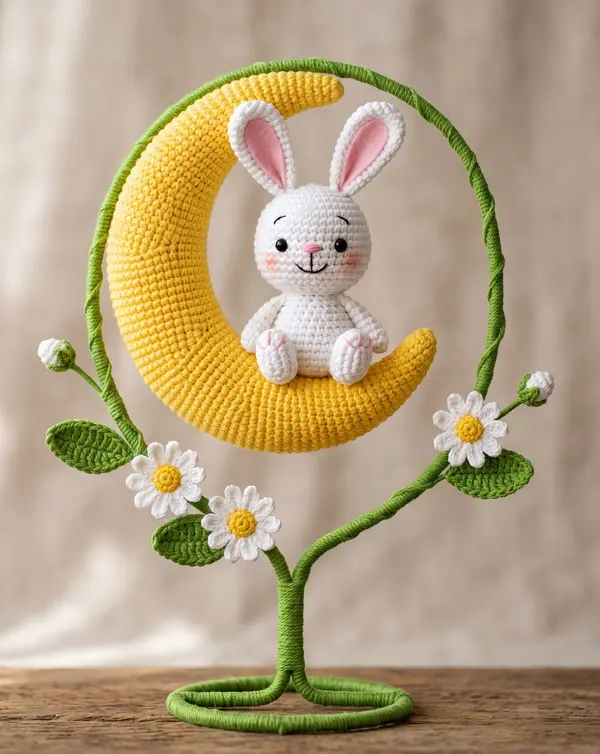
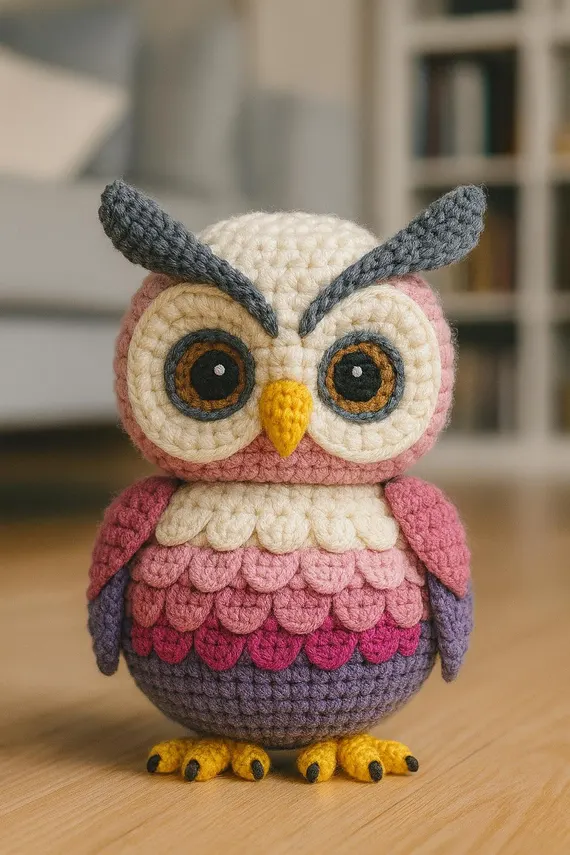
Amigurumi Puppy
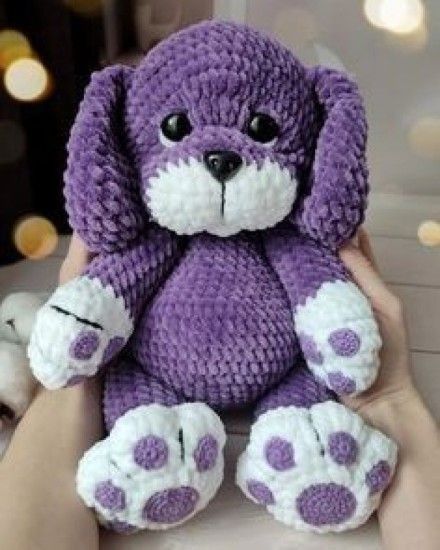
Create an irresistibly cuddly Amigurumi Puppy Crochet Pattern inspired by the adorable plush puppy shown in the photo. This chubby puppy features a deep violet body, oversized floppy ears, a soft white muzzle, and large white paws decorated with contrasting purple paw pads.
The pattern uses super bulky chenille yarn and is designed for advanced beginners who are comfortable crocheting amigurumi in continuous rounds, changing colors, increasing, decreasing, and sewing simple pieces together.