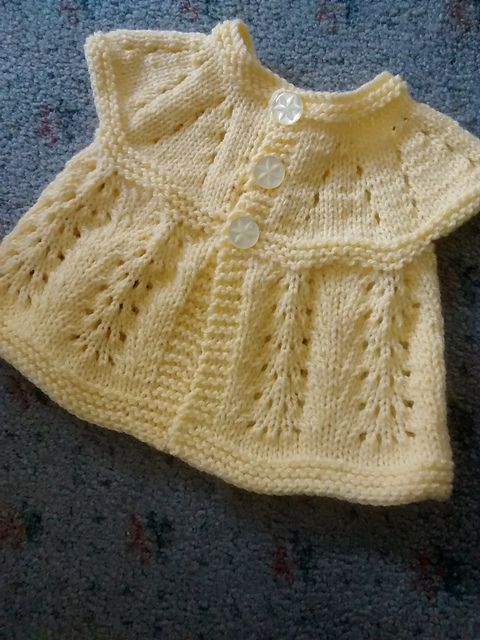
A sweet top-down baby matinee coat inspired by the classic vintage cardigan in the photo. This seamless design features a softly rounded lace-effect yoke, cap sleeves, decorative eyelet lines, a gently flared skirt, garter-stitch borders, and three buttonholes worked directly into the front band.
Size and Measurements
Finished size: 0-3 months
| Measurement | Approx. size |
|---|---|
| Finished chest circumference | 20 in / 51 cm |
| Length from shoulder to hem | 10.5 in / 27 cm |
| Sleeve circumference | 7 in / 18 cm |
| Sleeve length from underarm | 2.5 in / 6.5 cm |
| Neck opening | approx. 12 in / 30.5 cm |
The cardigan is designed with a little positive ease for comfortable baby wear.
To make a 6-12 month version
Use the same construction but:
- Work 2-4 additional raglan increase rows before separating the sleeves.
- Add approximately 8-12 stitches to the body if a wider garment is desired.
- Work the skirt for approximately 2-3 in / 5-7.5 cm longer.
- For larger sleeves, add 1-2 additional underarm stitches when separating.
- Check the garment against the baby's actual chest measurement rather than relying solely on age.
Materials and Tools
- DK-weight baby yarn: approximately 250-300 yd / 230-275 m
- Color: soft pastel yellow or pale butter yellow
- 3.75-4.0 mm knitting needles / US 5-6
- Straight needles can be used for the flat portions.
- A circular needle is convenient for holding the large number of body stitches, even though the cardigan is worked flat.
- 3 decorative white buttons, approximately 1/2 in / 12-15 mm
- Tapestry needle
- Stitch holders or scrap yarn
- Stitch markers
- Scissors
- Measuring tape
- Blocking mat and pins
Gauge
22 sts x 30 rows = 4 in / 10 cm in stockinette stitch
Adjust needle size if necessary to obtain gauge.
Because this is baby knitwear, make a gauge swatch before beginning. The finished measurements depend on achieving the stated gauge.
Abbreviations
- K - knit
- P - purl
- St/sts - stitch/stitches
- RS - right side
- WS - wrong side
- YO - yarn over
- K2tog - knit 2 stitches together
- SSK - slip, slip, knit
- St st - stockinette stitch
- Garter st - knit every row
- PM - place marker
- SM - slip marker
- CO - cast on
- BO - bind off
- Rep - repeat
- Beg - beginning
- Rem - remaining
- M1 - make 1
- RH - right-hand
- LH - left-hand
Pattern note: All increases in the yoke are created with yarn overs. This gives the characteristic decorative eyelet columns visible in the finished garment.
Part 1: Neckband and Bodice Yoke
The cardigan is knitted top down and flat, so the center front remains open throughout the project. There are no shoulder seams.
Neckband
Using 3.75-4.0 mm needles and pastel yellow DK yarn:
CO 68 sts.
The stitch distribution is:
- 4 sts - left front band
- 10 sts - left front
- 1 st - raglan line
- 8 sts - left sleeve
- 1 st - raglan line
- 20 sts - back
- 1 st - raglan line
- 8 sts - right sleeve
- 1 st - raglan line
- 10 sts - right front
- 4 sts - right front band
Place a marker immediately after each raglan stitch.
Neckband Rows 1-6
Rows 1-6: Knit across.
This creates a neat 6-row garter-stitch neckline.
The first 4 stitches and final 4 stitches are the front bands and remain in garter stitch throughout the yoke and body.
Lace-Effect Yoke
The yoke is worked in stockinette with decorative yarn-over eyelets placed along the four raglan lines.
The eyelet increases also shape the garment.
Important increase method
On every designated RS increase row, work each raglan line as follows:
K to 1 st before marker, YO, K1, YO, SM.
The center K1 is the raglan stitch.
Each raglan line therefore gains 2 stitches.
Because the two front edges each have one raglan line, each front gains 1 stitch per increase row. Each sleeve and the back gain 2 stitches per increase row.
Yoke Rows 1-26
The first 6 rows are already the neckband. Continue numbering from the neckband.
Row 7 - RS
Knit the 4-st front band.
Work the left front to 1 st before the first marker:
K to 1 st before marker, YO, K1, YO, SM.
Work across the left sleeve to 1 st before the next marker:
K to 1 st before marker, YO, K1, YO, SM.
Work across the back to 1 st before the next marker:
K to 1 st before marker, YO, K1, YO, SM.
Work across the right sleeve to 1 st before the final marker:
K to 1 st before marker, YO, K1, YO, SM.
Knit across the right front to the final 4 sts.
Knit the final 4 band sts.
St count: 76 sts.
Row 8 - WS
K4, P across to last 4 sts, K4.
76 sts
Row 9 - RS
Repeat Row 7.
84 sts
Row 10 - WS
K4, P across to last 4 sts, K4.
84 sts
Row 11 - RS
Repeat Row 7.
92 sts
Row 12 - WS
K4, P across to last 4 sts, K4.
92 sts
Row 13 - RS
Repeat Row 7.
100 sts
Row 14 - WS
K4, P across to last 4 sts, K4.
100 sts
Row 15 - RS - Buttonhole 1
Work the first 4 band stitches as:
K1, K2tog, YO, K1.
This creates the first buttonhole.
Continue the yoke increase pattern:
K to 1 st before marker, YO, K1, YO, SM at each raglan marker.
Work to the end, maintaining the final 4 stitches in garter stitch.
108 sts
Row 16 - WS
K4, P across to last 4 sts, K4.
108 sts
Row 17 - RS
Repeat the yoke increase row.
116 sts
Row 18 - WS
K4, P across to last 4 sts, K4.
116 sts
Row 19 - RS
Repeat the yoke increase row.
124 sts
Row 20 - WS
K4, P across to last 4 sts, K4.
124 sts
Row 21 - RS - Buttonhole 2
Work:
K1, K2tog, YO, K1
for the first 4 band stitches.
Continue the raglan eyelet increases at all four markers.
132 sts
Row 22 - WS
K4, P across to last 4 sts, K4.
132 sts
Row 23 - RS
Repeat the raglan eyelet increase row.
140 sts
Row 24 - WS
K4, P across to last 4 sts, K4.
140 sts
Row 25 - RS - Buttonhole 3
Work the first 4 stitches:
K1, K2tog, YO, K1.
Continue the raglan eyelet increases at all four markers.
148 sts
Row 26 - WS
K4, P across to last 4 sts, K4.
148 sts
Additional Yoke Shaping
To reach the desired underarm width, work five more increase rows.
Row 27 - RS
Repeat the raglan eyelet increase row.
156 sts
Row 28 - WS
K4, P across to last 4 sts, K4.
156 sts
Row 29 - RS
Repeat the raglan eyelet increase row.
164 sts
Row 30 - WS
K4, P across to last 4 sts, K4.
164 sts
Row 31 - RS
Repeat the raglan eyelet increase row.
172 sts
Row 32 - WS
K4, P across to last 4 sts, K4.
172 sts
Row 33 - RS
Repeat the raglan eyelet increase row.
180 sts
Row 34 - WS
K4, P across to last 4 sts, K4.
180 sts
Row 35 - RS
Repeat the raglan eyelet increase row.
188 sts
Row 36 - WS
K4, P across to last 4 sts, K4.
188 sts
At this point the yoke should measure approximately 4-4 1/2 in / 10-11.5 cm from the neckline.
Part 2: Separating the Sleeves
The stitch distribution after the final increase is:
- Left front: 24 sts
- Raglan stitch: 1 st
- Left sleeve: 34 sts
- Raglan stitch: 1 st
- Back: 46 sts
- Raglan stitch: 1 st
- Right sleeve: 34 sts
- Raglan stitch: 1 st
- Right front: 24 sts
- Front bands: 8 sts
Total: 188 sts
The sleeves are now placed on holders while the body is worked in one piece.
Separate the left sleeve
Work across:
- 4-st left front band
- 24 left-front sts
- 1 raglan stitch
Place the next 34 sleeve stitches on scrap yarn or a stitch holder.
Cast on 4 sts using the backward-loop method.
Knit the next raglan stitch.
Knit across all 46 back stitches.
Knit the next raglan stitch.
Place the next 34 sleeve stitches on a second holder.
Cast on 4 sts.
Knit the final raglan stitch and the 24 right-front stitches.
Knit the final 4-st right front band.
You now have:
112 body stitches
Break the yarn only if necessary; otherwise continue directly into the body.
Part 3: Skirt and Vertical Eyelet Lace Pattern
The lower body is worked flat in one piece.
The 4-stitch front bands remain in garter stitch.
The main skirt is worked primarily in stockinette with repeating vertical eyelet motifs.
Body Setup Row - WS
K4, P104, K4.
112 sts
Body Row - RS
K4, K104, K4.
112 sts
Repeat these two rows once more.
Vertical Eyelet Chevron Lace
The main body contains 104 stitches between the two 4-stitch front bands.
The lace is worked over a repeating 8-stitch motif, with 13 complete repeats.
The motif creates delicate diagonal eyelet movement while preserving the stitch count.
Lace Chart Written Out
Work the first and last 4 stitches of every RS row as garter-stitch borders.
Lace Row 1 - RS
K4.
Repeat across the center 104 sts:
K2, YO, K2tog, K2, YO, SSK
K4.
112 sts
Lace Row 2 - WS
K4, P104, K4.
112 sts
Lace Row 3 - RS
K4.
Repeat across the center:
K4, YO, SSK, K2, K2tog, YO
K4.
112 sts
Lace Row 4 - WS
K4, P104, K4.
112 sts
Lace Row 5 - RS
K4.
Repeat:
K2, YO, K2tog, K2, YO, SSK
K4.
112 sts
Lace Row 6 - WS
K4, P104, K4.
112 sts
Lace Row 7 - RS
K4.
Repeat:
K4, YO, SSK, K2, K2tog, YO
K4.
112 sts
Lace Row 8 - WS
K4, P104, K4.
112 sts
This creates one complete 8-row eyelet-chevron repeat.
Continue the Skirt
Repeat Lace Rows 1-8 a total of 5 times.
You will have completed 40 lace rows.
The skirt should now measure approximately 5 1/2-6 in / 14-15 cm from the underarm, depending on your row gauge.
For a longer cardigan, continue additional 8-row repeats until the desired length is reached.
Garter-Stitch Hem
After the final lace repeat, work:
Rows 1-8: Knit every stitch.
This produces a firm, attractive garter hem matching the neckline and front bands.
For a slightly deeper hem, work 10-12 garter rows instead.
Finishing Instructions
Bind Off
On the final row, bind off loosely in knit stitch.
Do not pull the stitches tightly. A flexible bind-off allows the lower edge to lie smoothly without drawing in.
Cut the yarn, leaving a 6-8 in / 15-20 cm tail.
Finish the Sleeves
Return the 34 held sleeve stitches to the needles.
Using the working yarn, pick up and knit the 4 underarm stitches.
You now have:
38 sleeve stitches.
Join the yarn at the underarm and work flat.
Sleeve Row 1 - RS
Knit all 38 sts.
Sleeve Row 2 - WS
Purl all 38 sts.
Repeat Rows 1-2 for approximately 1 1/2 in / 4 cm.
Then work:
6 rows garter stitch.
Bind off loosely.
Repeat the complete sleeve instructions for the second sleeve.
Optional sleeve shaping
For a slightly tapered cap sleeve, decrease 1 stitch at each end every 6th row twice:
- Knit to 3 sts before the end.
- K2tog.
- K1.
At the beginning of the same RS row:
- K1.
- SSK.
- Knit to the end.
This changes the sleeve from 38 to 34 stitches before the garter cuff.
Front Bands
The front bands were worked continuously with the cardigan, so no separate bands need to be sewn on.
Check each buttonhole:
- Buttonhole 1 - Row 15
- Buttonhole 2 - Row 21
- Buttonhole 3 - Row 25
Because each buttonhole uses K2tog + YO, the stitch count remains unchanged.
If your buttons are larger than 1/2 in / 12-15 mm, enlarge the buttonholes by substituting:
K1, K2tog, YO, YO, K2tog, K1
on a 6-stitch band section, or work the larger buttonhole with a short row of bound-off stitches and cast-on stitches.
Sewing on the Buttons
Lay the cardigan flat with the right side facing you.
Place one button opposite each buttonhole.
Sew the three decorative white buttons securely to the opposite front band using matching sewing thread or doubled yarn.
Before tightening the thread completely, leave a tiny amount of slack underneath each button. This gives the thick knitted fabric enough room to move comfortably around the button.
Final Blocking
Do not aggressively stretch baby knitwear.
- Soak the cardigan briefly in lukewarm water with a small amount of wool-safe detergent.
- Gently press out excess water.
- Roll in a clean towel and press.
- Lay flat on a blocking mat.
- Pin the front edges straight.
- Gently open the eyelet lace sections.
- Shape the skirt into an even gentle flare.
- Allow the cardigan to dry completely.
- Remove the pins.
Blocking will soften the fabric and help the vertical eyelet columns and chevron lace open clearly.
The finished cardigan should have a softly rounded yoke, compact cap sleeves, a gently flared skirt, neat garter borders, and three evenly spaced decorative buttons for the classic vintage baby-matinee look.
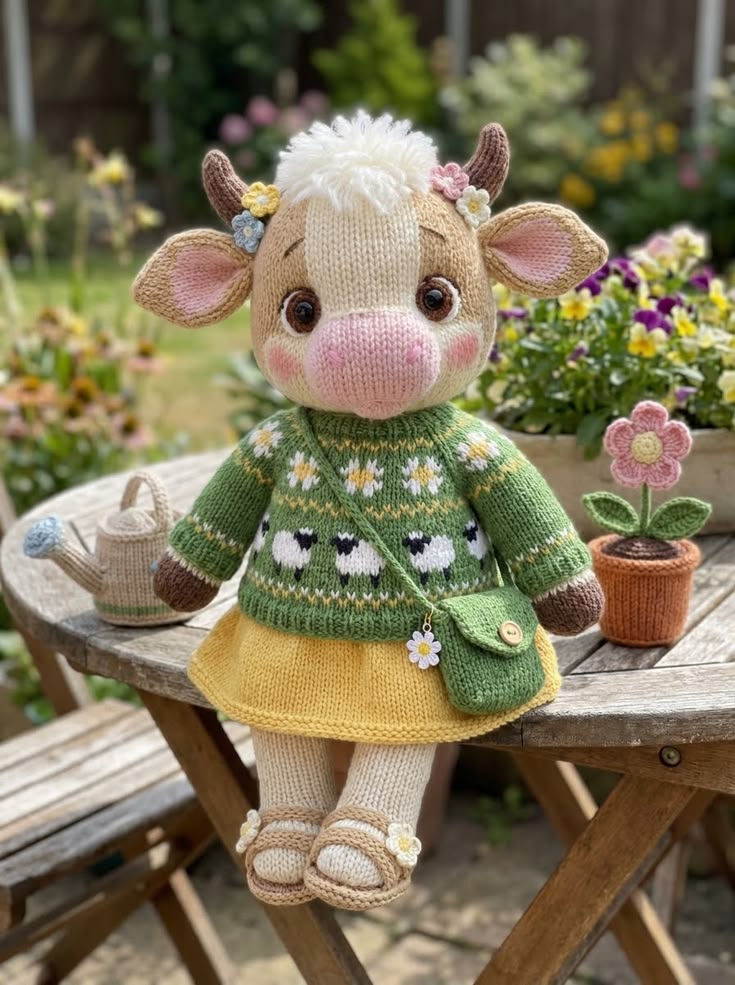
Spring Cow in Sheep Sweater and Yellow Skirt Free Knitting Pattern
This sweet spring cow is knitted as a soft garden doll with a cream-and-tan head, pink muzzle, wide ears, curved brown horns, fluffy white hair, a green sheep-pattern sweater, a sunny yellow skirt, little strap shoes, and a green crossbody garden bag with a daisy charm. The finished toy has a seated pose and delicate floral accents around the ears and shoes.
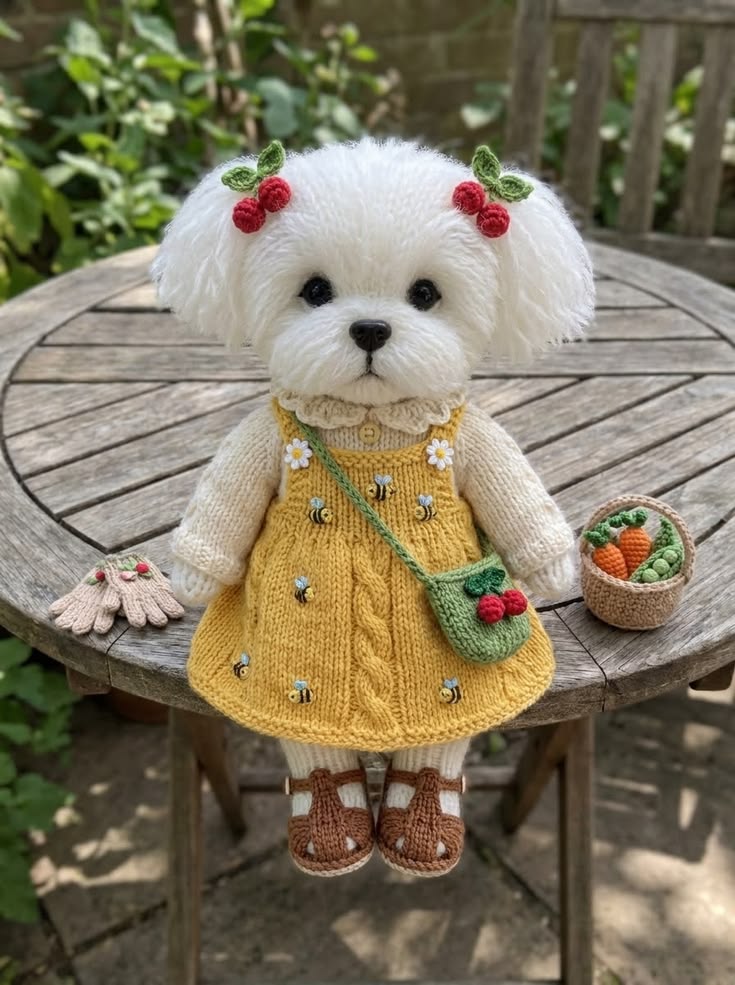
White Maltese Puppy in Yellow Bee Dress Free Knitting Pattern
This sweet knitting pattern creates a fluffy white Maltese-style puppy wearing a golden yellow bee dress with tiny embroidered bees, white daisies, cherry hair clips, a green crossbody purse, brown sandals, pink garden gloves, and a small vegetable basket filled with carrots and peas. The finished toy is designed as a soft display doll with rounded proportions, floppy ears, a gentle face, and detailed garden-themed accessories
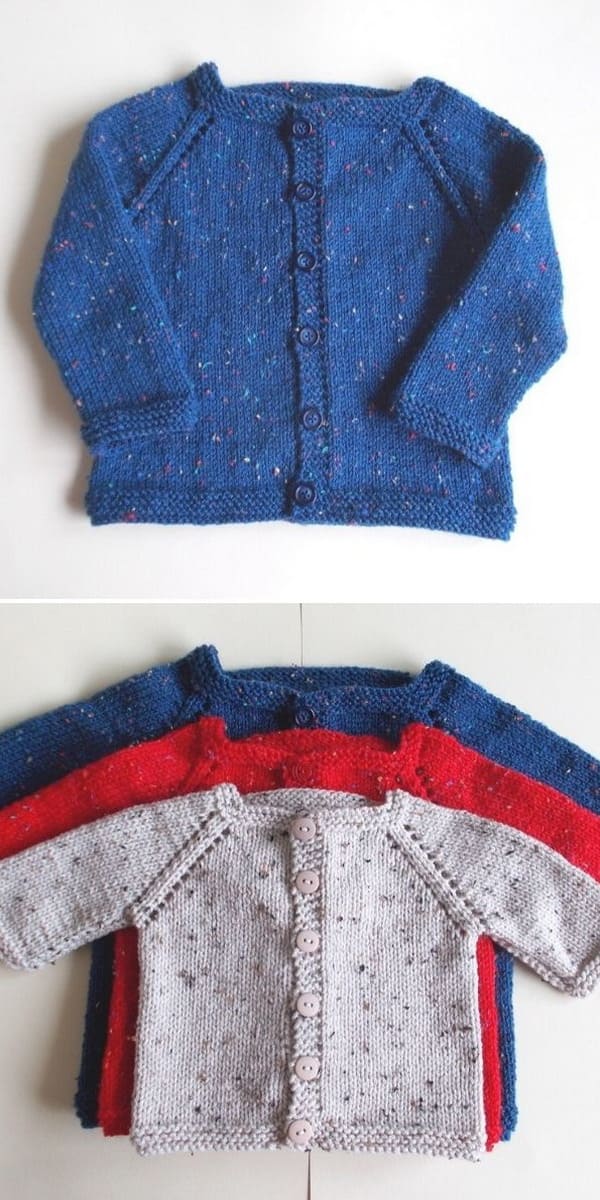
Max Baby Cardigan with Eyelet Raglan
- Designed by: marianna mel
This cute set of baby cardigans come in three different sizes. The sizes are: from 0 - 3 months, from 6 - 9 months, and 12 months. In other words, you can make all three for your baby and change them as your baby grows.
Izzy doll knitting pattern Free
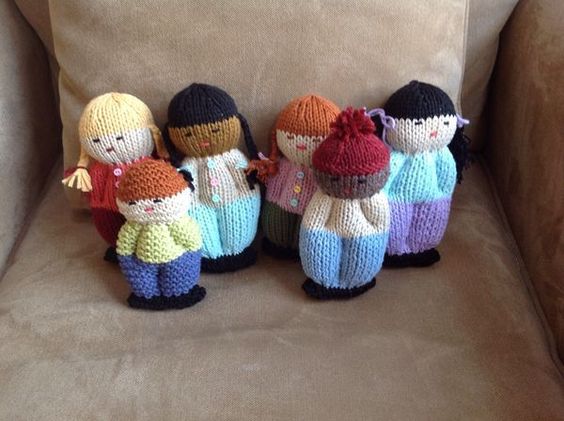
A sweet, traditional-style comfort doll knitted flat on straight needles, inspired by the colorful handmade dolls shown in the photo. The body is worked as one continuous piece from the feet upward, with simple color changes creating the shoes, pants, sweater, face, and hair or hat. After knitting, the rectangle is folded and seamed at the back, then lightly stuffed and shaped with yarn ties and simple embroidery.
French Macaroon Baby Sweater Free Knitting Pattern
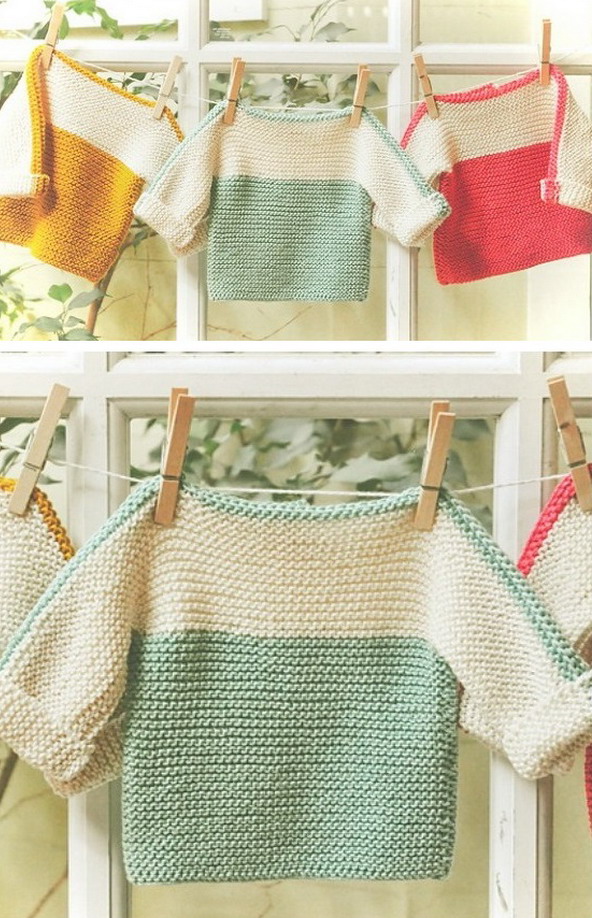
These cute little French Macaroon sweaters are great additions to your little one's closet. It will definitely add an extra dose of cuteness to any outfit. The French Macaroon Baby Sweater Free Knitting Pattern works up really fast in two flat parts with easy garter stitch. It has lovely boat neck and cute colors. It's easily customizable when it comes to sizing. The pattern includes detailed written instructions for six sizes to fit newborns, babies ages 3 months, 6 to 9 months, 12 to 18 months, 2 to 3 years, and 4 years old. Craft in different colors for a complete wardrobe. Thanks The Noble Thread for sharing this free pattern. The link for the free pattern is provided below photo. Happy knitting.