
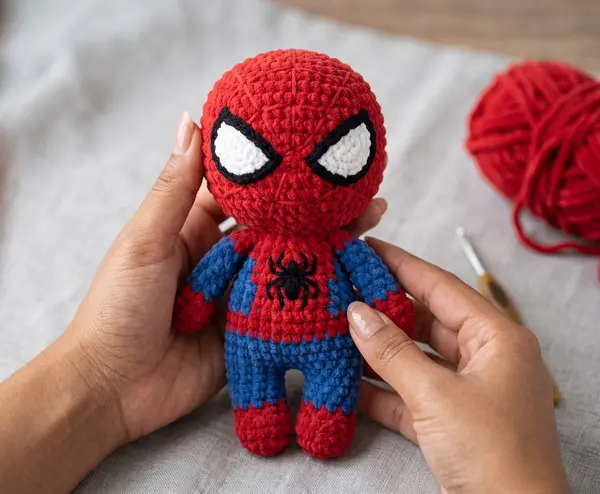
Easy No-Sew Crochet Spider Superhero Plush Pattern 🕷️❤️💙
Materials & Tools
- Super bulky chenille/velvet yarn
- Vibrant red - main color
- Royal blue - suit and sleeves
- White - eyes
- Black - spider logo and web embroidery
- 4.0-5.0 mm crochet hook - choose a size that produces firm stitches with your yarn
- Polyester fiberfill stuffing
- Tapestry needle for embroidery and weaving in ends
- Stitch marker
- Small amount of black embroidery floss or thin black yarn
- Optional: 10-12 mm safety eyes, if preferred for an alternative eye design
- Scissors
Finished Size
Using super bulky chenille yarn and a 4.5 mm hook, the finished plush will be approximately 8-10 inches (20-25 cm) tall, depending on yarn and tension.
Important: The main character is designed to be assembled without sewing. The legs, torso, and oversized head are crocheted as one continuous piece. The arms are prepared separately and crocheted directly into the torso during the body rounds. The decorative eyes are intentionally made separately because their flat almond shape is much easier to achieve cleanly this way.
Abbreviations
| Abbreviation | Meaning |
|---|---|
| MR | Magic ring |
| ch | Chain |
| sc | Single crochet |
| inc | Increase - 2 sc in the same stitch |
| dec | Single crochet 2 stitches together |
| sl st | Slip stitch |
| BLO | Back loop only |
| FLO | Front loop only |
| st/sts | Stitch/stitches |
| FO | Fasten off |
| rnd | Round |
| dc | Double crochet |
Pattern is written in standard US crochet terminology.
Part 1: Arms - Make 2
The arms begin with red gloves and transition into royal blue sleeves. They remain open at the top so they can be crocheted directly into the torso.
Red Glove
Rnd 1: 6 sc in MR. (6)
Rnd 2: Inc around. (12)
Rnd 3: Sc around. (12)
Rnd 4: Sc around. (12)
Rnd 5: Sc around. (12)
Change to Royal Blue
For a clean color change, work the final yarn-over of the last red stitch with blue yarn.
Rnd 6: Sc around. (12)
Rnd 7: Sc around. (12)
Rnd 8: Sc around. (12)
Rnd 9: Sc around. (12)
Rnd 10: Sc around. (12)
Rnd 11: Sc around. (12)
Rnd 12: Sc around. (12)
Do not stuff the sleeve heavily. Add only a small amount of stuffing to the red glove and lower sleeve.
Do not fasten off. Leave the blue yarn attached to the second arm until you are ready to join it to the body.
For the first arm, fasten off normally and leave a short tail. The first arm will be positioned while crocheting the body; the second arm can be kept attached until its joining round.
Arm Joining Method
When an arm is joined to the torso, place the arm against the outside of the body with the 12-arm-stitch opening aligned with 12 body stitches.
Crochet through both the next body stitch and the corresponding arm stitch to incorporate the arm:
sc through body and arm together for each of the 12 stitches.
This closes the arm opening while simultaneously attaching it to the body. No sewing is required.
Part 2: Large Spider Eyes
The plush in the reference image has large white almond-shaped eyes surrounded by a dramatic black border.
Make 2 white eye inserts.
Because these are flat decorative pieces, they are intentionally worked separately from the body. They can be attached with black embroidery or a very small amount of fabric-safe glue.
White Eye Insert - Make 2
Work back and forth in rows.
Row 1: Ch 2, 2 sc in 2nd ch from hook. (2)
Row 2: Ch 1, turn, inc in each st. (4)
Row 3: Ch 1, turn, sc across. (4)
Row 4: Ch 1, turn, inc, sc 2, inc. (6)
Row 5: Ch 1, turn, sc across. (6)
Row 6: Ch 1, turn, inc, sc 4, inc. (8)
Row 7: Ch 1, turn, sc across. (8)
Row 8: Ch 1, turn, dec, sc 4, dec. (6)
Row 9: Ch 1, turn, dec, sc 2, dec. (4)
Row 10: Ch 1, turn, dec twice. (2)
Row 11: Ch 1, turn, dec. (1)
FO.
This produces a pointed almond/triangle shape.
Black Eye Border
Using black yarn or embroidery floss:
- Insert the hook around the outside edge of the white eye.
- Work a neat round of sl sts around the perimeter.
- Keep the tension firm but not tight enough to distort the white center.
- Leave the inner portion white.
- Position the narrow point toward the outer/lower side of the face to reproduce the dramatic superhero mask expression.
For an even bolder mask, make a second pass of black embroidery around the outermost edge.
Attaching the Eyes
Position both eyes symmetrically on the red head.
The eyes should angle slightly downward toward the center, creating the characteristic determined superhero expression.
Attach them using either:
- small, nearly invisible stitches with black embroidery floss, or
- a tiny amount of fabric-safe glue.
For a plush intended for young children, embroidered eyes are preferable to safety eyes or glued components.
Part 3: Seamless Legs, Body & Head
This section creates the main plush as one continuous crocheted structure.
The construction begins at the feet, joins the two legs at the crotch, continues upward through the torso, incorporates the arms, and then expands directly into the oversized red head.
Leg 1 - Red Boot
Start with red yarn.
Rnd 1: 6 sc in MR. (6)
Rnd 2: Inc around. (12)
Rnd 3: (Sc 1, inc) around. (18)
Rnd 4: Sc around. (18)
Rnd 5: Sc around. (18)
Change to Blue
Work the final yarn-over of the last red stitch with royal blue.
Rnd 6: Sc around. (18)
Rnd 7: Sc around. (18)
Rnd 8: Sc around. (18)
Rnd 9: Sc around. (18)
Rnd 10: Sc around. (18)
Rnd 11: Sc around. (18)
Rnd 12: Sc around. (18)
Rnd 13: Sc around. (18)
Do not fasten off.
Leg 2 - Red Boot
With a fresh strand of red yarn:
Rnd 1: 6 sc in MR. (6)
Rnd 2: Inc around. (12)
Rnd 3: (Sc 1, inc) around. (18)
Rnd 4: Sc around. (18)
Rnd 5: Sc around. (18)
Change to blue by completing the final yarn-over of the last red stitch with blue.
Rnd 6: Sc around. (18)
Rnd 7: Sc around. (18)
Rnd 8: Sc around. (18)
Rnd 9: Sc around. (18)
Rnd 10: Sc around. (18)
Rnd 11: Sc around. (18)
Rnd 12: Sc around. (18)
Rnd 13: Sc around. (18)
Fasten off the second leg, leaving the blue yarn attached if possible, or reattach blue when joining the legs.
Stuff both legs firmly but avoid overstuffing.
Joining the Legs
Place the legs beside each other with the feet pointing forward.
The opening of each leg contains 18 stitches.
The body is created by crocheting around both legs and chaining across the crotch gaps.
Joining Round
With blue yarn attached to the first leg:
Rnd 14: Sc 18 around Leg 1, ch 4, sc 18 around Leg 2, ch 4, then join to the first sc with a sc. (44 sts)
The 4 chains at each side bridge the spaces between the legs.
You now have a continuous body circumference of 44 stitches.
Reduce the Crotch Area
Rnd 15: Sc 18, sc 2 across first ch-4 space, sc 18, sc 2 across second ch-4 space. (40)
Rnd 16: (Sc 3, dec) around. (32)
Rnd 17: Sc around. (32)
At this stage, gently add stuffing to the crotch and lower torso.
Blue Torso
Rnd 18: Sc around. (32)
Rnd 19: Sc around. (32)
Rnd 20: Sc around. (32)
Rnd 21: Sc around. (32)
Rnd 22: Sc around. (32)
Rnd 23: Sc around. (32)
Joining the Arms Directly to the Body
The arms are attached on the next round.
Position one arm on each side of the torso.
Each arm contains 12 stitches at the opening.
The first arm should occupy body stitches 5-16.
The second arm should occupy body stitches 21-32.
Stuff the arms lightly before attaching them.
Arm-Joining Round
Rnd 24:
- Sc 4.
- Place Arm 1 against the body.
- Sc through the next 12 body stitches and the 12 arm stitches together.
- Sc 4.
- Place Arm 2 against the body.
- Sc through the next 12 body stitches and the 12 arm stitches together.
(32 body stitches)
The arms are now securely incorporated into the torso without sewing.
Tip: Keep the arm stitches facing outward and the seam created by the joining stitches toward the underside/back of the arm. This gives the plush a cleaner front view.
Red Superhero Torso Band
Change from blue to red.
For a clean stripe, complete the final yarn-over of the last blue stitch using red yarn.
Rnd 25: Sc around. (32)
Rnd 26: Sc around. (32)
Rnd 27: Sc around. (32)
Rnd 28: Sc around. (32)
This creates the red chest section visible in the reference design.
Return to Blue
Change back to royal blue, again completing the final yarn-over of the previous stitch with blue.
Rnd 29: Sc around. (32)
Rnd 30: Sc around. (32)
Rnd 31: Sc around. (32)
Rnd 32: Sc around. (32)
Rnd 33: Sc around. (32)
Rnd 34: Sc around. (32)
Begin stuffing the torso firmly as you work. Add stuffing gradually rather than filling the entire body at once.
Transition Into the Oversized Red Head
Change to red.
Complete the final yarn-over of the last blue stitch with red.
Rnd 35: Sc around. (32)
This round creates the red neck-to-head transition.
Now begin increasing dramatically to create the characteristic large round head.
Rnd 36: (Sc 3, inc) around. (40)
Rnd 37: (Sc 4, inc) around. (48)
Rnd 38: (Sc 5, inc) around. (56)
Rnd 39: (Sc 6, inc) around. (64)
The head is now substantially wider than the torso.
Oversized Round Head
Rnd 40: Sc around. (64)
Rnd 41: Sc around. (64)
Rnd 42: Sc around. (64)
Rnd 43: Sc around. (64)
Rnd 44: Sc around. (64)
Rnd 45: Sc around. (64)
Rnd 46: Sc around. (64)
Rnd 47: Sc around. (64)
Begin stuffing the head.
Add fiberfill firmly around the cheeks, back, and crown while keeping the stitches smooth.
Rnd 48: Sc around. (64)
Rnd 49: Sc around. (64)
Rnd 50: Sc around. (64)
The head should now have a rounded, slightly oversized superhero-plush silhouette.
Shape the Crown
Begin decreasing gradually.
Rnd 51: (Sc 6, dec) around. (56)
Rnd 52: (Sc 5, dec) around. (48)
Rnd 53: (Sc 4, dec) around. (40)
Rnd 54: (Sc 3, dec) around. (32)
Add additional stuffing before the opening becomes too small.
Rnd 55: (Sc 2, dec) around. (24)
Rnd 56: (Sc 2, dec) around. (18)
Rnd 57: (Sc 1, dec) around. (12)
Rnd 58: Dec around. (6)
Cut the yarn, leaving a tail.
Using a tapestry needle, weave through the front loops of the remaining 6 stitches and pull firmly to close.
Weave the remaining yarn through several stitches inside the head and trim.
Details & Finishing Instructions
Creating the Black Spider Chest Logo
The small black spider emblem is one of the most important details because it immediately gives the plush its superhero identity.
Use black embroidery floss or thin black yarn.
Step 1: Spider Body
Locate the center of the red chest, approximately Rnd 25-28.
Create a small vertical oval approximately 8-10 mm tall.
Use several close satin stitches or tightly packed vertical stitches.
Step 2: Spider Head
Add a tiny round or oval directly above the body.
Keep it small so the logo remains proportional to the plush.
Step 3: Spider Legs
Create four legs on each side.
Use a single strand of black embroidery floss.
Starting near the center:
- First pair: angle slightly upward.
- Second pair: angle diagonally outward.
- Third pair: angle horizontally outward.
- Fourth pair: angle downward.
Each leg should consist of one clean continuous embroidered line rather than several bulky stitches.
The resulting spider should resemble a stylized eight-legged emblem.
Tip for Chenille Yarn
Chenille stitches can hide fine embroidery. Use slightly thicker black yarn if necessary, and gently separate the plush fibers with the tip of the tapestry needle before passing the black yarn through.
Embroidered Spiderweb Head Detail
The reference style has subtle black web lines radiating across the red head.
The web should remain delicate rather than covering the entire head.
Vertical Web Lines
Using black embroidery floss:
- Begin near the top-center of the head.
- Stitch a line downward toward the forehead.
- Add additional lines radiating from the central area.
- Curve the lines slightly so they follow the spherical shape of the head.
Horizontal Web Lines
Add short curved lines crossing between the radiating lines.
Do not make these rings perfectly straight.
Instead, create shallow arcs that follow the curvature of the head.
A good layout is:
- 1 central vertical line
- 2-4 diagonal lines on each side
- 3-4 curved connecting lines
Keep the embroidery subtle so the large white eyes remain the dominant facial feature.
Positioning the Eyes
Place the eyes approximately halfway down the head, leaving enough red space above them for the forehead.
The inner corners should point toward each other.
For the expressive superhero appearance:
- angle the upper edges downward toward the center;
- keep both eyes at the same height;
- leave a narrow red gap between them;
- position the outer corners slightly higher than the inner corners.
Once satisfied with the placement, attach the eyes securely with black embroidery thread or fabric-safe glue.
Final Shaping
Because chenille yarn can temporarily hide uneven stuffing, take a few minutes to shape the plush by hand.
Head
Gently massage the fiberfill toward:
- both cheeks,
- the back of the head,
- the crown.
The head should be round and noticeably larger than the torso.
Body
Push stuffing downward into the torso and hips to create a compact sitting-plush shape.
Legs
Make sure both feet point forward and sit at approximately the same height.
Arms
Angle the arms slightly outward and downward for the relaxed superhero pose shown in the reference.
Final Checklist
- Main body, legs, torso, and head are one continuous crocheted piece.
- Arms are crocheted directly into the torso rather than sewn on.
- Red boots transition cleanly into blue legs.
- Blue torso transitions into the red chest stripe.
- Red continues seamlessly into the oversized head.
- White almond-shaped eyes have a bold black border.
- Black spider emblem is embroidered onto the chest.
- Subtle black web lines decorate the red head.
- All stuffing is firmly enclosed.
- Remaining yarn tails are woven securely inside the plush and trimmed neatly.
Crocheted Elephant
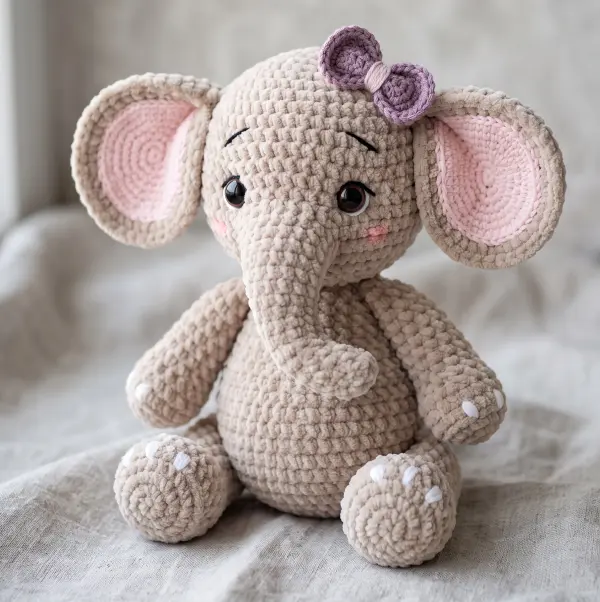
A soft, chubby, squishy crocheted elephant is one of those projects that is almost impossible to resist. With its oversized ears, tiny trunk, round belly, and cuddly chenille texture, this little elephant has the perfect handmade-toy look.
This beginner-friendly pattern is designed for quick crafting with plush yarn. The construction keeps the assembly simple, with parts attached using crochet stitches and slip stitches instead of traditional sewing. That makes it especially appealing if you love no-sew amigurumi and want a project you can finish in a short crafting session.
Easy No-Sew Crochet Turtle Pattern Quick Plush Make
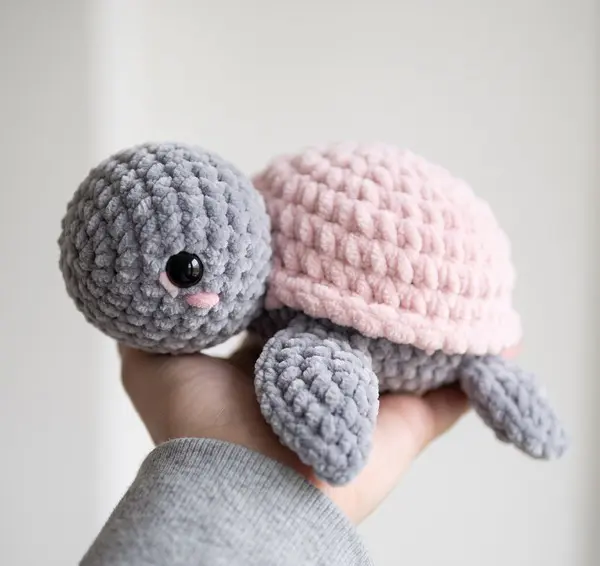
Create an irresistibly cute, chubby turtle inspired by the soft pastel plush in the photo. This Easy No-Sew Crochet Turtle Pattern uses chunky chenille yarn to create a soft, squishy texture and keeps the construction simple.
The head and body are crocheted as one continuous piece. The four flippers and tail are made first, flattened, and then crocheted directly into the body as you work. The pink shell is crocheted separately and attached with a crochet join rather than traditional needle sewing.
Easy No-Sew Crochet Minion Pattern
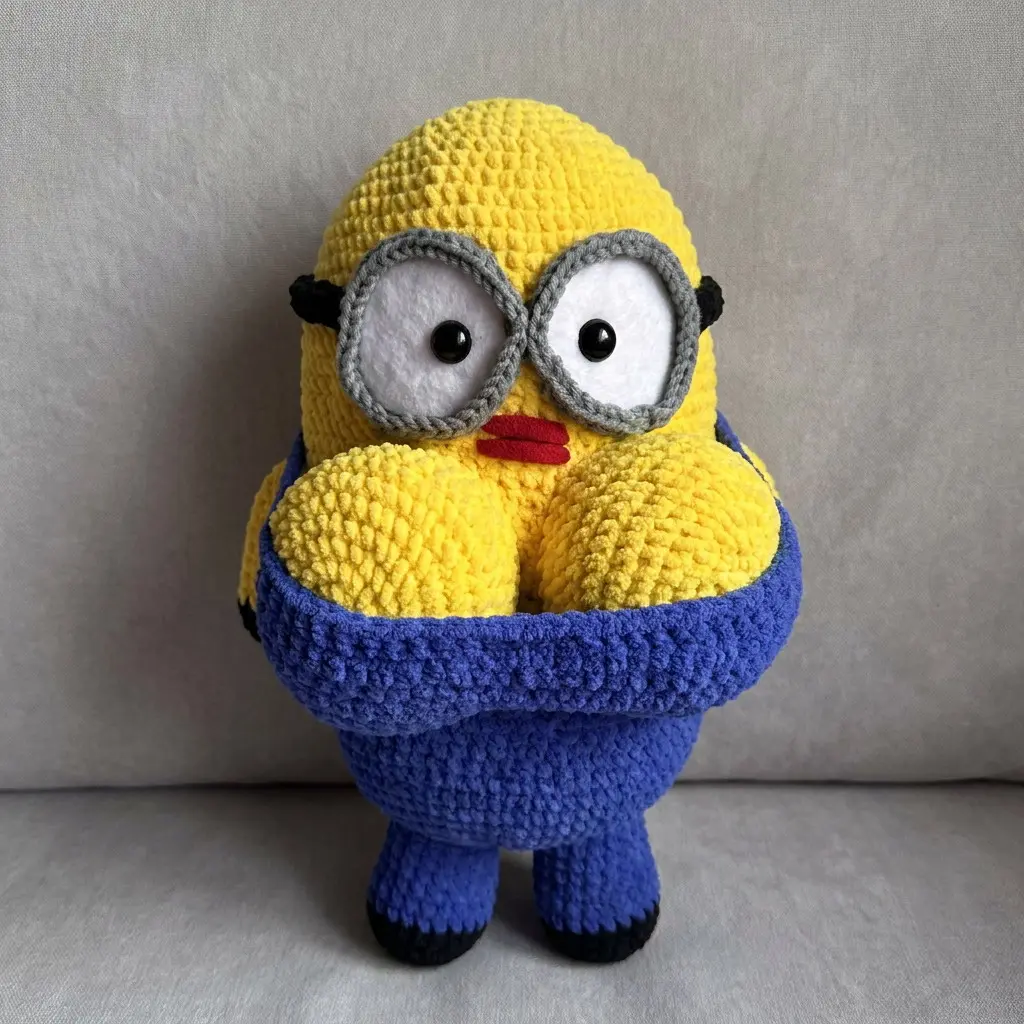
Easy No-Sew Crochet Minion Pattern - Chunky Plush Character-Inspired Amigurumi
Free No-Sew Crochet Koala Pattern
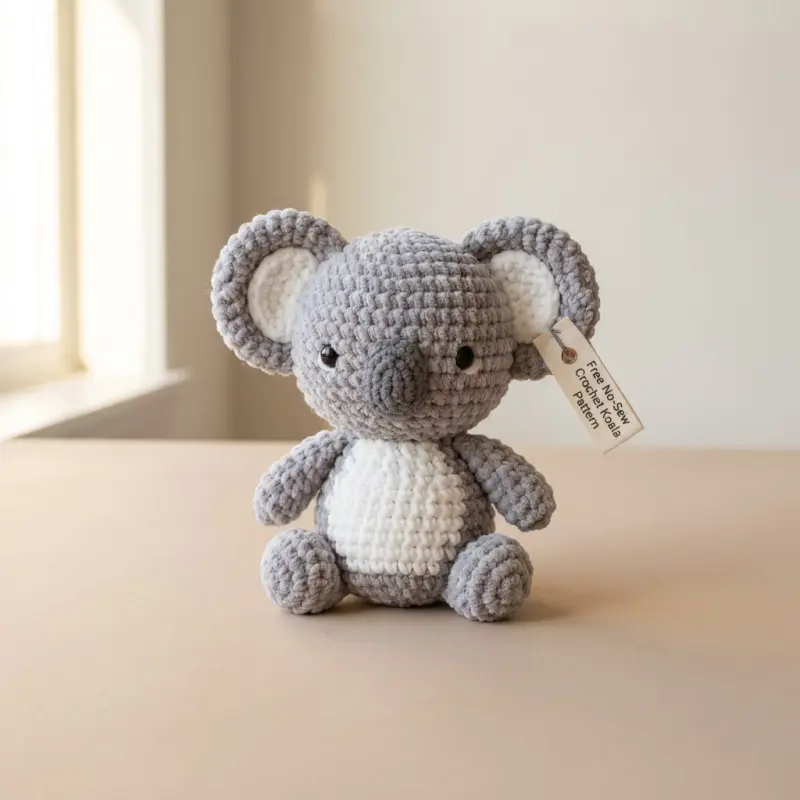
Create an irresistibly squishy Free No-Sew Crochet Koala Pattern with chunky chenille yarn, a round cuddly body, oversized ears, a soft white belly, tiny arms, and adorable little feet. This advanced-beginner amigurumi is designed so the major pieces are crocheted together as you work, eliminating traditional needle-sewn assembly.
The finished koala has the same plush, rounded character as the inspiration photo and works beautifully as a handmade gift, nursery decoration, key-sized plush variation, or craft-fair item.
Amigurumi Puppy
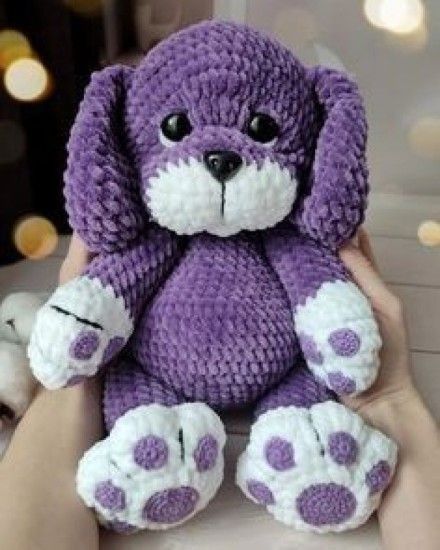
Create an irresistibly cuddly Amigurumi Puppy Crochet Pattern inspired by the adorable plush puppy shown in the photo. This chubby puppy features a deep violet body, oversized floppy ears, a soft white muzzle, and large white paws decorated with contrasting purple paw pads.
The pattern uses super bulky chenille yarn and is designed for advanced beginners who are comfortable crocheting amigurumi in continuous rounds, changing colors, increasing, decreasing, and sewing simple pieces together.