
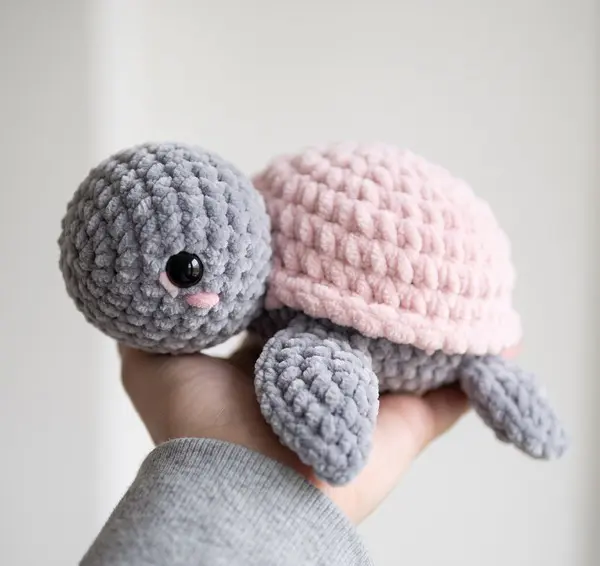
Create an irresistibly cute, chubby turtle inspired by the soft pastel plush in the photo. This Easy No-Sew Crochet Turtle Pattern uses chunky chenille yarn to create a soft, squishy texture and keeps the construction simple.
The head and body are crocheted as one continuous piece. The four flippers and tail are made first, flattened, and then crocheted directly into the body as you work. The pink shell is crocheted separately and attached with a crochet join rather than traditional needle sewing.
Skill Level: Advanced Beginner
Finished Size: Approximately 6-7 in (15-18 cm) long, depending on yarn and tension
Construction: No-sew main construction
US Crochet Terms
Materials & Tools
Yarn
Use plush, chunky chenille or velvet yarn similar to the texture shown in the photo.
- Gray chenille/velvet yarn: approximately 60-75 g
- Head
- Body
- Four flippers
- Tail
- Pastel pink chenille/velvet yarn: approximately 40-50 g
- Top shell
- Pink embroidery floss or thin pink yarn: small amount for the cheeks
Tools
- 5.0 mm crochet hook
- 12-14 mm black safety eyes
- Polyester fiberfill
- Stitch marker
- Small scissors
- Tapestry needle, optional for the embroidered cheeks
Important Note About the No-Sew Construction
The head, body, flippers, tail, and shell are not sewn together with a needle.
The flippers and tail are incorporated with your crochet hook while working the body. The shell is attached afterward with a crochet slip-stitch/sc join.
The only optional needle work is the tiny embroidered cheeks and hiding yarn tails.
Abbreviations
All terms are standard US crochet terminology.
| Abbreviation | Meaning |
|---|---|
| MR | Magic Ring |
| ch | Chain |
| sc | Single Crochet |
| inc | Increase - 2 sc in the same stitch |
| dec | Decrease - single crochet 2 stitches together |
| sl st | Slip Stitch |
| BLO | Back Loop Only |
| FLO | Front Loop Only |
| st/sts | Stitch/Stitches |
| R | Round |
| FO | Fasten Off |
Pattern note: Work the main pieces in continuous rounds unless otherwise stated. Use a stitch marker to identify the first stitch of each round.
Part 1: Flippers & Tail
These pieces are worked first in gray yarn. Do not stuff them.
They are intentionally made flat so they can be crocheted directly into the body later.
Front & Back Flippers - Make 4
Round 1
Start with a MR.
- 6 sc into the MR. (6)
Round 2
- inc in each stitch around. (12)
Round 3
- sc in the next stitch, inc in the next stitch.
- Repeat this sequence around. (18)
Round 4
- sc in the next 2 stitches, inc in the next stitch.
- Repeat around. (24)
Round 5
- sc in all 24 stitches. (24)
Round 6
- sc in all 24 stitches. (24)
FO, leaving a short yarn tail.
Do not add stuffing.
Flattening the Flipper
Lay the flipper flat and fold it in half so that the 24 stitches form 12 matching pairs.
Press the piece gently between your fingers.
Do not crochet around the folded edge yet. The 12 paired stitches will be incorporated into the body during Part 3.
Set all four flippers aside.
Tail
Use gray yarn.
Round 1
- 6 sc into a MR. (6)
Round 2
- inc in each stitch around. (12)
Round 3
- sc in all 12 stitches. (12)
Round 4
- sc in the next stitch, dec in the next 2 stitches.
- Repeat around. (8)
Round 5
- sc in all 8 stitches. (8)
FO, leaving a short yarn tail.
Do not stuff.
Flatten the tail so the 8 stitches form 4 matching pairs.
Set aside for the final body rounds.
Part 2: Top Shell
The shell is worked from the center outward in pastel pink chenille yarn.
Working several rounds in the BLO creates subtle horizontal ridges that give the shell the chunky, textured appearance seen in the photo.
The shell is intentionally kept lightly structured rather than heavily stuffed.
Shell
Use pastel pink yarn.
Round 1
Make a chain of 8.
- sc in the 2nd ch from hook.
- sc in the next 5 chains.
- 3 sc in the last chain.
- Working along the opposite side of the foundation chain, sc in the next 6 stitches.
- 2 sc in the first chain.
(17)
Round 2
- sc in the next 2 stitches, inc in the next stitch.
- Repeat this increase sequence 5 times.
- sc in the remaining 2 stitches.
(22)
Round 3
- sc in the next 3 stitches, inc in the next stitch.
- Repeat 5 times.
- sc in the remaining 2 stitches.
(27)
Round 4
- sc in the next 4 stitches, inc in the next stitch.
- Repeat 5 times.
- sc in the remaining 2 stitches.
(32)
Round 5
- sc in the next 7 stitches, inc in the next stitch.
- Repeat 4 times.
- sc in the remaining 4 stitches.
(36)
The shell should now have a rounded, slightly elongated shape.
Round 6 - Texture
- sc in BLO around. (36)
Round 7
- sc in BLO around. (36)
Round 8
- sc in BLO around. (36)
Round 9 - Raised Shell Edge
Working in the FLO:
- sc in FLO around. (36)
This creates a raised ridge around the bottom edge of the shell.
Round 10 - Edge Stabilizer
- sc through both loops around. (36)
FO and leave a long enough tail to hold the shell temporarily if needed.
Do not sew the shell to the body with a needle.
Set the shell aside while you crochet the complete gray body.
Part 3: Head & Bottom Body
This section creates the head and body as one continuous crocheted piece.
The construction begins with a rounded head. After the head is formed, the circumference continues backward into the smaller body area.
The shell will eventually sit over this gray body.
Use gray yarn.
Head
Round 1
- 6 sc into a MR. (6)
Round 2
- inc around. (12)
Round 3
- (sc, inc) around. (18)
Round 4
- (2 sc, inc) around. (24)
Round 5
- (3 sc, inc) around. (30)
Round 6
- (4 sc, inc) around. (36)
Round 7
- sc around. (36)
Round 8
- sc around. (36)
Round 9
- sc around. (36)
Round 10
- sc around. (36)
Round 11
- sc around. (36)
Round 12 - Head-to-Body Transition
- sc in BLO around. (36)
This BLO round creates a subtle change in texture where the rounded head flows into the body.
Insert the Safety Eyes
Before continuing too far, insert the safety eyes.
For the plush look shown in the photo:
- Place the eyes between Rounds 7 and 8.
- Position them on the front portion of the head.
- Leave approximately 8 stitches between the eye posts.
- Make sure both eyes are at the same height.
Use 12-14 mm safety eyes.
Embroidered Cheeks
Using pink embroidery floss or thin pink yarn, add a tiny horizontal oval or two small stitches directly underneath each eye.
Keep the cheeks small and subtle.
The cheeks should sit close to the eyes to create the sweet expression shown in the reference image.
Continue Into the Body
Round 13
- sc around. (36)
The head should now be clearly rounded, while the following rounds create the lower body beneath the shell.
Round 14 - Attach the First Two Flippers
Take the first flattened flipper.
You will crochet through both layers of the flipper and the body at the same time.
Work as follows:
- sc in the next 6 body stitches. (6)
- Place the flattened flipper against the body.
- Crochet through the next paired flipper stitches and the corresponding body stitches, making 12 sc through both layers. (12)
- sc in the next 6 body stitches. (6)
- Place the second flattened flipper on the opposite side.
- Crochet 12 sc through both layers of the second flipper and the corresponding body stitches. (12)
Total: 36 stitches
The flippers should point outward and slightly downward.
Do not stuff the flippers.
Round 15
- sc around all 36 stitches. (36)
Check that both flippers are firmly incorporated and hanging naturally.
Round 16 - Attach the Remaining Two Flippers
Position the other two flattened flippers slightly farther toward the rear of the body.
Work:
- sc in the next 6 stitches. (6)
- Crochet 12 sc through both layers of the third flipper and the corresponding body stitches. (12)
- sc in the next 6 stitches. (6)
- Crochet 12 sc through both layers of the fourth flipper and the corresponding body stitches. (12)
Total: 36 stitches
You now have all four flippers incorporated directly into the body.
Round 17
- sc around. (36)
Round 18
- sc around. (36)
At this point, gently begin adding fiberfill.
Stuff the head firmly enough to keep its round shape, but do not overfill it.
Continue adding stuffing into the body as you work.
Round 19
- (4 sc, dec) around. (30)
Round 20
- sc around. (30)
Round 21
- (3 sc, dec) around. (24)
Round 22
- sc around. (24)
Add more fiberfill.
Concentrate on the underside of the body so it remains rounded and plush.
Round 23
- (2 sc, dec) around. (18)
Round 24
- sc around. (18)
Add the final amount of stuffing.
Do not overstuff the rear section because the tail still needs to be incorporated.
Attach the Tail
Round 25
Take the flattened tail.
Its 8 stitches form 4 matching pairs.
Position the tail at the very rear of the body.
Work:
- sc in the next 15 body stitches. (15)
- Crochet through both layers of the tail and the next 4 body stitches, making 4 sc through both layers. (4)
Total: 19 stitches
To keep the final stitch count consistent with the following round, work a dec across the final two stitches of the round.
Round 25 final count: 18
The tail should extend from the center rear of the turtle and angle slightly upward.
Round 26
- (sc, dec) around. (12)
Round 27
- dec around. (6)
Add a small amount of stuffing if needed.
Do not overfill the very end.
FO.
Use your crochet hook to pull the remaining yarn tail inside the body. Secure it between several stitches and trim the excess.
Part 4: Crochet the Shell Onto the Body
The pink shell is attached without traditional sewing.
Place the shell over the gray body with the raised dome facing upward.
The shell should cover the middle and rear portion of the body while leaving the round gray head clearly visible.
The shell has 36 stitches around its edge, matching the 36-stitch body section.
Positioning
Before joining:
- Center the shell over the body.
- The shell should begin behind the head.
- The widest portion of the shell should sit over the four flippers.
- The rear of the shell should extend toward the tail.
- Make sure the pink shell edge sits evenly around the gray body.
Use a few stitch markers to hold the shell temporarily in position.
No-Sew Crochet Join
Attach pastel pink yarn to the shell edge.
Insert your hook through:
- The next stitch of the shell edge.
- The corresponding stitch on the gray body.
Yarn over and pull through both pieces.
Then complete a sc.
Continue around, making one sc through the shell edge and corresponding body stitch.
Work all 36 stitches.
36 sc
Slip stitch to the first stitch.
FO.
This creates a neat crocheted join while avoiding a traditional sewing seam.
The pink shell should now stay securely over the gray body.
Finishing Instructions
Shape the Turtle
Gently massage the plush into shape.
- Round out the head with your fingers.
- Smooth the gray body underneath the shell.
- Pull the four flippers gently outward.
- Angle the flippers slightly downward.
- Shape the tail into a small rounded point.
- Make sure the shell sits evenly around the body.
Because chenille yarn can hide stitches, gently fluff the fibers around any visible joins.
Shape the Shell
The shell should have a soft, domed appearance.
If the shell looks too flat, gently push a small amount of fiberfill underneath the pink dome before completing the final crochet join.
Use only a little stuffing.
The shell should remain soft and slightly squishy rather than stiff.
Hide the Yarn Ends
For a completely needle-free finish, use your crochet hook.
- Pull each remaining yarn tail to the inside of the toy.
- Thread it under several nearby stitches with the hook.
- Pull gently.
- Trim the excess yarn.
- Massage the chenille fibers over the end.
The small cheek ends can be hidden in the same way after the embroidered cheeks are finished.
Final Shape
Your finished turtle should have:
- A large, round gray head
- Two glossy black safety eyes
- Tiny pink rosy cheeks
- A soft gray body
- Four chunky gray flippers
- A small gray tail
- A rounded pastel pink shell
- A raised, textured shell edge
- A soft, squishy chenille finish
- No traditional sewing for the main construction
The combination of chunky velvet yarn, simple continuous rounds, and hook-joined appendages gives this turtle its characteristic soft, chubby, handmade plush look.
Crocheted Elephant
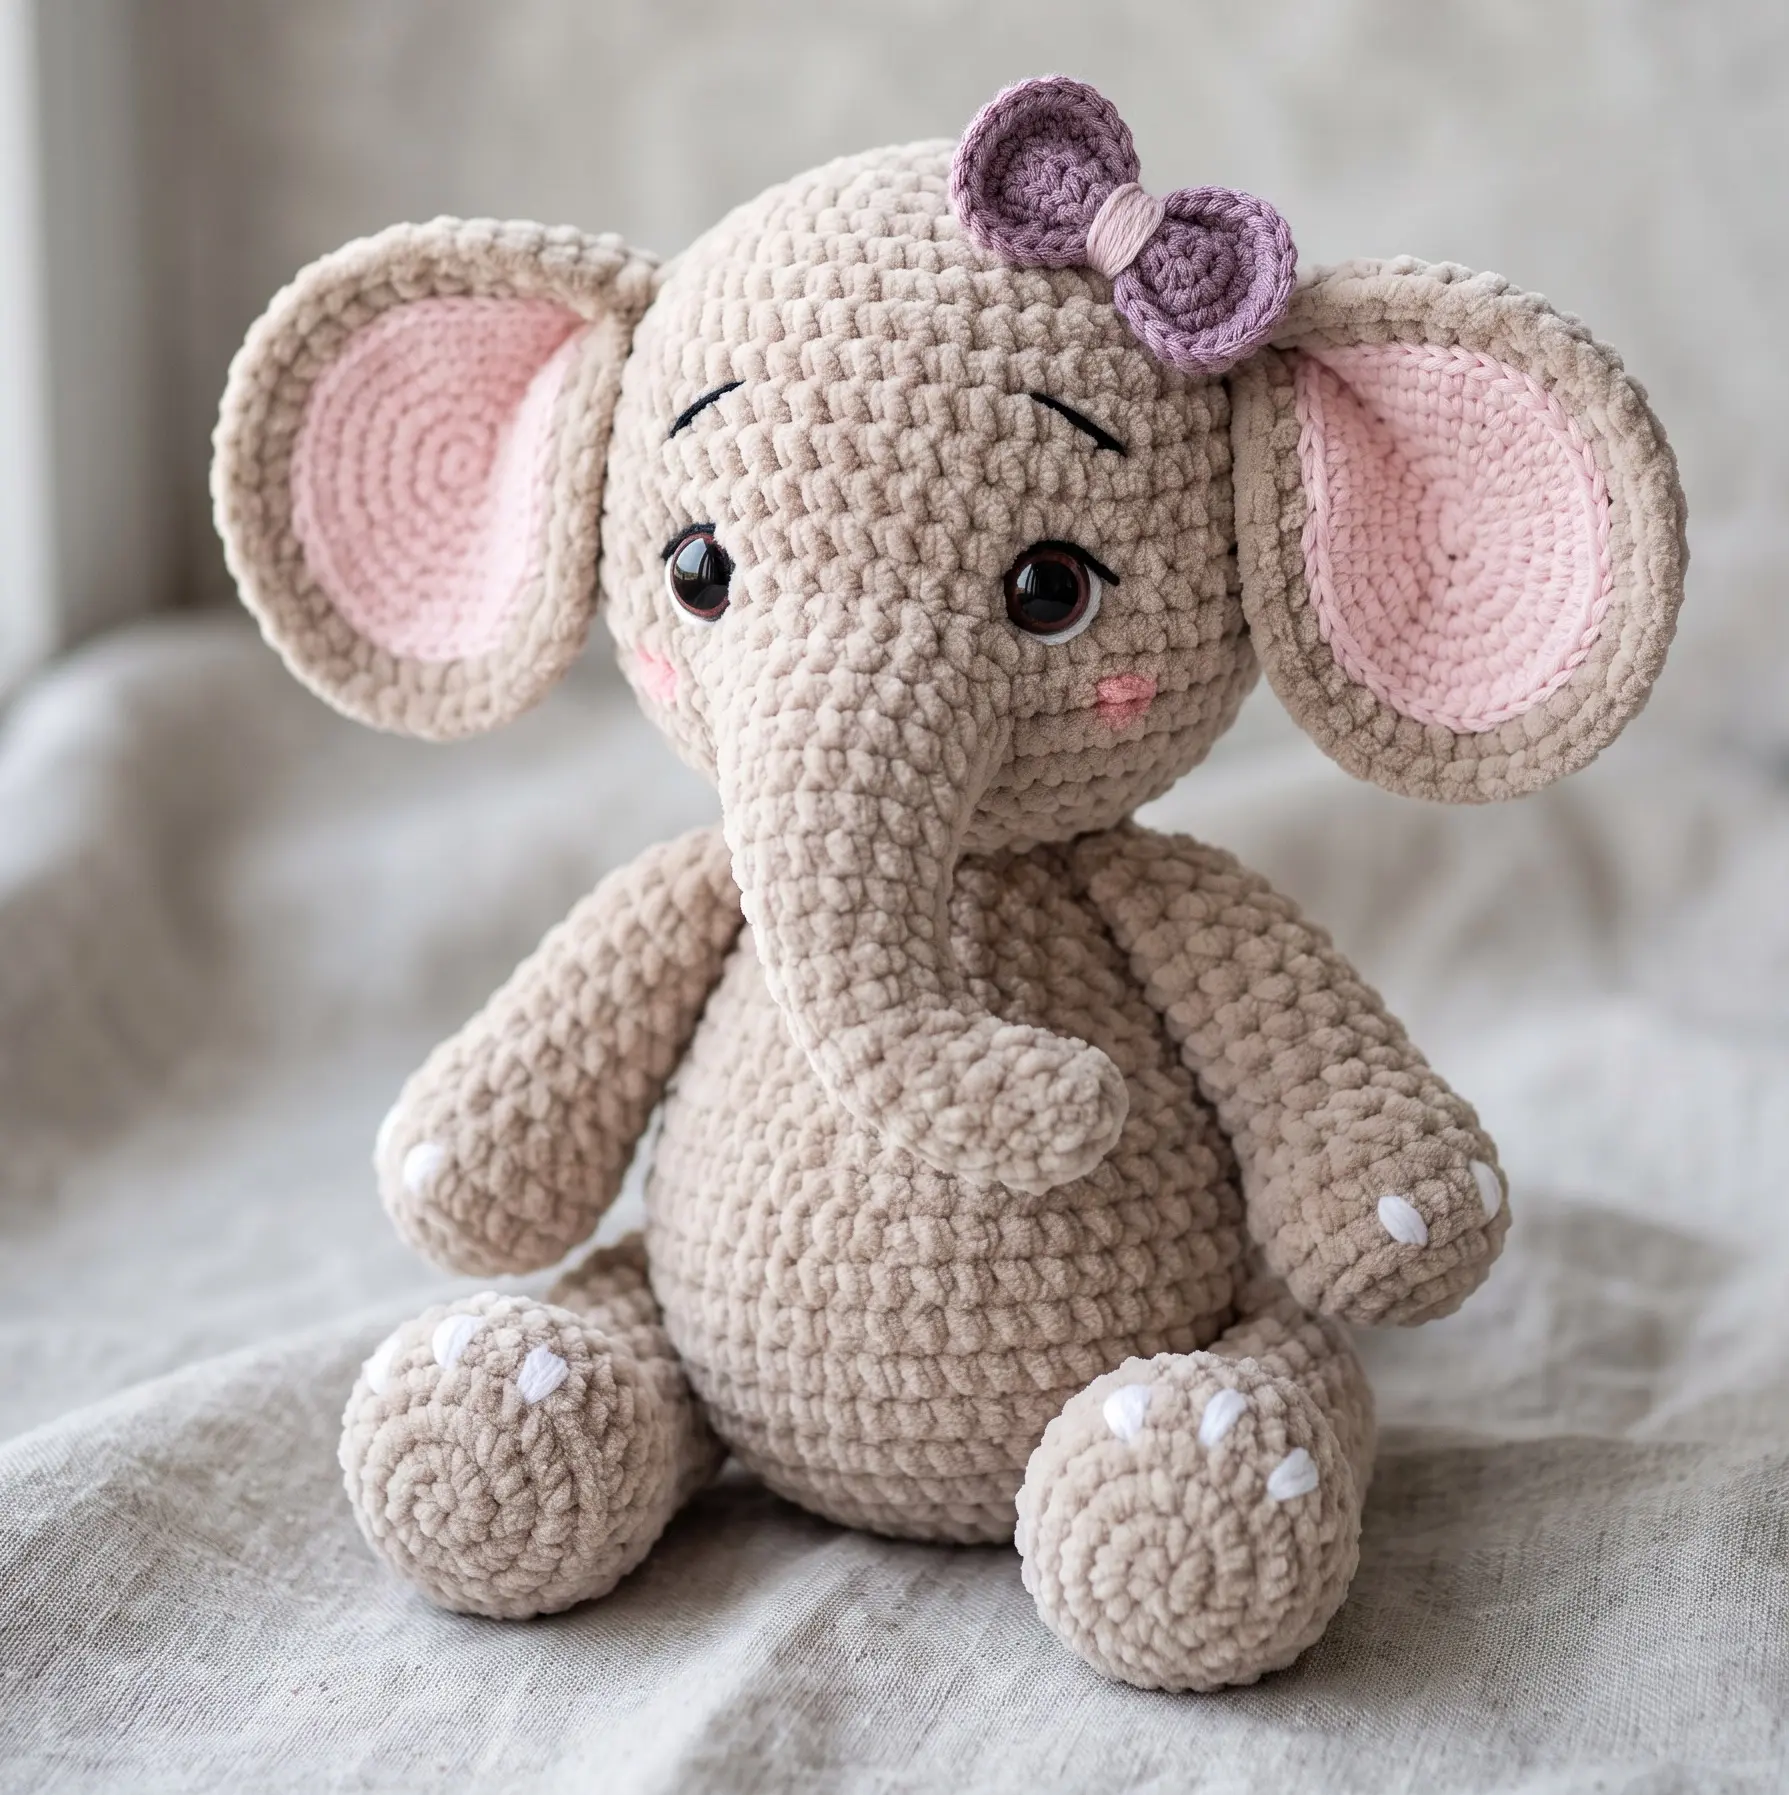
A soft, chubby, squishy crocheted elephant is one of those projects that is almost impossible to resist. With its oversized ears, tiny trunk, round belly, and cuddly chenille texture, this little elephant has the perfect handmade-toy look.
This beginner-friendly pattern is designed for quick crafting with plush yarn. The construction keeps the assembly simple, with parts attached using crochet stitches and slip stitches instead of traditional sewing. That makes it especially appealing if you love no-sew amigurumi and want a project you can finish in a short crafting session.
Easy No-Sew Crochet Monkey Pattern
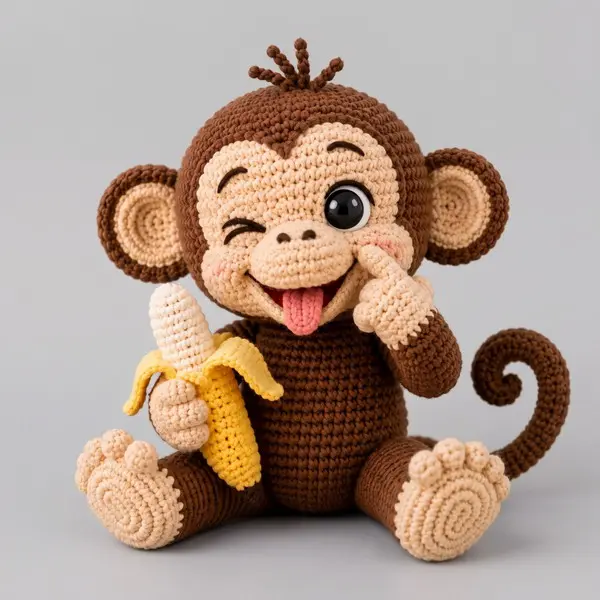
Meet your new favorite quick plush project: the Easy No-Sew Crochet Monkey Pattern! This cheeky little monkey is designed with a chubby body, oversized head, squishy cheeks, big ears, chunky feet, a curly tail, and a playful expression inspired by the monkey in the photo.
Easy No-Sew Crochet Bunny Pattern A Quick, Squishy Plush
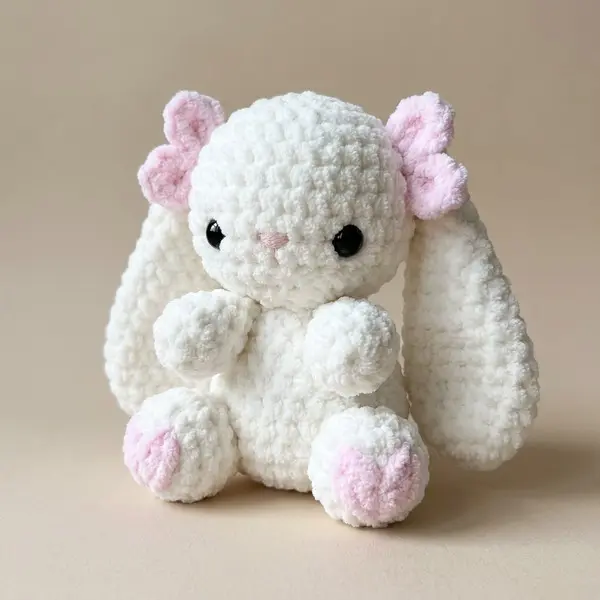
A super-soft bunny with long floppy ears, chubby paws, pink axolotl-style gills, and sweet little feet. This design is worked primarily in continuous rounds, with the ears, arms, feet, and pink gills crocheted onto the main piece using crochet joins rather than needle sewing.
Free No-Sew Crochet Koala Pattern
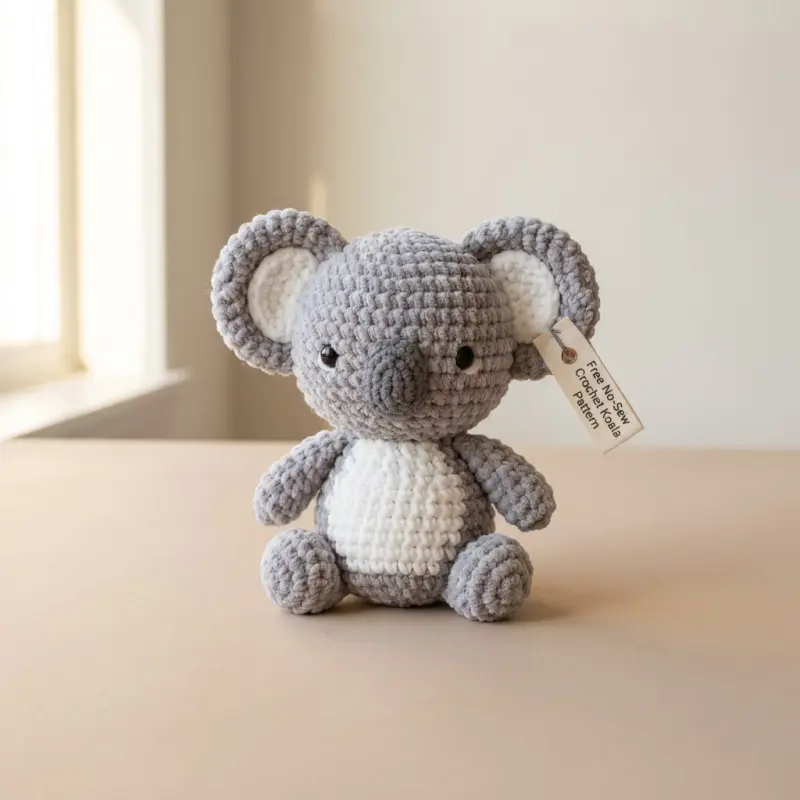
Create an irresistibly squishy Free No-Sew Crochet Koala Pattern with chunky chenille yarn, a round cuddly body, oversized ears, a soft white belly, tiny arms, and adorable little feet. This advanced-beginner amigurumi is designed so the major pieces are crocheted together as you work, eliminating traditional needle-sewn assembly.
The finished koala has the same plush, rounded character as the inspiration photo and works beautifully as a handmade gift, nursery decoration, key-sized plush variation, or craft-fair item.
Turtle-Themed Crochet Coaster Pattern
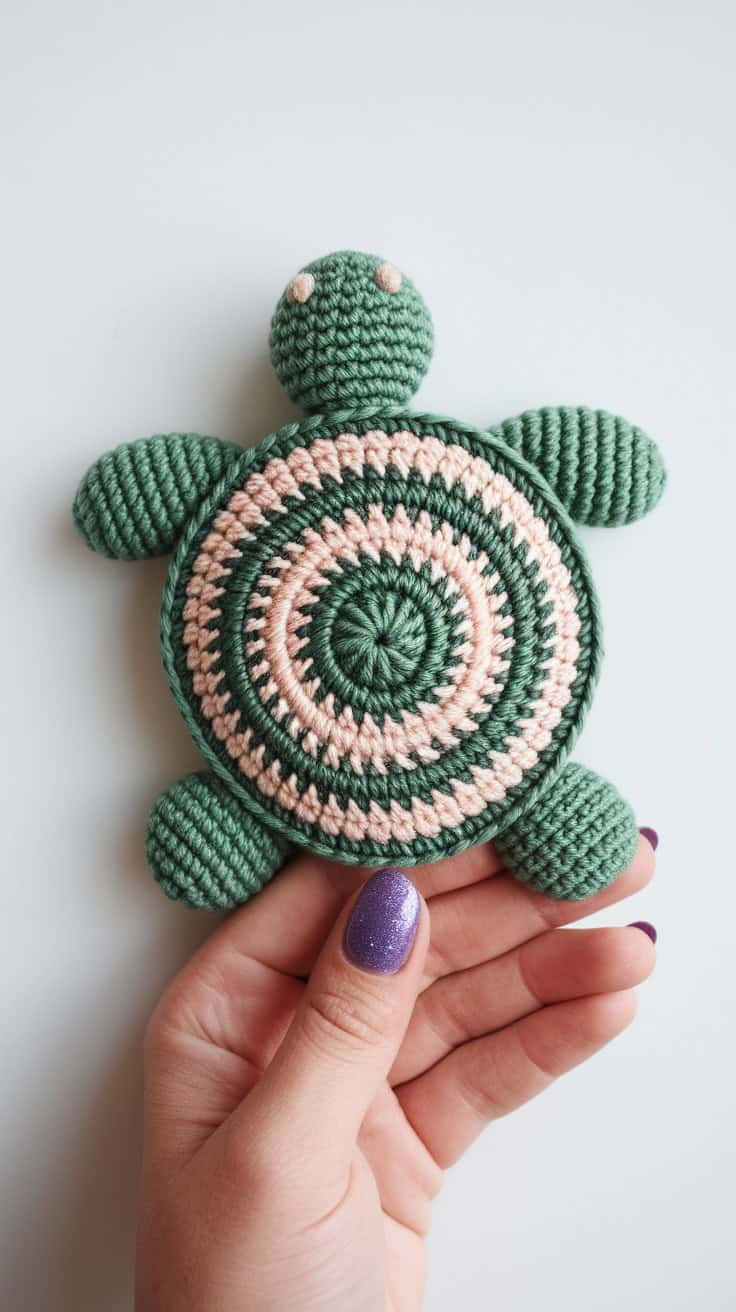
Easy Turtle-Themed Crochet Coaster Pattern: Cute No-Sew Quick Make
Engaging Introduction
This Turtle-Themed Crochet Coaster Pattern turns a simple round coaster into an adorable little turtle you can use, gift, or sell at craft fairs. Inspired by the soft sage-green and blush-pink turtle in the photo, this design features a beautifully striped shell, a rounded head, four raised flippers, and tiny eyes crocheted directly into the edge. Best of all, the entire turtle is 100% no-sew. There are no separate legs, head, or eyes to stitch onto the finished coaster. Everything is incorporated as you crochet. That makes this project especially convenient for beginner crocheters and craft-fair makers who want a polished finished product without a long finishing session. The flat shell works beautifully as a drink coaster, while the raised bobble features give it the unmistakable personality of a cute turtle. Use cotton yarn for a practical coaster, or soft acrylic yarn when making this as a decorative turtle motif.