
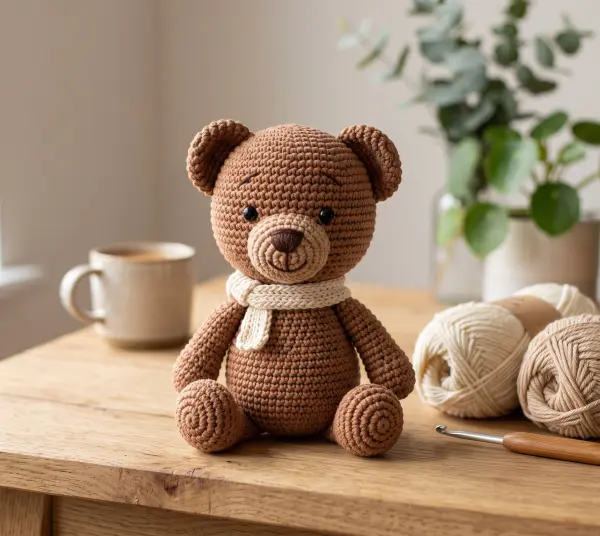
If you have always wanted to dive into the magical world of soft toy making, this free amigurumi teddy bear pattern is the perfect place to start! Designed specifically with beginners in mind, this project uses basic stitches and simple assembly to help you craft your very first handmade plush friend.
Grab your favorite yarn, warm up your hands, and let's get stitching!
Abbreviations, Materials Needed
Before we begin, make sure you are familiar with these standard US crochet terms:
- MR: Magic Ring
- SC: Single Crochet
- INC: Increase (2 single crochets in the same stitch)
- DEC: Invisible Decrease (crochet 2 stitches together using front loops only)
- ST: Stitch
What you will need:
- Medium-weight yarn (worsted or blanket yarn) in brown or beige
- A 3.5mm crochet hook (or size matching your yarn)
- 8mm safety eyes
- Fiberfill stuffing
- Yarn needle and scissors
Step-by-Step Pattern
1. The Head and Body (Worked as one piece)
We will start from the top of the head and work down to the bottom of the body. Stuff firmly as you go!
- Round 1: 6 SC in a Magic Ring (6)
- Round 2: INC in every stitch around (12)
- Round 3: [1 SC, INC] repeat 6 times (18)
- Round 4: [2 SC, INC] repeat 6 times (24)
- Round 5-9: SC in each stitch around (24) - Insert safety eyes between rounds 7 and 8, about 5 stitches apart.
- Round 10: [2 SC, DEC] repeat 6 times (18)
- Round 11: [1 SC, DEC] repeat 6 times (12) - Stuff the head firmly.
- Round 12: [1 SC, INC] repeat 6 times (18) - Moving into the body!
- Round 13-16: SC in each stitch around (18)
- Round 17: [1 SC, DEC] repeat 6 times (12) - Stuff the body firmly.
- Round 18: DEC around 6 times (6)
Fasten off, weave in the tail, and close the remaining hole using your yarn needle.
2. The Ears (Make 2)
- Round 1: 6 SC in a Magic Ring (6)
- Round 2: [1 SC, INC] repeat 3 times (9)
- Round 3: SC around in each stitch (9)
Fasten off, leaving a long tail for sewing. Do not stuff the ears. Flatten them out.
3. The Muzzle (Make 1)
- Round 1: 6 SC in a Magic Ring (6)
- Round 2: INC in every stitch around (12)
Fasten off, leaving a long tail. Use a small piece of black yarn to embroider a cute triangular nose onto the muzzle before attaching it.
4. The Arms and Legs (Make 4)
- Round 1: 6 SC in a Magic Ring (6)
- Round 2-5: SC in each stitch around (6)
Fasten off, leaving a long tail. Lightly stuff the tips of the limbs.
Assembly Guide
Now comes the fun part - bringing your teddy bear to life! Follow these simple steps for sewing:
- The Muzzle: Sew the muzzle to the face, centering it right between and slightly below the safety eyes. Add a little bit of stuffing underneath before completely sealing it.
- The Ears: Sew the flattened ears onto the top of the head, between rounds 3 and 6.
- The Limbs: Attach the arms just below the neck seam (round 12) and the legs near the bottom of the body (round 16) so your little bear can sit down comfortably.
Congratulations! Your very first handmade amigurumi teddy bear is complete. 🎉
Did you enjoy this beginner-friendly tutorial? Feel free to share your creations and tag WeaveCrochet on social media. Happy crafting!
Crocheted Giraffe
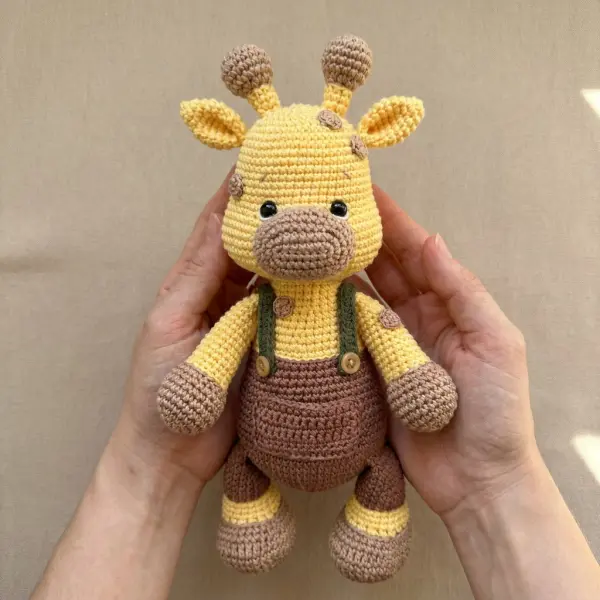
This adorable crocheted giraffe is a fun, beginner-friendly amigurumi project inspired by the sweet handmade giraffe in the photo. With a round head, tiny muzzle, floppy ears, tall ossicones, chunky legs, and cute little overalls, this plush has an irresistibly squishy personality.
The pattern is designed for quick crafting and simple construction. Most of the major pieces are worked directly onto the body with crochet stitches or slip stitches, keeping assembly to a minimum. There is no complicated garment sewing or difficult shaping.
Crocheted Elephant
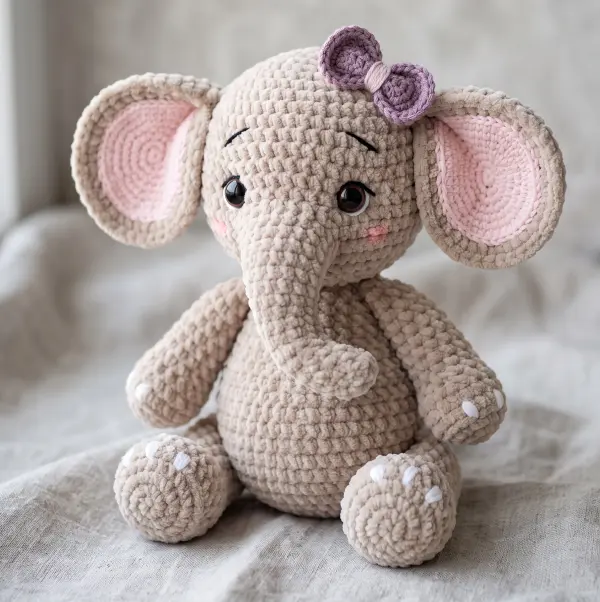
A soft, chubby, squishy crocheted elephant is one of those projects that is almost impossible to resist. With its oversized ears, tiny trunk, round belly, and cuddly chenille texture, this little elephant has the perfect handmade-toy look.
This beginner-friendly pattern is designed for quick crafting with plush yarn. The construction keeps the assembly simple, with parts attached using crochet stitches and slip stitches instead of traditional sewing. That makes it especially appealing if you love no-sew amigurumi and want a project you can finish in a short crafting session.
Easy No-Sew Crochet Turtle Pattern Quick Plush Make
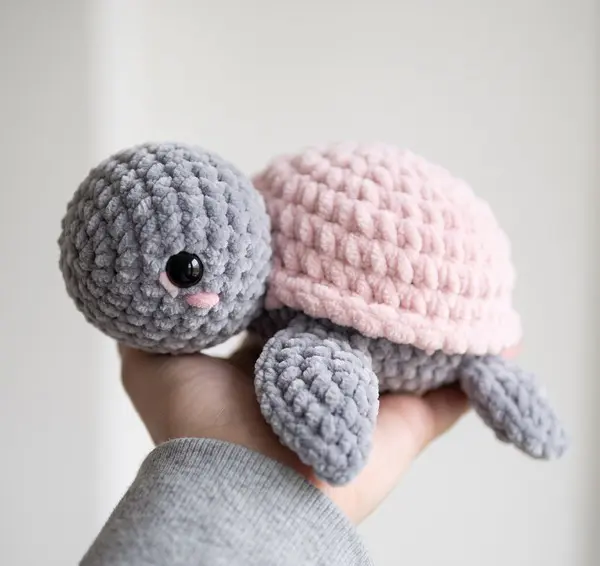
Create an irresistibly cute, chubby turtle inspired by the soft pastel plush in the photo. This Easy No-Sew Crochet Turtle Pattern uses chunky chenille yarn to create a soft, squishy texture and keeps the construction simple.
The head and body are crocheted as one continuous piece. The four flippers and tail are made first, flattened, and then crocheted directly into the body as you work. The pink shell is crocheted separately and attached with a crochet join rather than traditional needle sewing.
Amigurumi Puppy
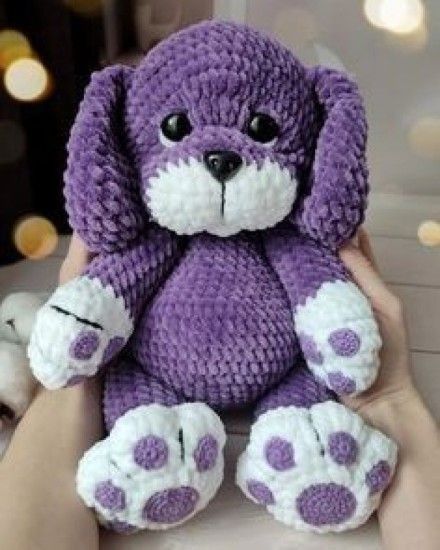
Create an irresistibly cuddly Amigurumi Puppy Crochet Pattern inspired by the adorable plush puppy shown in the photo. This chubby puppy features a deep violet body, oversized floppy ears, a soft white muzzle, and large white paws decorated with contrasting purple paw pads.
The pattern uses super bulky chenille yarn and is designed for advanced beginners who are comfortable crocheting amigurumi in continuous rounds, changing colors, increasing, decreasing, and sewing simple pieces together.
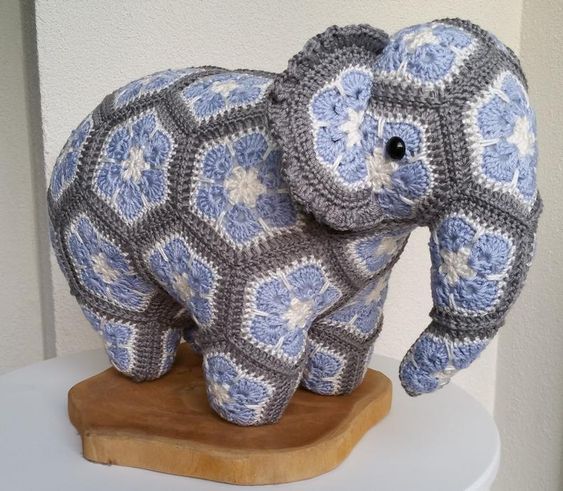
African flower crochet elephant free pattern
Materials and Tools
Yarn
Use a smooth, tightly spun sport or DK-weight cotton/cotton-blend yarn so the motifs remain crisp after joining and stuffing.
- Gray: approximately 100-120 g - outer framing, joining, and structural seams
- Light blue: approximately 70-90 g - flower petals
- Cream/white: approximately 40-60 g - flower centers and petal outlines
- Total: approximately 220-270 g
The exact amount will vary according to yarn brand, tension, and finished size.