
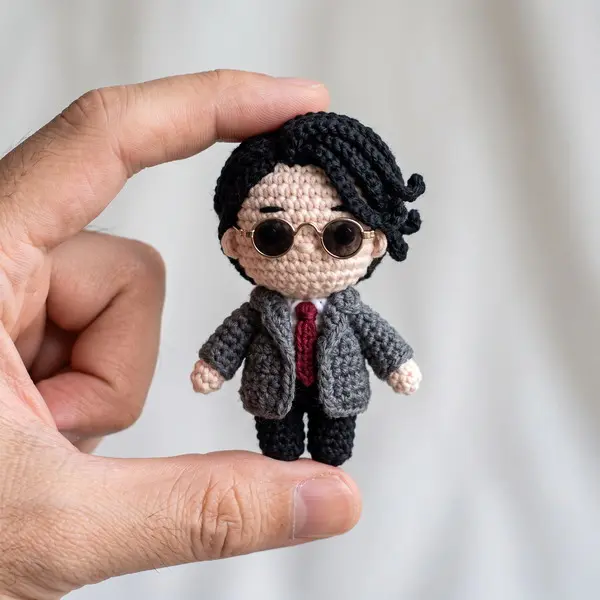
This tiny crochet wizard doll is designed as a quick, beginner-friendly project with a cute, chubby amigurumi shape. Inspired by the handmade wizard-style doll shown in the photo, this version features round glasses, tousled black hair, a gray jacket, a red tie, and little black shoes.
The entire doll is designed with a no-sew construction. The legs are joined directly to the body, the arms are crocheted directly from the body, and the hair, jacket details, and tie are added with crochet techniques rather than sewn-on pieces.
It is an especially fun project for anyone who loves miniature dolls, bookish characters, magical themes, or quick handmade gifts.
Why This Crochet Wizard Doll Is a Must-Make
Small crochet dolls are incredibly popular for good reason. They are quick to make, easy to customize, and use relatively little yarn.
This wizard-inspired doll makes a great:
-
Craft-fair item
-
Handmade gift
-
Backpack charm
-
Desk decoration
-
Book-lover gift
-
Party favor
-
Stash-buster project
-
Beginner amigurumi project
-
Magical-themed nursery or shelf decoration
The chubby proportions make the finished doll extra cute and squishy. You can also change the hair, skin, jacket, and tie colors to create completely different characters.
Design note: This is an original wizard-inspired amigurumi design based on the visual features in the supplied photo. It is not intended to reproduce any specific copyrighted character.
Skill Level & Prerequisites
Skill Level: Easy / Beginner-Friendly
You should be comfortable with:
-
Making a Magic Ring
-
Working single crochet
-
Increasing
-
Decreasing
-
Working in continuous rounds
-
Changing yarn colors
-
Basic surface crochet
-
Stuffing amigurumi
-
Inserting safety eyes
The body is made mostly with simple sc stitches. The no-sew arm construction is the only technique that may feel slightly different at first.
Materials & Tools Needed
-
Worsted-weight or soft chenille yarn in:
-
Skin tone
-
Black
-
Charcoal or medium gray
-
Red
-
-
4.0 mm crochet hook for worsted yarn
-
4.5 mm crochet hook if using thicker chenille yarn
-
Pair of 8 mm safety eyes
-
Small pair of round doll glasses, approximately 25–30 mm wide
-
Polyester fiberfill stuffing
-
Stitch marker
-
Tapestry needle for hiding yarn tails
-
Small scissors
-
Optional: black embroidery thread for eyebrows
-
Optional: a tiny amount of white felt or embroidery thread for eye highlights
Yarn Tip
For a tiny doll like this, medium-weight yarn produces more recognizable facial details than super-bulky yarn.
If you use velvet or chenille yarn, choose a hook size that creates a firm fabric so the stuffing does not show through.
Abbreviations Used
| Abbreviation | Meaning |
|---|---|
| MR | Magic Ring |
| sc | Single Crochet |
| inc | Increase |
| dec | Invisible Decrease |
| ch | Chain |
| sl st | Slip Stitch |
| st | Stitch |
| sts | Stitches |
| BLO | Back Loop Only |
| FLO | Front Loop Only |
The pattern uses standard US crochet terminology.
Finished Size
Using worsted-weight yarn and a 4.0 mm hook, the finished doll should measure approximately:
-
5–6 inches tall
-
About 2½ inches wide
Your exact size will depend on yarn weight, hook size, and crochet tension.
Step-by-Step Crochet Pattern
Important Pattern Notes
Work the main body in continuous rounds unless otherwise stated.
Place a stitch marker in the first stitch of each round.
Keep your stitches tight.
Stuff gradually rather than waiting until the very end.
The stitch counts shown at the end of every round are the total stitches for that round.
Legs and Body
Start with black yarn.
You will crochet the two legs first and then join them directly together.
Left Leg
Round 1: 6 sc in MR. (6 sts)
Round 2: Inc in each stitch around. (12 sts)
Round 3: Sc in each stitch around. (12 sts)
Round 4: Sc in each stitch around. (12 sts)
Round 5: Sc in each stitch around. (12 sts)
Round 6: Sc in each stitch around. (12 sts)
Round 7: Sc in each stitch around. (12 sts)
Fasten off and weave in the short tail.
Do not stuff the leg yet.
Right Leg
Repeat the same construction, but do not fasten off after Round 7.
Round 1: 6 sc in MR. (6 sts)
Round 2: Inc in each stitch around. (12 sts)
Round 3: Sc in each stitch around. (12 sts)
Round 4: Sc in each stitch around. (12 sts)
Round 5: Sc in each stitch around. (12 sts)
Round 6: Sc in each stitch around. (12 sts)
Round 7: Sc in each stitch around. (12 sts)
Do not fasten off.
Join the Legs
Place the legs next to each other with the feet facing forward.
Continue from the second leg.
Round 8: Sc in all 12 sts of the second leg, ch 2, sc in all 12 sts of the first leg, sc in both sides of the connecting chain. (28 sts)
The chain bridge closes the gap between the legs.
Body
Change to charcoal gray yarn.
Round 9: Sc in each stitch around. (28 sts)
Round 10: Sc in each stitch around. (28 sts)
Round 11: Sc in each stitch around. (28 sts)
Round 12: (6 sc, inc) repeat around. (32 sts)
Round 13: Sc in each stitch around. (32 sts)
Round 14: (7 sc, inc) repeat around. (36 sts)
Round 15: Sc in each stitch around. (36 sts)
Round 16: Sc in each stitch around. (36 sts)
Round 17: Sc in each stitch around. (36 sts)
At this point, begin adding the integrated arms.
No-Sew Arms
The arms are crocheted directly from the body, so there is no separate arm to sew on.
Work the first arm when you reach the side of the body.
First Arm
At the designated side stitch:
Arm Round: Ch 6, sc in the 2nd ch from hook, sc in next 4 ch, sl st into the same body stitch. (5 arm sts)
This creates a narrow arm extension.
Continue crocheting around the body from the next body stitch.
Continue the Body
Round 18: Sc in the next 9 body sts, work the first arm as instructed above, sc in the next 9 body sts, work the second arm in the same manner. (36 body sts + 10 arm sts)
For the second arm:
Ch 6, sc in the 2nd ch from hook, sc in next 4 ch, sl st into the same body stitch.
The arms remain attached to the body because their base is crocheted directly into the body stitches.
Finish the Torso
Round 19: Sc in each body stitch around. When you reach each arm attachment, work 2 sc around the arm base to reinforce the connection. (36 sts)
Round 20: Sc in each stitch around. (36 sts)
Round 21: (4 sc, dec) repeat around. (30 sts)
Round 22: Sc in each stitch around. (30 sts)
Round 23: (3 sc, dec) repeat around. (24 sts)
Begin stuffing the body firmly.
Round 24: Sc in each stitch around. (24 sts)
Round 25: (2 sc, dec) repeat around. (18 sts)
Round 26: Sc in each stitch around. (18 sts)
Round 27: (sc, dec) repeat around. (12 sts)
Stuff the torso firmly.
Round 28: Sc in each stitch around. (12 sts)
Do not fasten off.
Head
Change to skin-tone yarn.
The head is worked directly from the neck, eliminating the need to sew the head onto the body.
Round 29: Sc in each stitch around. (12 sts)
Round 30: Inc in each stitch around. (24 sts)
Round 31: (sc, inc) repeat around. (36 sts)
Round 32: (2 sc, inc) repeat around. (48 sts)
Round 33: Sc in each stitch around. (48 sts)
Round 34: Sc in each stitch around. (48 sts)
Round 35: Sc in each stitch around. (48 sts)
Round 36: Sc in each stitch around. (48 sts)
Round 37: Sc in each stitch around. (48 sts)
Insert the Safety Eyes
Place the eyes between Rounds 34 and 35.
Position them approximately 8-10 stitches apart.
Because the glasses will sit over the eyes, check the placement from the front before locking the backs into position.
Round 38: (6 sc, dec) repeat around. (42 sts)
Round 39: (5 sc, dec) repeat around. (36 sts)
Round 40: (4 sc, dec) repeat around. (30 sts)
Begin adding more stuffing.
Round 41: (3 sc, dec) repeat around. (24 sts)
Round 42: (2 sc, dec) repeat around. (18 sts)
Add a final small amount of stuffing.
Round 43: (sc, dec) repeat around. (12 sts)
Round 44: Dec around. (6 sts)
Cut the yarn.
Thread the yarn through the remaining 6 stitches, pull closed, and hide the yarn tail inside the head.
Simple Amigurumi Ears
The ears can be added without sewing by using surface crochet.
Using skin-tone yarn, insert the hook into the side of the head around the eye level.
For the first ear:
-
Ch 2.
-
Work 4 sc around the base area.
-
Sl st back into the head.
-
Fasten off.
-
Pull the yarn tail inside the head.
Repeat the same crochet process on the opposite side.
Because the ears are tiny, they only need a subtle rounded shape.
No-Sew Black Hair
The hair is one of the most important details in the finished doll.
Instead of crocheting a separate wig and sewing it onto the head, work the hair directly over the head using black yarn and surface crochet.
Hair Cap
Attach black yarn at the back of the head.
Work surface sc following the curve of the head.
Create approximately:
-
12 surface sc across the back
-
18 surface sc around the upper sides
-
12 surface sc across the forehead
-
8–10 additional surface sc along the side where the curls fall
The exact placement can be adjusted to match the hairstyle you want.
Curled Side Locks
For each curl:
-
Insert your hook into a black hair stitch.
-
Ch 8.
-
Work 2 sc into each chain stitch.
-
Sl st back into the hair cap.
-
Repeat with shorter chains for smaller curls.
For a more textured hairstyle, make curls using chains of:
-
5 chains
-
7 chains
-
9 chains
-
11 chains
Curl the longer chains around your finger before releasing them.
This creates the tousled, chunky hairstyle shown in the inspiration photo.
No sewing is necessary.
No-Sew Gray Jacket Details
The gray body already forms the base of the jacket.
To create the visual opening of the cardigan, use gray or a slightly darker charcoal yarn for surface crochet.
Starting at the neckline:
-
Surface sl st down the left front.
-
Continue around the lower edge.
-
Surface sl st back up the right front.
-
Add a second line beside each front edge for a thicker jacket border.
This creates the appearance of a miniature open jacket without crocheting and sewing a separate garment.
Jacket Sleeves
Use surface crochet along each arm.
Work a line of sc from the shoulder toward the wrist.
Add another line beside it.
This gives the arms a fuller, jacket-like appearance.
At the wrist, work 3–4 surface sc in a small circle to create a cuff.
Crochet Tie
Use red yarn.
Attach the yarn directly below the neck.
Row 1: Ch 3, sc in 2nd ch from hook, sc in next ch. (2 sts)
Row 2: Ch 1, turn, sc in each stitch across. (2 sts)
Row 3: Ch 1, turn, sc in each stitch across. (2 sts)
Row 4: Ch 1, turn, dec across. (1 st)
Row 5: Ch 1, turn, sc in the stitch. (1 st)
Row 6: Ch 1, turn, 2 sc in the stitch. (2 sts)
Row 7: Ch 1, turn, sc in each stitch across. (2 sts)
Row 8: Ch 1, turn, sc in each stitch across. (2 sts)
Fasten off.
Instead of sewing the tie onto the body, use surface slip stitches to anchor it vertically down the center of the shirt.
Hide the yarn tail inside the torso.
Collar
Use charcoal or black yarn.
At the neckline, work:
-
Sl st into the first neckline stitch.
-
Ch 2.
-
Sc into the next 2 stitches.
-
Sl st into the next stitch.
Repeat on the opposite side.
This creates two small collar points around the red tie.
Eyebrows
Using black embroidery thread or thin black yarn, add two short eyebrows above the eyes.
Keep them slightly curved.
For a more expressive face, angle them very slightly downward toward the center.
This tiny detail makes a surprisingly big difference.
Glasses
The easiest option is a miniature pair of round doll glasses.
Place them over the safety eyes.
For a completely handmade version, you can use thin craft wire formed into two small circles connected at the bridge.
Make sure any wire ends are completely covered and secured before giving the finished doll to a child.
Finishing Touches
Your little wizard doll is almost finished!
Use these quick tips to improve the final shape.
Make the Head Round
Massage the stuffing gently with your fingers.
Push stuffing evenly into the cheeks, forehead, and back of the head.
Avoid creating hard lumps.
Shape the Feet
Add a little extra stuffing to the lower portions of the black legs.
This gives the doll a more stable, chunky appearance.
Shape the Jacket
Gently pinch the gray torso on both sides.
This creates the slightly tapered jacket silhouette visible in the inspiration photo.
Make the Hair Fuller
Add extra black surface-crochet curls around the right side of the head.
Longer curls create a more playful, tousled appearance.
Keep the Face Centered
Before permanently securing the glasses, check the doll from:
-
Front
-
Left side
-
Right side
Make sure the eyes, glasses, nose area, and tie all appear centered.
Hide Every Yarn Tail
Pull each remaining tail into the body with a tapestry needle.
Run it through several stitches.
Trim the excess close to the fabric.
Crocheted Giraffe
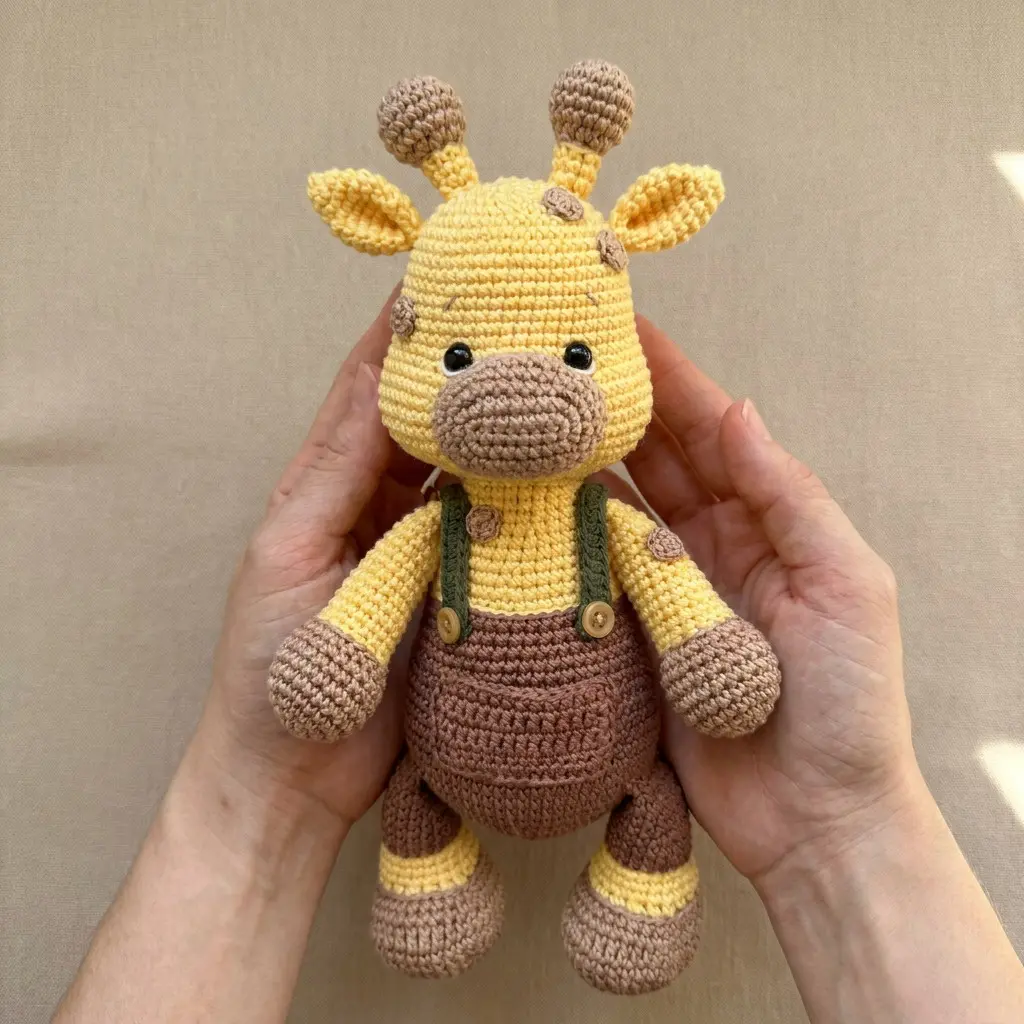
This adorable crocheted giraffe is a fun, beginner-friendly amigurumi project inspired by the sweet handmade giraffe in the photo. With a round head, tiny muzzle, floppy ears, tall ossicones, chunky legs, and cute little overalls, this plush has an irresistibly squishy personality.
The pattern is designed for quick crafting and simple construction. Most of the major pieces are worked directly onto the body with crochet stitches or slip stitches, keeping assembly to a minimum. There is no complicated garment sewing or difficult shaping.
Crocheted Elephant
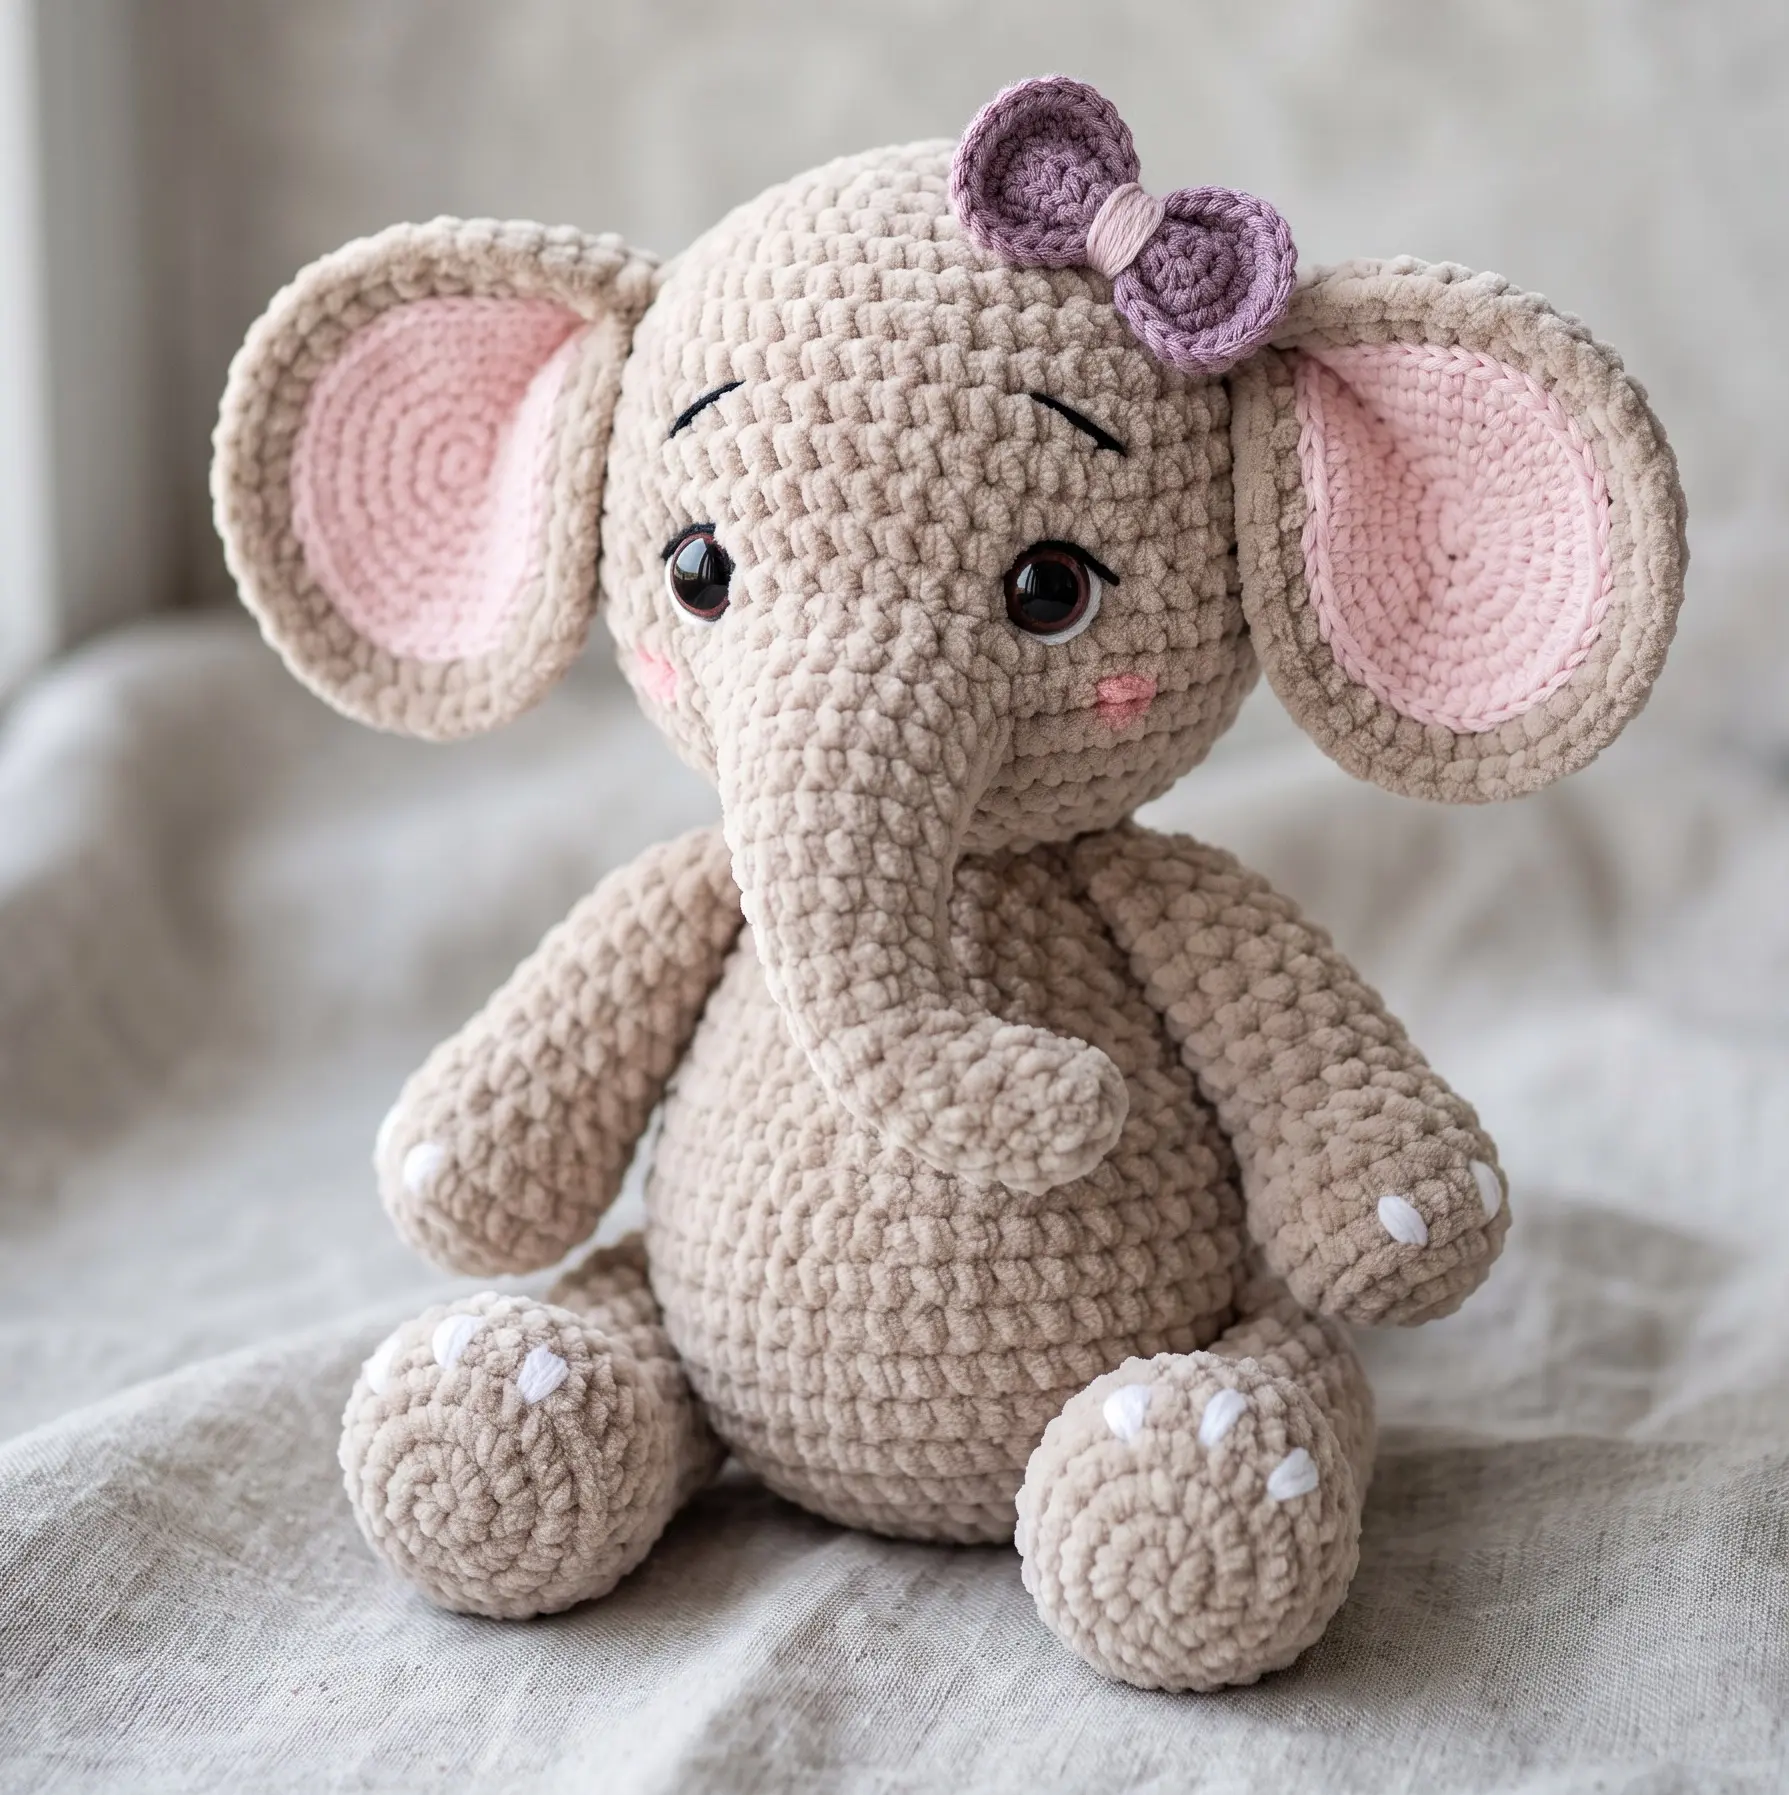
A soft, chubby, squishy crocheted elephant is one of those projects that is almost impossible to resist. With its oversized ears, tiny trunk, round belly, and cuddly chenille texture, this little elephant has the perfect handmade-toy look.
This beginner-friendly pattern is designed for quick crafting with plush yarn. The construction keeps the assembly simple, with parts attached using crochet stitches and slip stitches instead of traditional sewing. That makes it especially appealing if you love no-sew amigurumi and want a project you can finish in a short crafting session.
Easy No-Sew Crochet Turtle Pattern Quick Plush Make
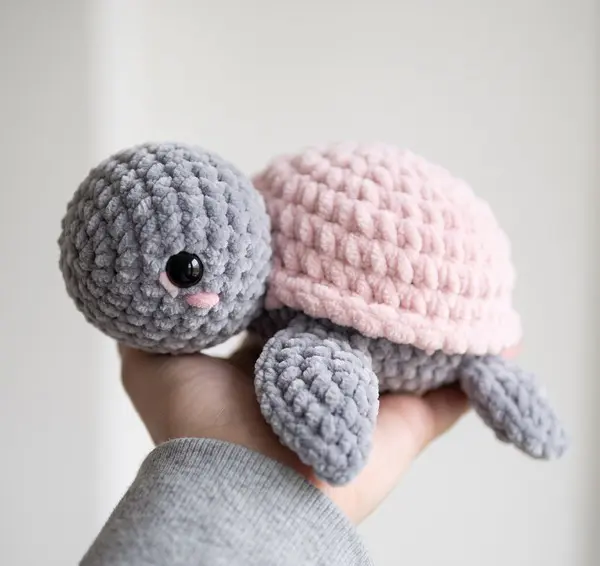
Create an irresistibly cute, chubby turtle inspired by the soft pastel plush in the photo. This Easy No-Sew Crochet Turtle Pattern uses chunky chenille yarn to create a soft, squishy texture and keeps the construction simple.
The head and body are crocheted as one continuous piece. The four flippers and tail are made first, flattened, and then crocheted directly into the body as you work. The pink shell is crocheted separately and attached with a crochet join rather than traditional needle sewing.
Easy No-Sew Crochet Minion Pattern
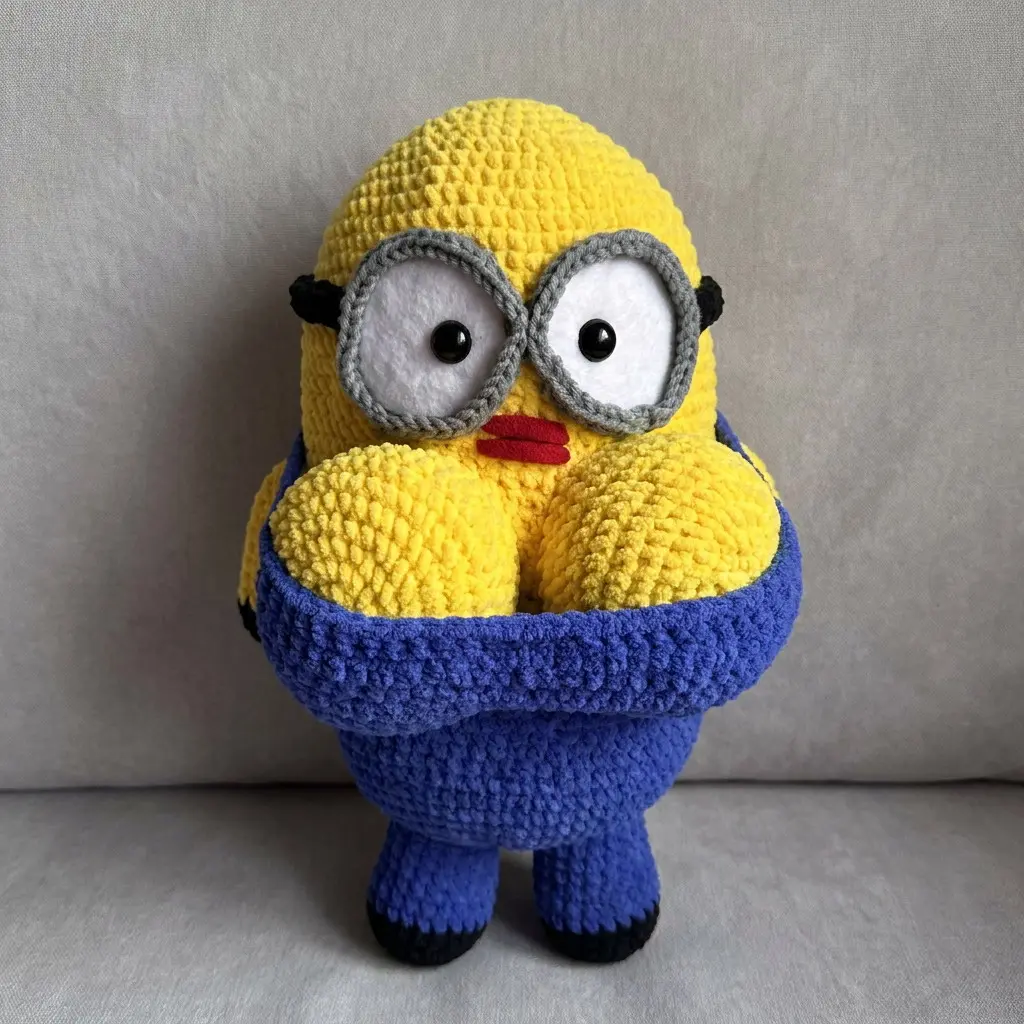
Easy No-Sew Crochet Minion Pattern - Chunky Plush Character-Inspired Amigurumi
Free No-Sew Crochet Koala Pattern
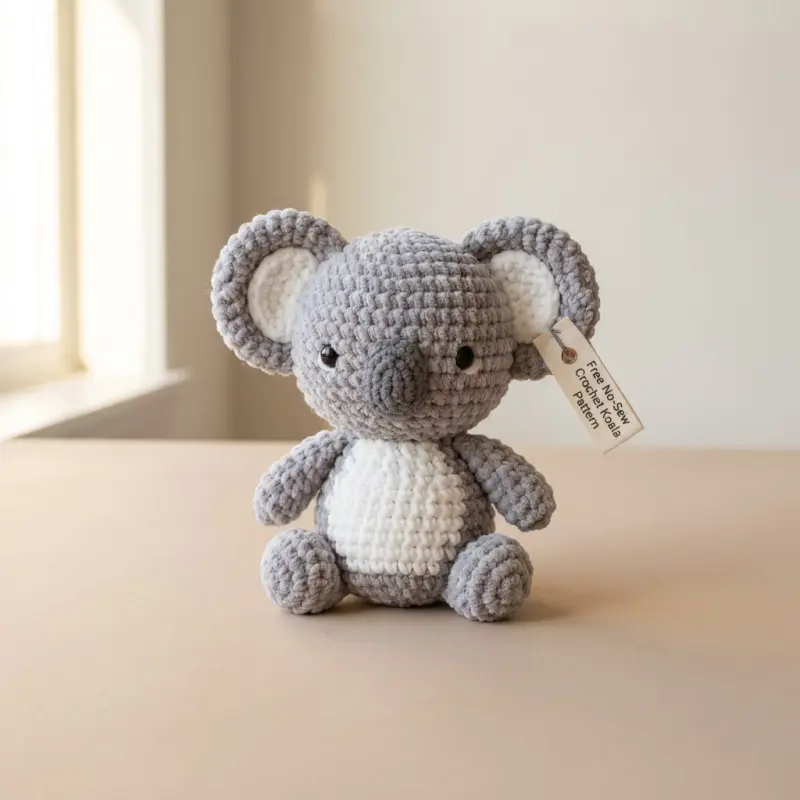
Create an irresistibly squishy Free No-Sew Crochet Koala Pattern with chunky chenille yarn, a round cuddly body, oversized ears, a soft white belly, tiny arms, and adorable little feet. This advanced-beginner amigurumi is designed so the major pieces are crocheted together as you work, eliminating traditional needle-sewn assembly.
The finished koala has the same plush, rounded character as the inspiration photo and works beautifully as a handmade gift, nursery decoration, key-sized plush variation, or craft-fair item.