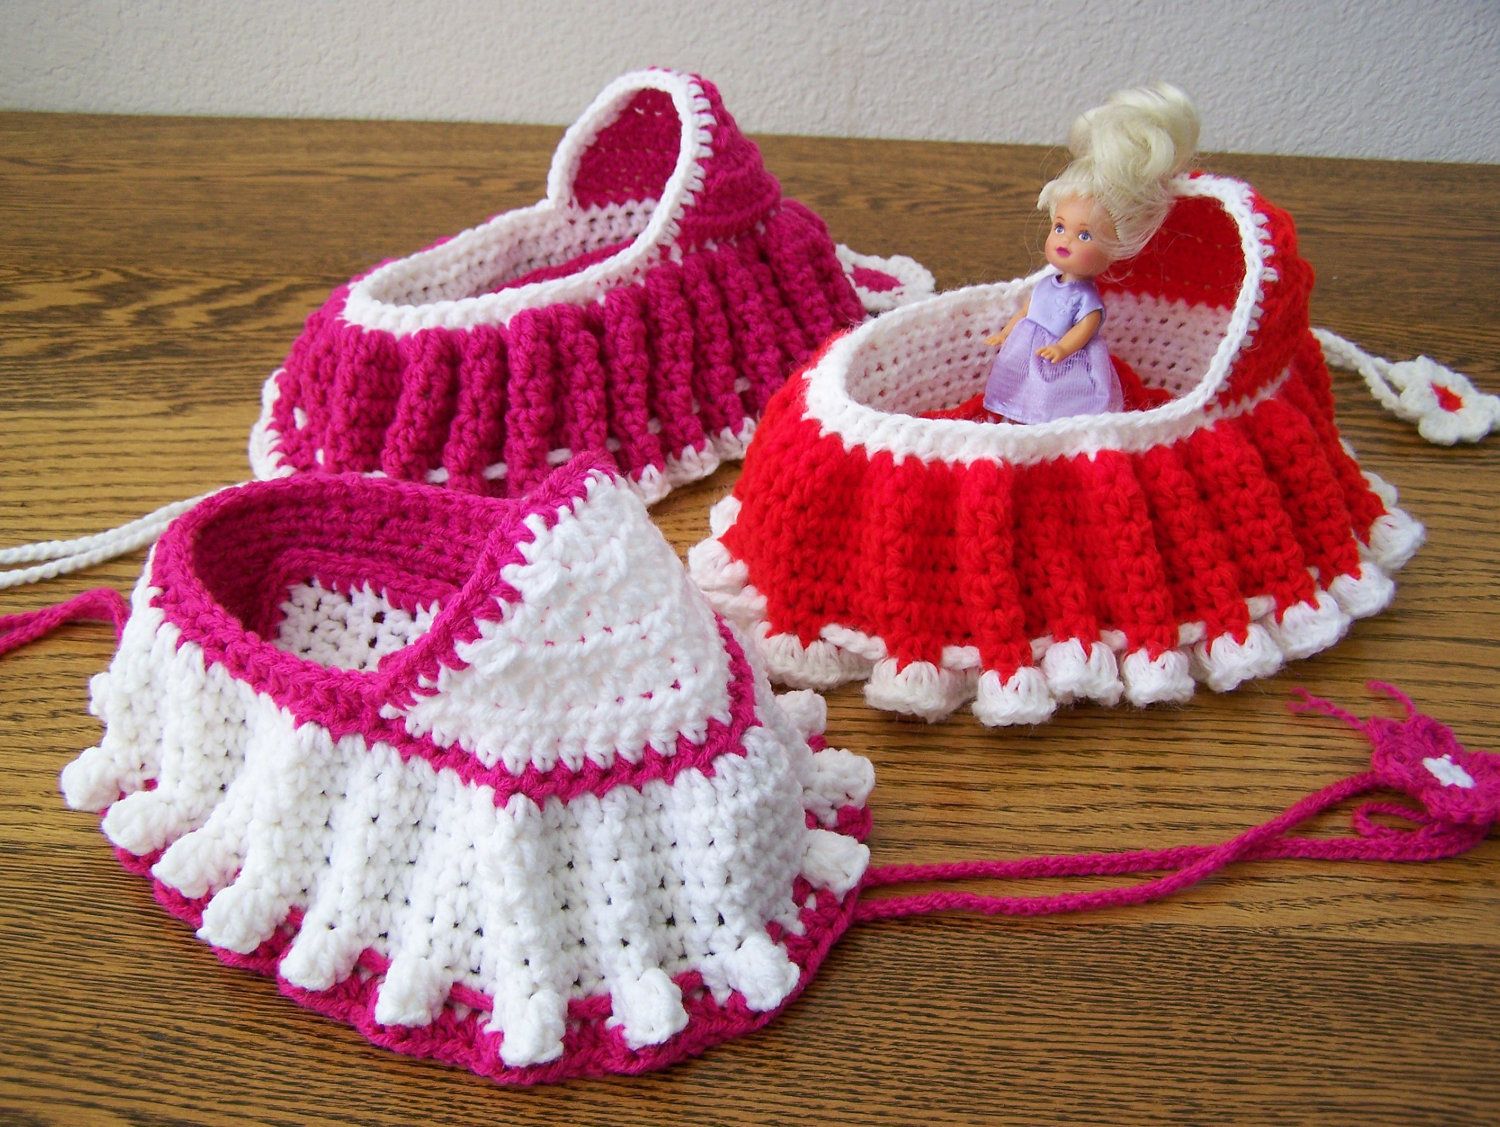
A charming Free 2-in-1 Cradle Purse crochet pattern inspired by classic vintage toy designs. This clever little project works as both a gathered drawstring purse and a miniature doll cradle. Loosen the ties, open the bag, and turn it inside out to reveal a sweet ruffled bassinet with a raised hood.
Designed for an approximately 4-5 inch doll, this pattern combines a sturdy oval mattress, low cradle walls, a shaped hood, dramatic vertical ruffles, decorative shell edging, and braided drawstring ties.
Materials and Tools
Yarn
Use a smooth worsted-weight acrylic or cotton yarn similar to the texture and thickness shown in the photograph.
- White: approximately 100-120 yards
- Pink or magenta: approximately 60-80 yards
- Red: approximately 60-80 yards
- Small amounts of contrasting yarn for decorative flowers
- Optional: 2-3 yards of 1/4-inch ribbon for drawstrings
Acrylic is particularly suitable for a toy because it is durable, washable, and holds the ruffles well. Cotton gives the cradle a slightly firmer vintage appearance.
Tools
- US H/8 (5 mm) crochet hook for a softer fabric, or
- 3.5-4.0 mm crochet hook for a denser, more structured purse
- Yarn needle
- Stitch markers
- Scissors
- Measuring tape
- Optional: small 4-5 inch doll for fitting
- Optional: large-eyed blunt tapestry needle for threading ribbon
Important: Crochet tightly enough that the stuffing-free cradle fabric does not become overly loose or floppy.
Finished Size
Approximately:
- 8-9 inches long
- 5-6 inches wide
- 4-5 inches tall at the hood
- Suitable for a doll approximately 4-5 inches tall
Your finished measurements will vary slightly depending on yarn weight and tension.
Abbreviations
US crochet terminology is used throughout.
| Abbreviation | Meaning |
|---|---|
| MR | Magic Ring |
| ch | Chain |
| sc | Single Crochet |
| hdc | Half Double Crochet |
| dc | Double Crochet |
| sl st | Slip Stitch |
| inc | Increase - 2 sc in the same stitch |
| dec | Single Crochet Decrease |
| BLO | Back Loop Only |
| FLO | Front Loop Only |
| st/sts | Stitch/Stitches |
| sk | Skip |
| rep | Repeat |
| RS | Right Side |
| WS | Wrong Side |
| FO | Fasten Off |
| Shell | 5 dc worked in the same stitch |
Special Stitch: Shell
Shell: 5 dc in the indicated stitch.
Special Stitch: Long Rib
A Long Rib is worked as:
FPdc around the designated stitch from the previous round.
This creates the raised vertical ridges characteristic of the vintage ruffled skirt.
Pattern Notes
- The cradle is worked in two visual layers from the same oval base.
- The upper layer becomes the cradle interior.
- The lower layer, worked from the unused front loops of the base, becomes the gathered exterior skirt.
- No stuffing is required.
- Do not join every round unless specifically instructed.
- Use a stitch marker to identify the first stitch of each round.
- When changing colors, complete the final yarn-over of the previous stitch with the new color.
- The pattern is designed to be reversible. The side that looks like the purse exterior becomes the cradle exterior after turning.
Part 1: The Mattress / Oval Base
The oval base is deliberately firm. It provides the flat mattress at the bottom of the cradle and gives the purse enough structure to hold its shape.
Work in White.
Foundation
Ch 18.
Do not turn.
Round 1
Sc in 2nd ch from hook and in next 13 ch, 3 sc in last ch.
Working along the opposite side of the foundation chain, sc in next 13 ch, 2 sc in the remaining loop of the beginning chain.
Total: 32 sc
Round 2
Sc in next 13 sts, inc in each of next 3 sts, sc in next 13 sts, inc in each of next 2 sts.
Total: 37 sc
Round 3
Sc in next 13 sts, [sc, inc] 3 times, sc in next 13 sts, [sc, inc] 2 times.
Total: 42 sc
Round 4
Sc in next 13 sts, [2 sc, inc] 3 times, sc in next 13 sts, [2 sc, inc] 2 times.
Total: 47 sc
Round 5
Sc in next 13 sts, [3 sc, inc] 3 times, sc in next 13 sts, [3 sc, inc] 2 times.
Total: 52 sc
Round 6
Sc in next 13 sts, [4 sc, inc] 3 times, sc in next 13 sts, [4 sc, inc] 2 times.
Total: 57 sc
Round 7
Sc in next 13 sts, [5 sc, inc] 3 times, sc in next 13 sts, [5 sc, inc] 2 times.
Total: 62 sc
The base should now be a smooth, gently elongated oval.
If your oval begins to cup, your tension is too tight. If the edges wave noticeably, your tension is too loose.
Part 2: Hood and Cradle Walls
The walls are worked upward from the perimeter of the mattress.
This section creates the low basket-like portion of the cradle.
Lower Cradle Walls
Continue with White.
Round 8
Working in BLO, sc in every stitch around.
62 sc
Working this round through the back loops creates a defined ridge while leaving the unused front loops visible underneath for the decorative skirt.
Round 9
Sc around.
62 sc
Round 10
Sc around.
62 sc
Round 11
Sc around.
62 sc
Round 12
Sc around.
62 sc
Round 13
Sc around.
62 sc
Round 14
Sc around.
62 sc
The cradle wall should now be approximately 1 1/2-2 inches high.
Decorative Top Rim
Switch to Pink or Red.
Round 15
Sc around.
62 sc
Round 16
Working in FLO, sc around.
62 sc
This creates another visible ridge for the contrasting vintage trim.
Switch back to White.
Round 17
Sc around.
62 sc
Round 18 - Eyelet Round
This round creates the openings for the drawstring.
Sc in next 2 sts, ch 1, sk next st around.
Because 62 is not divisible evenly by 3, finish the final 2 stitches as ordinary sc so the round remains structurally balanced.
62 base stitches
The chain-1 spaces are the drawstring eyelets.
Do not make the eyelets excessively large. They should comfortably accommodate a crocheted cord or narrow ribbon.
Round 19
Sc in each sc and 1 sc in every ch-1 space around.
62 sc
Fasten off.
Shaping the Hood
The hood is worked directly onto one rounded end of the cradle.
The hood should rise at one end while the remaining sides stay low.
Place the cradle flat with the longer sides running left to right.
At one rounded end, count and mark 20 consecutive stitches centered over the head end.
Attach Pink, Red, or White to the first marked stitch.
Work back and forth in rows.
Hood Rows
Row 1
Sc across the 20 marked stitches.
20 sc
Ch 1 and turn.
Row 2
Sc across.
20 sc
Row 3
Sc in first st, dec, sc across to last 3 sts, dec, sc in last st.
18 sc
Row 4
Sc across.
18 sc
Row 5
Sc in first st, dec, sc across to last 3 sts, dec, sc in last st.
16 sc
Row 6
Sc across.
16 sc
Row 7
Sc in first st, dec, sc across to last 3 sts, dec, sc in last st.
14 sc
Row 8
Sc across.
14 sc
Row 9
Sc in first st, dec, sc across to last 3 sts, dec, sc in last st.
12 sc
Row 10
Sc across.
12 sc
Row 11
Sc in first st, dec, sc across to last 3 sts, dec, sc in last st.
10 sc
Row 12
Sc across.
10 sc
Row 13
Sc in first st, dec, sc across to last 3 sts, dec, sc in last st.
8 sc
Row 14
Sc across.
8 sc
Fasten off.
The progressively narrower rows create the characteristic raised vintage cradle hood.
Hood Edging
Join White at the lower corner of the hood.
Work sc evenly around both sloping sides and across the top.
At the upper point, work 3 sc in the same stitch if necessary to keep the edging flat.
Continue down the opposite side and sl st to the beginning.
Fasten off.
For a more pronounced vintage appearance, work one additional round of:
[sc, ch 1, sk 1] around the hood edge.
This produces a delicate eyelet border similar to the white trim visible in the photograph.
Part 3: Exterior Skirt + Dramatic Ruffles
This is the feature that gives the project its unmistakable vintage appearance.
Turn the work so the bottom of the oval base is facing you.
The front loops left unused when Round 8 was worked are now available for the skirt.
Attach Pink, Red, or White to any exposed FLO of Round 7.
Skirt Foundation
Round 1
Working through the exposed FLO of Round 7, sc in each stitch around.
62 sc
Sl st to the first sc.
Round 2
Ch 2.
Dc in the same stitch and in each stitch around.
Sl st to the first dc.
62 dc
Round 3 - Begin the Ribbed Ruffle
Ch 2.
Work:
FPdc around next dc, dc in next 2 sts
around.
When you reach the end, sl st to the first FPdc.
62 stitches
The front-post stitches form raised vertical columns.
Round 4
Ch 2.
Work FPdc around every FPdc from the previous round, placing 2 dc between each raised rib.
Continue around.
Approximately 93 dc/FPdc stitches
Do not worry if the skirt begins to flare at this stage. The deliberate increase is what creates the fullness.
Round 5
Ch 2.
Work:
FPdc around next raised post, dc in next 2 dc, 2 dc in next dc
around.
Sl st to join.
The skirt should now visibly flare outward.
Long Vintage Ruffles
For the characteristic elongated ruffles, switch to White if the main skirt is Pink or Red.
If the skirt is White, use Pink or Red for the contrast.
Round 6
Ch 1.
Sc around.
Do not fasten off.
Round 7
Working in the FLO, sc around.
This creates another horizontal foundation ridge.
Round 8
Ch 2.
Work 3 dc in the FLO of each stitch around.
Sl st to join.
The skirt will become substantially fuller.
Round 9
Ch 1.
Sc around.
Round 10 - Deep Ruffle
Working in FLO:
Sc in next 2 sts, 5 dc in next st.
Repeat around.
Sl st to join.
The 5-dc groups create the rounded lower edge of each individual ruffle.
Optional Extra-Long Ruffles
For the especially dramatic ruffles shown in the photograph, add a second layer.
Attach the contrasting color to the exposed FLOs from Round 9.
Ruffle Layer
Sc in next 2 sts, 5 dc in next st.
Repeat around.
Sl st to join.
Fasten off.
Gently straighten each 5-dc group with your fingers.
The groups should hang downward rather than folding sideways.
Vintage Shell-Stitch Lower Border
The shell edging provides the decorative scalloped finish around the bottom.
Attach White to the lower edge.
Shell Border
Ch 1.
Sc in first 2 sts.
Sk next 2 sts, 5 dc in next st, sk next 2 sts, sc in next 2 sts.
Repeat around.
If necessary at the final repeat, adjust by skipping one stitch rather than allowing the border to bunch.
Sl st to the beginning sc.
Fasten off.
Finishing the Shells
For a more dimensional vintage look, work one final round of slip stitches around the upper edge of the shell border.
Do not pull the slip stitches tightly.
The shell border should remain soft and rounded.
Part 4: Drawstring Handles
The drawstring is what transforms the open cradle into a compact purse.
You can use either braided crochet cords or ribbon.
Crochet Drawstring Cord
Make two cords.
For each cord:
Ch 90.
Sl st in the 2nd ch from hook and in every chain across.
Fasten off, leaving approximately a 6-inch tail.
For a thicker cord, make Ch 100 and work back with sl sts.
Threading the Drawstrings
Lay the cradle flat.
Locate the eyelet round near the upper rim.
Thread the first cord through the eyelets, passing over one stitch and under the next.
Bring both ends out at the center of one side.
Thread the second cord through the same eyelet round, beginning on the opposite side.
This creates two independent drawstrings.
When pulled, the cradle walls gather evenly from both sides.
Important
Do not pull the cords completely tight when the toy is being used as a cradle.
Leave approximately 2-3 inches of slack so the opening remains wide enough for the doll.
Decorative Flower Tassels
The original vintage appearance is enhanced by small flower-like decorations at the cord ends.
Use contrasting yarn.
Mini Flower
Make a MR.
Work:
[ch 3, 2 dc, ch 3, sl st in MR] x 5
You will have five small petals.
Pull the MR closed firmly.
Fasten off, leaving a long tail.
Wrap the flower securely around the end of the drawstring cord and knot from the back.
Alternatively, make two small flowers for each cord so that the purse has four decorative flower ends.
Weave the yarn tails securely through the flower and cord.
Optional Contrasting Trim
For an even closer vintage look, add a narrow contrasting border around the upper cradle opening.
With White attached:
Trim Round
Sc evenly around the entire upper opening.
At the hood, work sc evenly around the hood edge.
Sl st to join.
For a picot-style finish:
Sc in next 2 sts, ch 3, sl st in first ch, sc in next 2 sts.
Repeat around the opening.
This produces a tiny decorative scallop without adding significant bulk.
Finishing Instructions
Weaving in Ends
Use a blunt yarn needle to weave every yarn tail through several stitches on the wrong side.
For drawstring ends, weave the tails into the braided cord itself before trimming.
Do not cut yarn tails immediately after knotting. Weave them through at least 1 1/2-2 inches of fabric and reverse direction once for extra security.
Trim excess yarn close to the fabric.
How to Transform the Cradle Into a Purse
- Place the doll inside the cradle.
- Loosen both drawstrings completely.
- Remove the doll.
- Push the cradle walls gently inward.
- Turn the project inside out, allowing the ruffled skirt to become the outer decorative layer.
- Tuck the hood section inward.
- Straighten the lining and ruffles with your fingers.
- Pull the two drawstrings evenly.
- The oval cradle gathers into a compact purse.
- Tie the cords into a soft bow.
The raised hood folds neatly toward the inside of the gathered purse.
How to Transform the Purse Back Into a Cradle
- Untie the drawstrings.
- Pull the purse gently open.
- Reach inside and push the oval mattress outward.
- Turn the project back through itself.
- Smooth the white lining over the mattress.
- Pull the hood upright.
- Loosen the cords until the cradle opening is wide.
- Arrange the ruffled skirt evenly around the bottom edge.
- Place the small doll inside.
The finished piece should now resemble a miniature vintage doll bassinet with a dramatic ruffled skirt and raised hood.
Vintage Color Variations
For the classic look shown in the photograph, try:
- Hot Pink + White: pink skirt and walls with crisp white ruffles and trim.
- Cherry Red + White: red body with white hood edging and shell border.
- White + Magenta: white ruffles and walls with vivid magenta contrast bands.
- Pastel Pink + Cream: a softer heirloom-style version.
- Red + Pink + White: a particularly cheerful retro color combination.
The most important visual elements are the strong contrasting bands, raised vertical ribs, gathered ruffles, white edging, and long drawstring cords the details that give this 2-in-1 toy its unmistakable vintage cradle-purse character.
Easy No-Sew Crochet Turtle Pattern Quick Plush Make
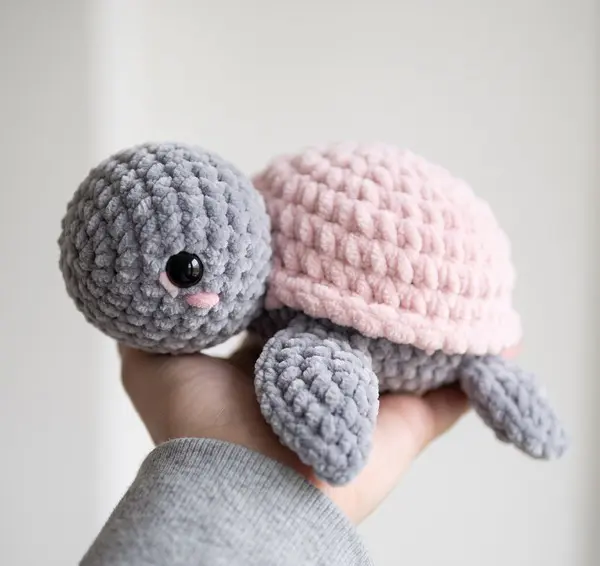
Create an irresistibly cute, chubby turtle inspired by the soft pastel plush in the photo. This Easy No-Sew Crochet Turtle Pattern uses chunky chenille yarn to create a soft, squishy texture and keeps the construction simple.
The head and body are crocheted as one continuous piece. The four flippers and tail are made first, flattened, and then crocheted directly into the body as you work. The pink shell is crocheted separately and attached with a crochet join rather than traditional needle sewing.
Turtle-Themed Crochet Coaster Pattern
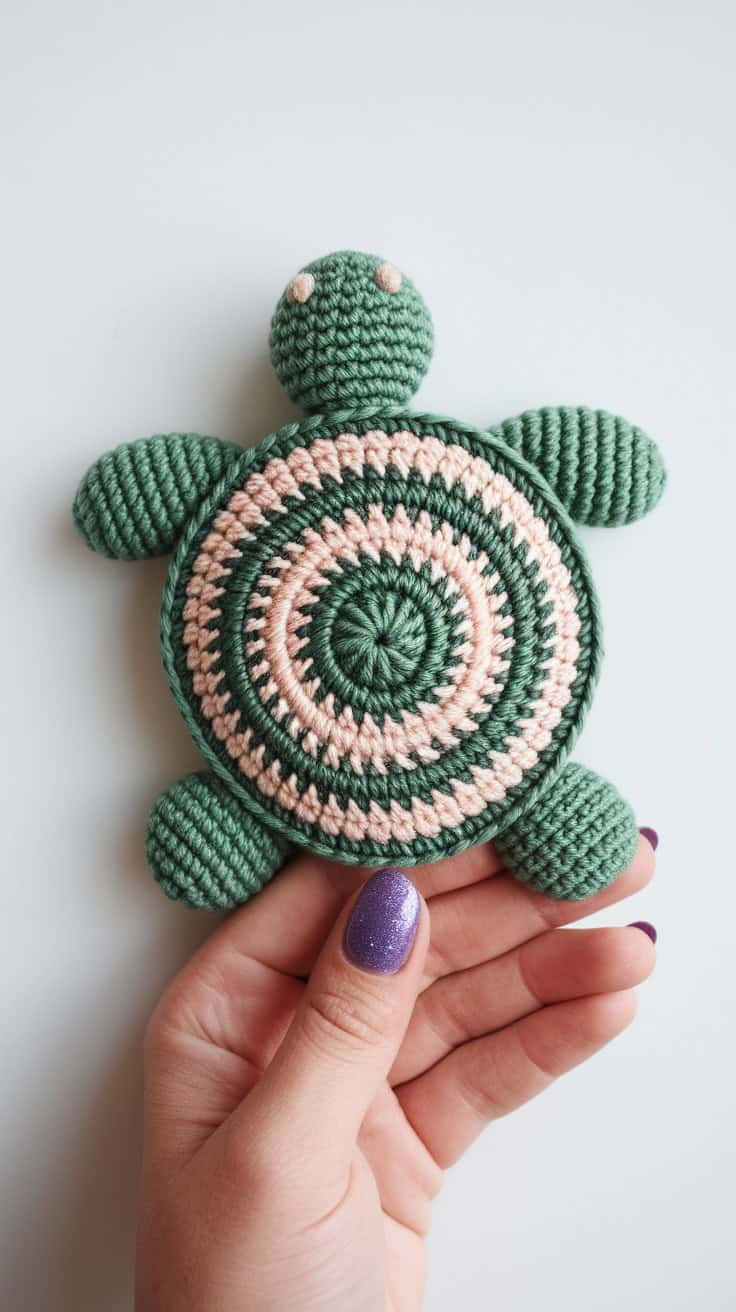
Easy Turtle-Themed Crochet Coaster Pattern: Cute No-Sew Quick Make
Engaging Introduction
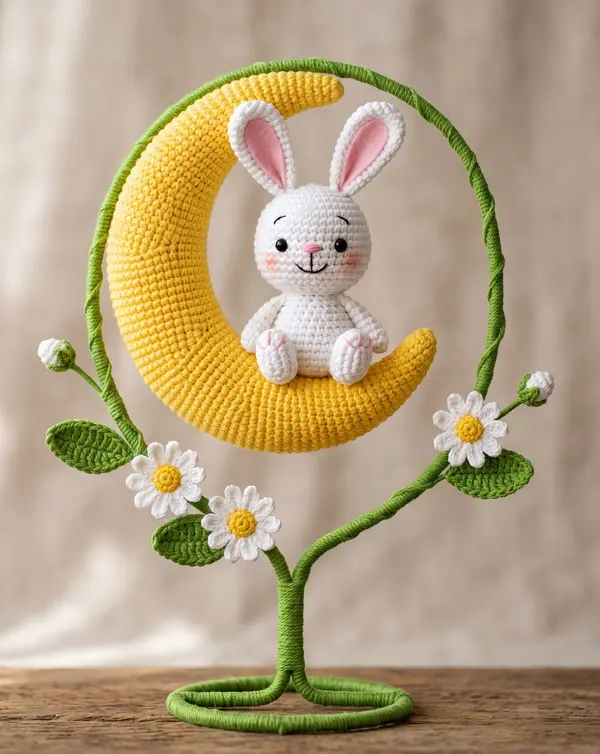
This Turtle-Themed Crochet Coaster Pattern turns a simple round coaster into an adorable little turtle you can use, gift, or sell at craft fairs. Inspired by the soft sage-green and blush-pink turtle in the photo, this design features a beautifully striped shell, a rounded head, four raised flippers, and tiny eyes crocheted directly into the edge. Best of all, the entire turtle is 100% no-sew. There are no separate legs, head, or eyes to stitch onto the finished coaster. Everything is incorporated as you crochet. That makes this project especially convenient for beginner crocheters and craft-fair makers who want a polished finished product without a long finishing session. The flat shell works beautifully as a drink coaster, while the raised bobble features give it the unmistakable personality of a cute turtle. Use cotton yarn for a practical coaster, or soft acrylic yarn when making this as a decorative turtle motif.
Amigurumi Snake Crochet Free Pattern
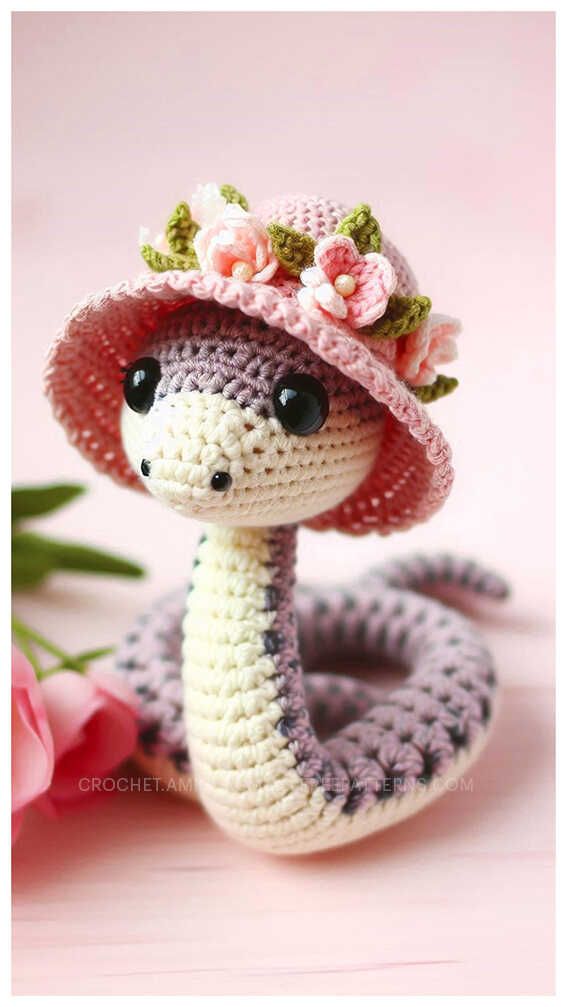
Create an irresistibly sweet coiled pastel snake amigurumi with a soft cream belly, oversized glossy eyes, tiny embroidered nostrils, and a charming pink sun hat covered in miniature flowers and leaves. This elegant snake is worked primarily in continuous rounds and designed for advanced beginners to intermediate crocheters familiar with amigurumi shaping and color changes.
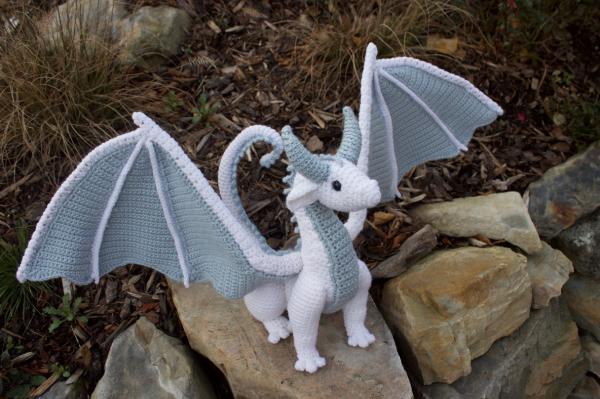
Free dragon crochet pattern